


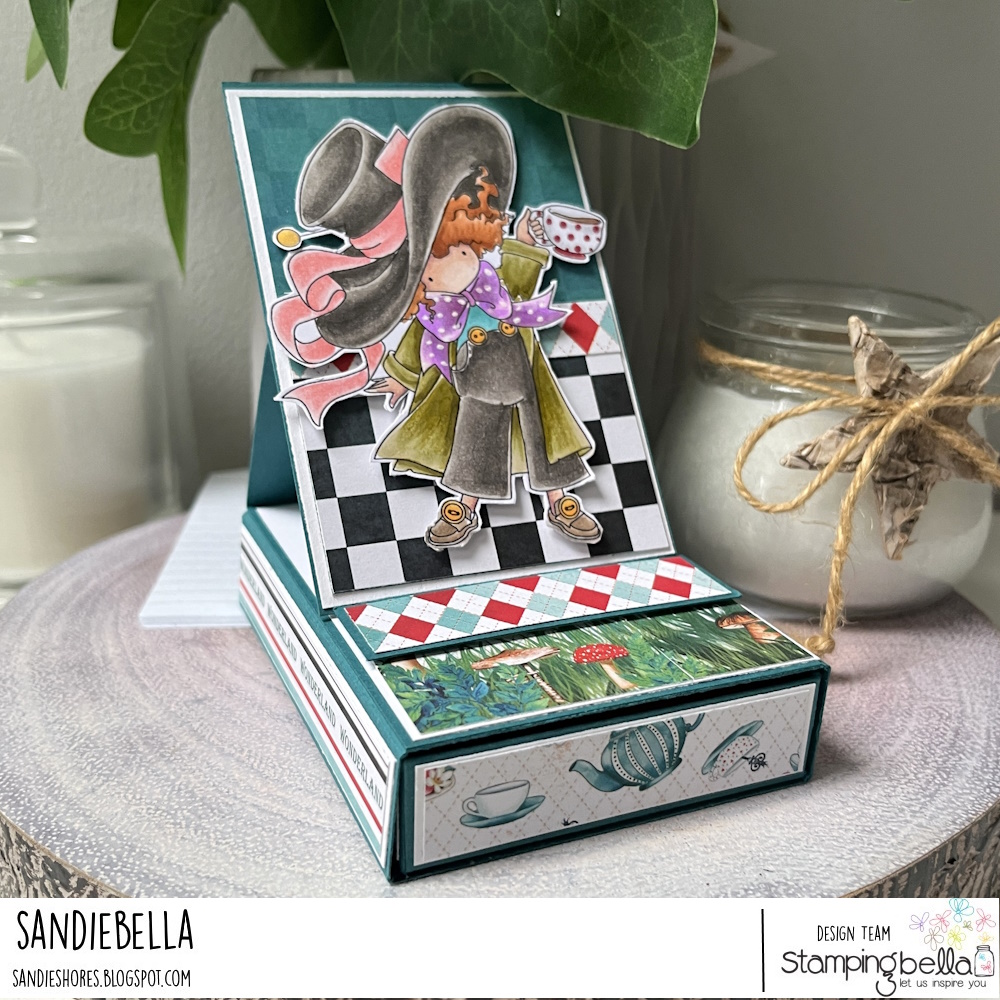
Tiny Townie Mad Hatter Easel Drawer Card
Supplies:
How to:
Stamp Tiny Townie Wonderland Mad Hatter onto white card and colour using your preferred medium.

Fussy cut around the outline and set to one side.

Score the 7″ x 5.75″ piece of card at 0.75″ an 1.5″ on all four sides.


Apply a strip of double sided tape on the inside of each of the long sections.

Turn the card over and apply wet glue to each of the tabs. Adhere the tabs to the inside of each adjacent side.

When all the tabs are glued down, remove the tape backing and fold in the long sections. Use a bone folder to burnish well.


Taper the edges of the 0.5″ section.

Apply adhesive to the 0.5″ section then fold over the other end and adhere.


Slide the drawer into the sleeve to ensure it fits. It should be loose enough to move easily.

Then adhere the smaller pieces to the card pieces and adhere to the front and back. The card adds strength to the drawer front and back.

Fold the 2.75″ x 8″ in half.

Fold the top half in half again to make a mountain.

Apply adhesive to the bottom half of the folded piece and adhere the 2.75″ x 4″ piece of card to it.


Fold the drawer sleeve flat

Apply adhesive to the back of the easel

Adhere to the top of the drawer sleeve.


Adhere the card and paper panels to the easel front.

Adhere the white card panel inside the easel.

Make an easel stop using card/paper, or you can use a button, brad, etc.

Add some contrasting paper beneath the easel stop.

Decorate the front of the easel

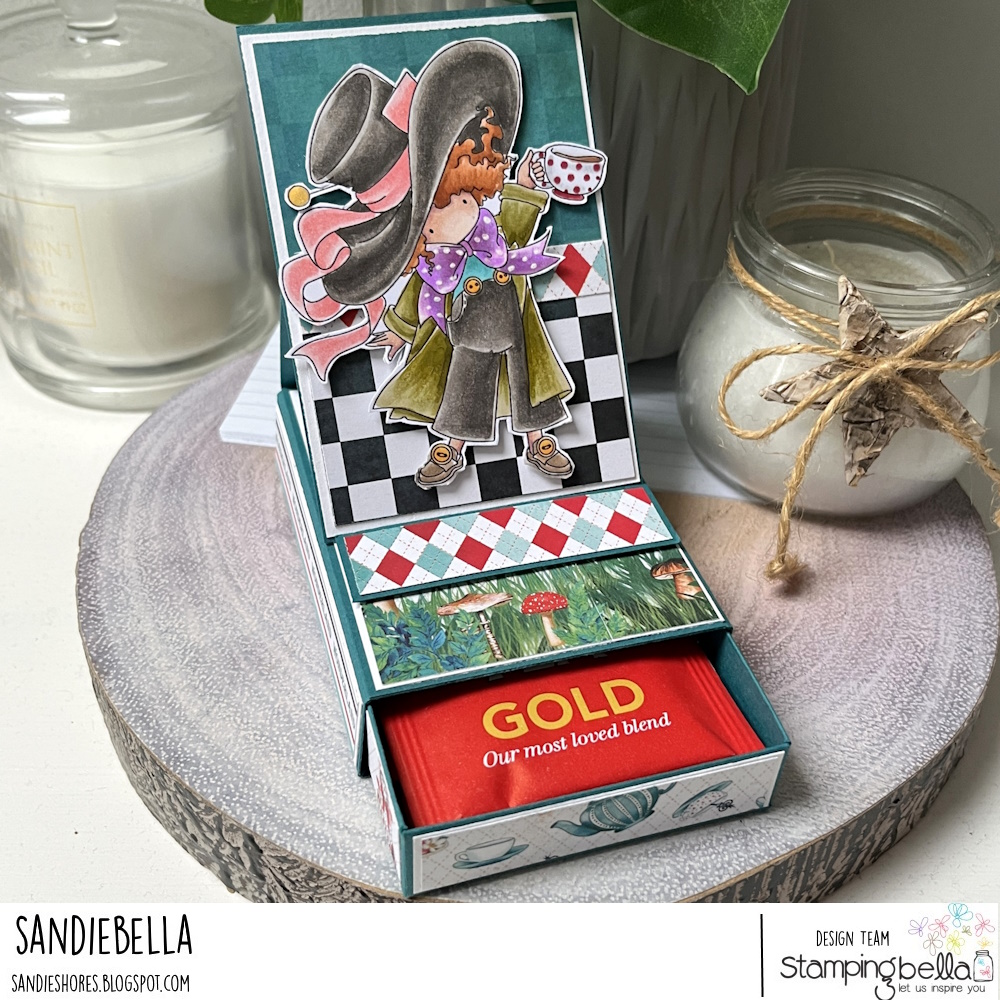
Adhere the image to the easel front using foam tape or dots. Fill the drawer with a cookie and some teabags.

This is a wonderful card and project. I know it’s the Mad Hatter, but I can picture a little girl with a friend, Mom or Dad, dressing up and playing with a tea set, having a wonderful time playing games and sipping tea. So cheerful and fun. What a wonderful gift and surprise for that special someone. Thank you for sharing.