


Time for another amazing step by step tutorial from our Sandiebella!
Father’s Day Pop-up Card with Gift Card Pocket
Supplies:
How to:


On the 5/8″ sections draw a line, diagonally, as shown below. Cut along the diagonal line and then cut along the 1″ line to each edge, removing the pieces of card entirely.

Score diagonally across the four centre 1″ squares, and score along the 1″ line. Fold all the score lines and crease well. Score on the 3/8″ line on each end of the piece and fold upwards.

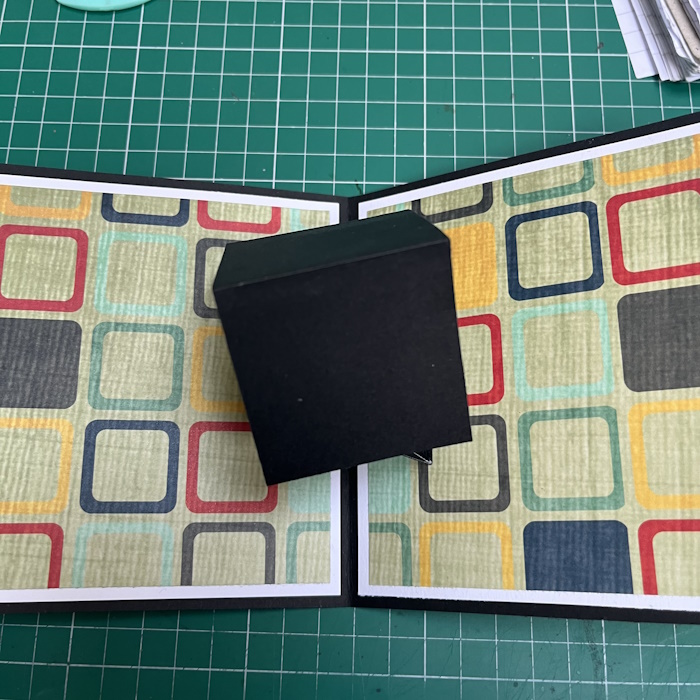
Pinch up the 1″ scoreline and push inwards to create the pop mechanism.


Fold the 4″ x 2″ piece of card in half to make a 2″ square.

Apply adhesive to the outside of one of the 3/8″ sections and adhere to the inside of the open end of the 2″ square.


Flip the piece over and repeat on the other side.

Open up the card base and place a pencil/white mark at the 2.5″ point across the fold

Line up the point on the pop mechanism with the 2.5″ pencil mark. Apply adhesive to one side of the triangle and fold the card over it.


Flip the card over, again apply adhesive to the right half of the pop mechanism and fold the card closed again.


Make the inside panel from the remaining black and white card pieces.

With the card in the upright position, and fully open, apply adhesive to front of the pop mechanism, up to the crease line.

Adhere the pop panel to it.

Fold the card closed to ensure the pop panel can’t be seen when the card is closed.

Adhere any remaining 4.5″ squares of paper to the card base.

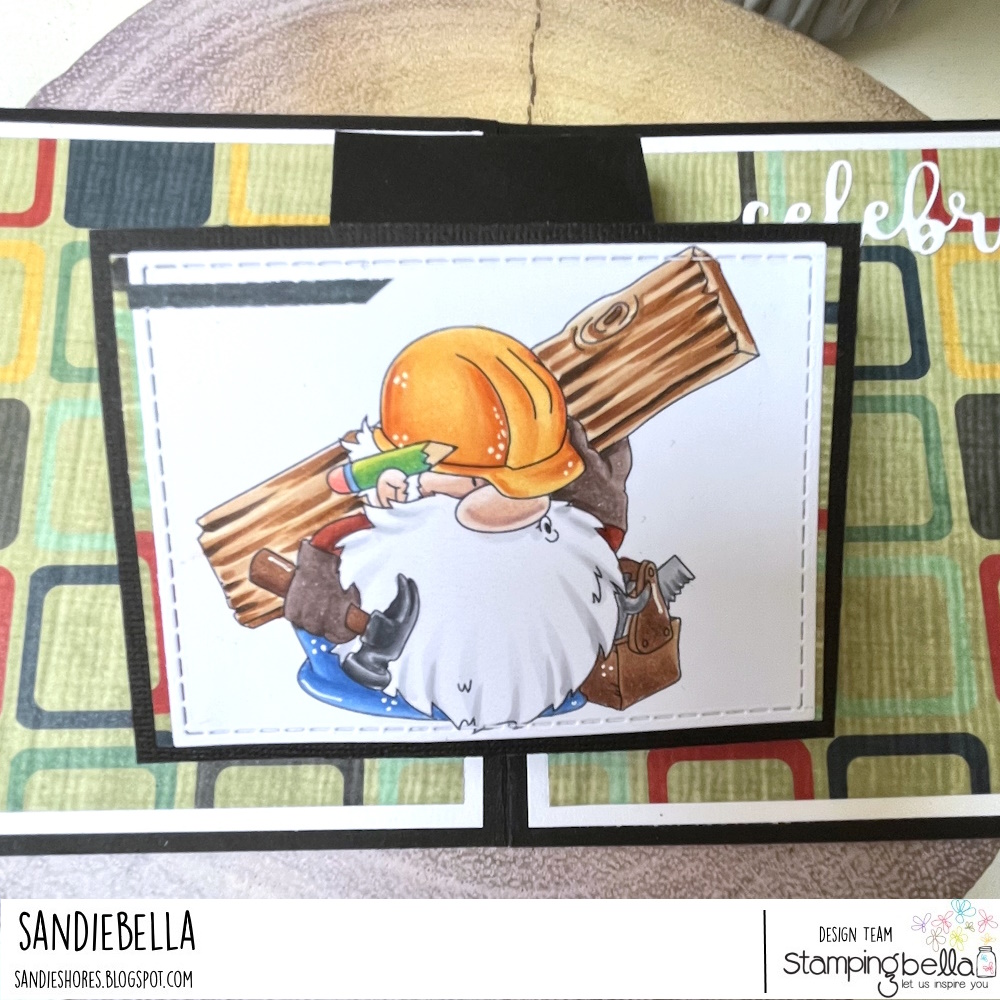
Stamp Gnome Carpenter onto white card and colour using your preferred medium. Cut out using a stitched rectangle die, or just trim to size using a paper trimmer.


Adhere the image to the pop up mechanism.

Decorate the inside of the card with a sentiment.

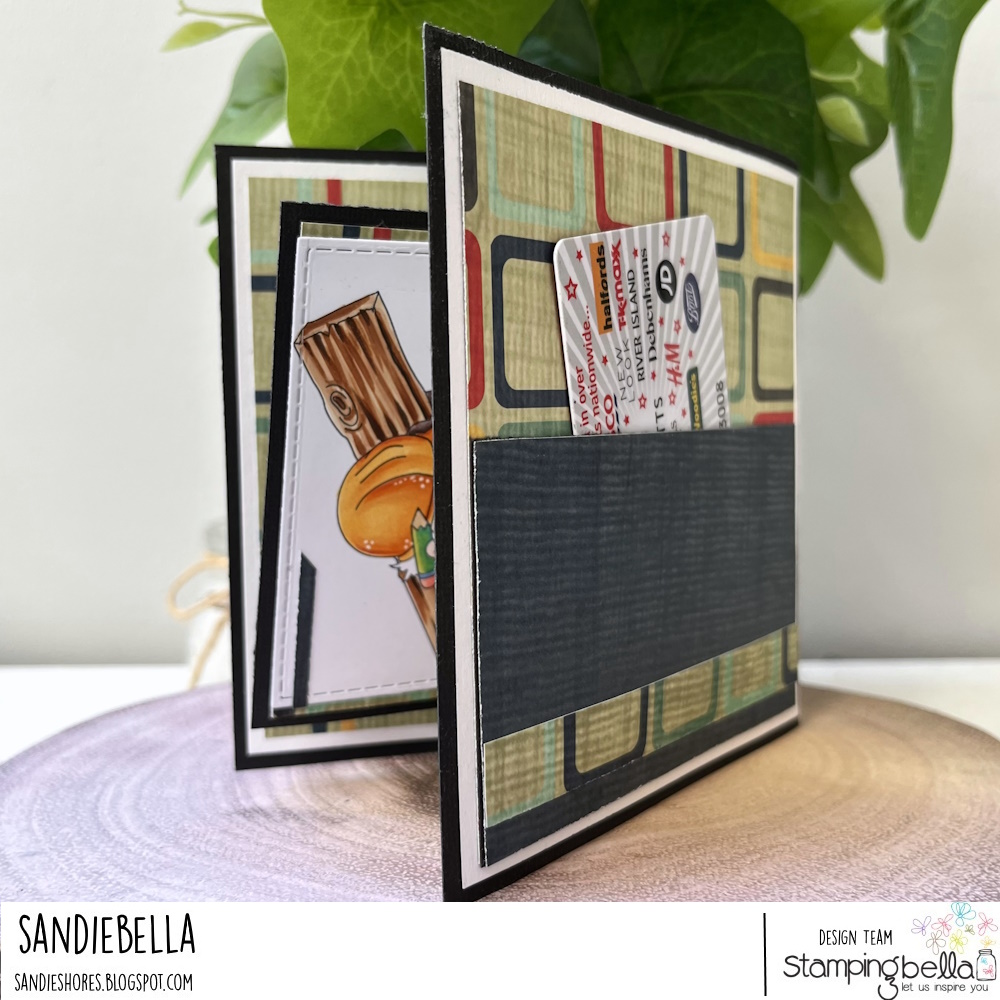
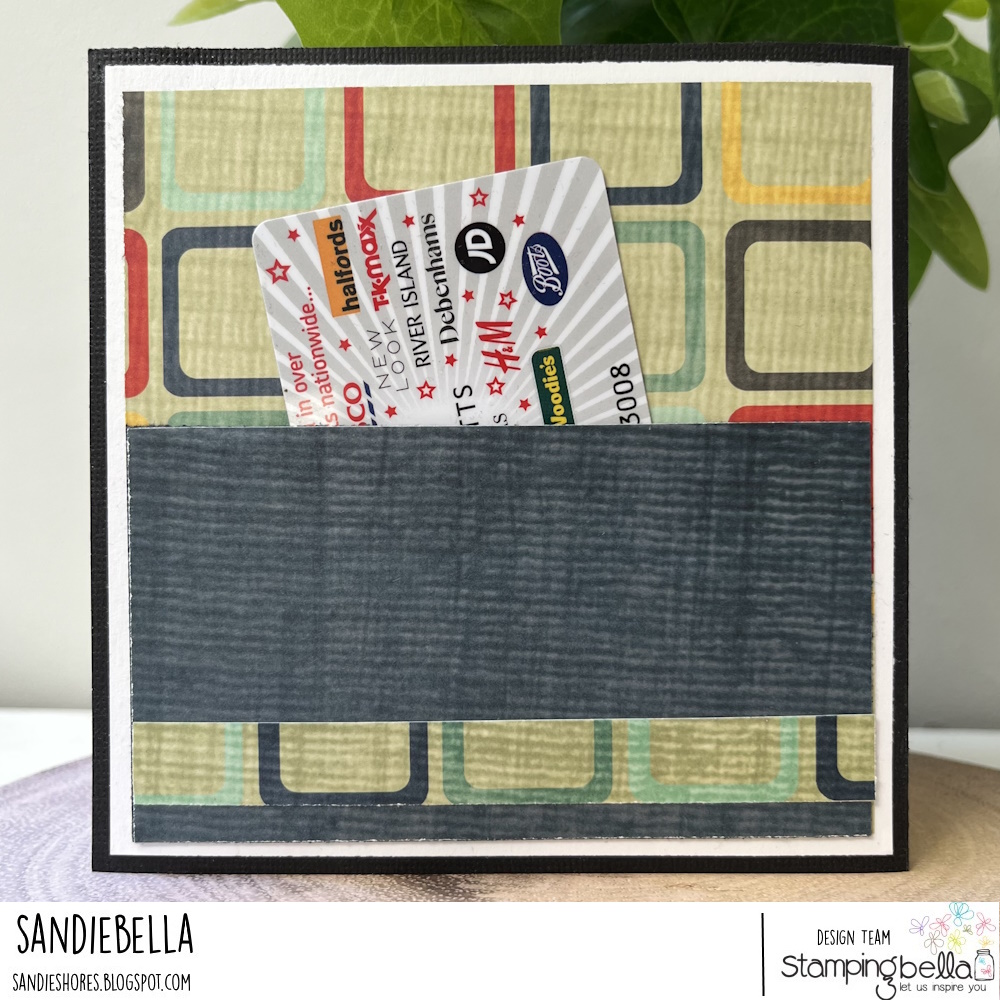
Apply adhesive to both short sides and the bottom long side of the remaining piece of designer paper. Adhere to the back of the card to make a pocket for a gift card, sentiment card, or tags.

Love this! thanks for sharing!