


Haven’t made your Father’s Day cards yet? Need a card idea for your Dad’s birthday? Sandiebella has a tutorial for you today! Of course you can also use the fold for other occasions too.
Interlocking Gatefold Card

Supplies:
How to:

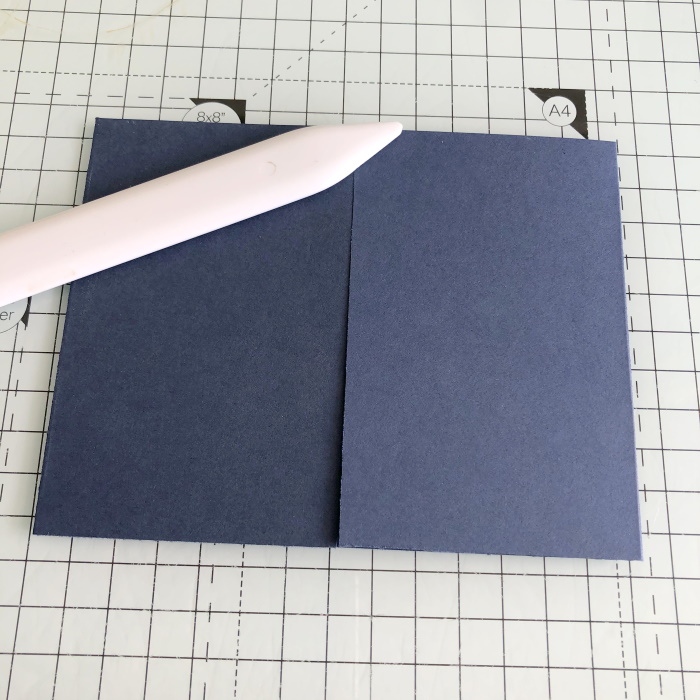
Fold in the outer pieces and make sure they meet in the middle.
Cut an octagon shape (approx 4″H x 3″W) from the blue card. You can use any shape you want, as long as the image fits.

Take a smaller octagon die (approx 3.5″H x 2.5″W) and cut out the centre of the larger one, to make the frame.

Cut a piece of white paper/card for your image using the 3.5″ x 2.5″ octagon die.

Stamp the Father’s Day Chick onto the white card and colour using your desired medium.


Cut a piece of white card using the smaller octagon die.

Using distress oxide inks, create a grass/sky background.

Adhere the white card to the smaller blue octagon you cut from the centre of the big one.

Cut 2 pieces of white card measuring 4-1/8″ x 2-5/8″ and 2 pieces of patterned paper measuring 4″ x 2.5″. Glue each of the paper pieces to each white card piece to make 2 panels, and glue them down to the front of the card.

Place the frame into the centre of the card and insert the background scene. Do not sick them down.

When you have the centre piece stuck down, remove the frame and apply glue to the back of the left side of it. Put it back around the centre piece and press firmly.


To open it up, pop up the right side of the frame.

Apply foam tape/dots to the back of the image.

Adhere the image onto the centre piece.

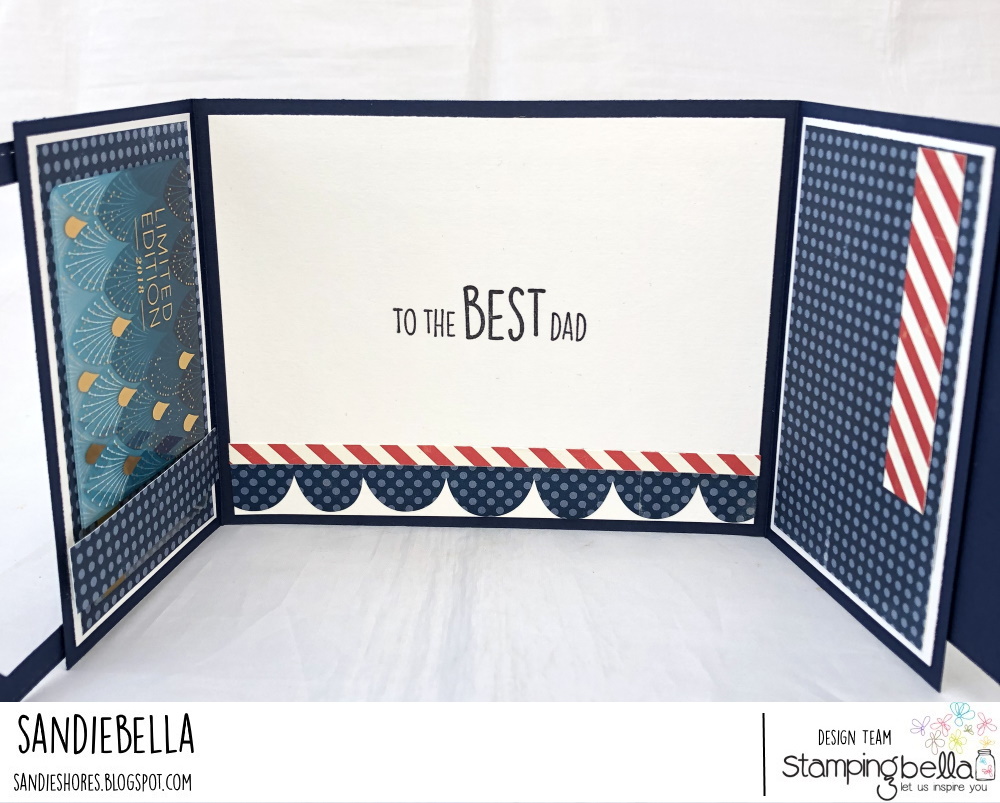
Cut a white piece of card measuring 4″ x 5.25″. Decorate across the bottom with contrasting paper.

For each side, cut a piece of card measuring 4″ x 2.5″ and a piece of paper measuring 3-7/8″ x 2-3/8″

Decorate the front of the card as desired.

To finish the card –

Over To You!
Share your personal favourite Stamping Bella creations with us. We LOVE to see what you’ve been creating with Stamping Bella stamps. Share a link to your latest Stamping Bella card in the comments below, or an old favourite you made a while ago. Tell us what your favourite stamps are. Are there any additions you would like to see to the range? Let us know!
Another way to connect is by joining us in the Stamping Bella Sistahood Facebook Group and share your pictures.
If you are posting your images online, we would love to see them on Instagram and all the platforms mentioned above. To make it easier for us to find you just use #stampingbella as a hashtag. Even better tag me @markergeek and Emily @stampingbella . We love it when you connect, so don’t be shy!
Until next time, HAPPY STAMPING!
MWAH
Elaineabella
What a clever and very cool card! Love the chick and excellent coloring!!!