


Learn how to create an adorable Christmas box by following along with Sandiebella’s instructions below!
Christmas Gnome Prism Box
Supplies:
How to:

On the 11.5″ side, score at 3″, 6″ and 9″

Make a tick mark at 4.5″ from the left edge. Flip the card over so that the bottom is at the top and make another tick mark at 4.5″ (opposite the first tick mark)


Score from the 4.5″ tick marks, down to the corners of the intersecting score lines.


Fold and burnish all of the score lines.

Cut away all of the outer sections each side of the section with the diagonal scoring.

Fold over the diagonal score lines and burnish with a bone folder.

Round the ends of the 2.5″ section.

Take both 2.75″ x 2-3/8″ pieces of paper and, on the back, along the 2.75″ side, make a mark at 1-3/8″. Cut from the 1-3/8″ mark outwards to the bottom corners to make the triangles for the side of the box.


Adhere the triangles and the 2.75″ x 2.75″ pieces of card to the outside of the box as shown below.

Take two magnets and two sticky dots.

Apply a sticky dot to one magnet and place on the front flap, approx 0.75″ from the edge and centered across.

Round the corners one one end of both 2.75″ x 2.25″ pieces of paper. Adhere one over the magnet.

Fold up the box into a triangle with the front flap in place. Apply a sticky dot to the second magnet and then use the magnet, sticky dot side down, to find the the one on the front flap. Push down to secure to the card.


Adhere the rest of the papers to the inside of the box.

Apply wet glue to one of the front triangles. Fold up and adhere the front to it.


Repeat on the other side.

Fold in the back triangles and then fold the box up into the prism shape. The magnets will keep it closed.

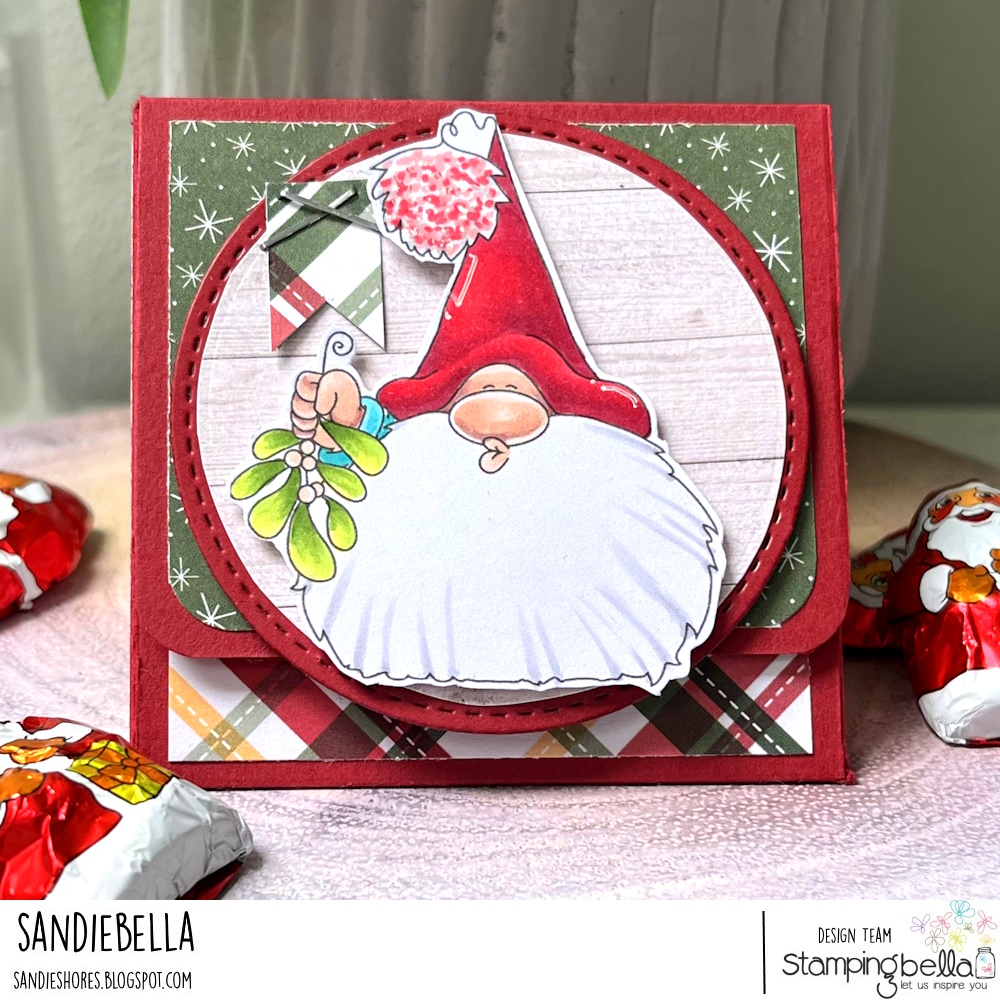
Cut two 2.75″ stitched circles from card, and one from paper. Trim the paper one to remove the stitching. Adhere the paper to one of the card circles. There will be a red border all around the edges.

Stamp The Gnome and the Mistletoe onto white card, colour with your preferred medium, then fussy cut around the outline.


Adhere the The Gnome to the circle panel using foam tape or dots.

Apply foam tape to the back of the circles, about 3/4″ down. The circle overhangs the front flap so ensure you don’t bring the tape down too far.

Adhere the circle panel to the box front.


Take the second card circle and cut a piece from it.

Open up the front flap and adhere this piece of card to the back of the circle panel to reinforce it.

Stamp the sentiment from the Winter Sentiments set onto white card, cut out using a double stitched rectangle.

Adhere the sentiment inside the front flap.

Fill the box with Christmas candy or a small gift.
