DT Thursday: Create a Fun Peek-a-BOO Card with Sandie!

It’s time for another DT Thursday post from Sandiebella. This week Sandie is showing us how to create a fun Peek-a-BOO card! We’re heading into Halloween, so Sandie has used one of our awesome new Halloween themed stamp sets, but this project could easily be adapted for other occasions (you know, like that other holiday that is creeping ever closer). Click through for the full step by step tutorial.

Stamping Bella DT Thursday - Peek-a-BOO Card. Click through for the full step by step tutorial!

Continue reading

DT Thursday: Create a Treat Box Card using Sandiebella’s Step by Step Tutorial

It’s time for another fantastic DT Thursday post! This week our awesome Sandiebella is showing you how to make a beautiful Treat Box Card – perfect for sending someone a little treat at Christmas or any time of year!  Click through to keep reading for the step by step tutorial.

At the end Sandie also has a BONUS Silhouette Studio Cut File for Silhouette users to download. This is not required to make the project, as full cutting and scoring instructions are provided in the tutorial.

Stamping Bella - DT Thursday Sandie's Treat Box Card. Click through for a full step by step tutorial and a bonus Silhouette Studio file download!

Continue reading

Design Team Thursday with SANDIEBELLA- How to make a GIFTBAG!

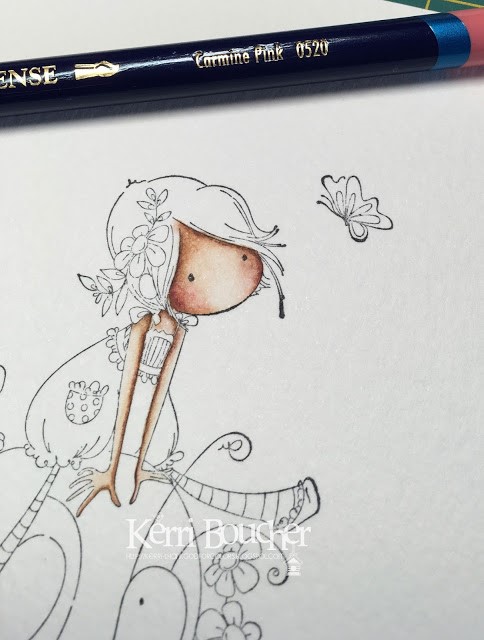
Time for another Design Team Thursday! This week we’ve got another awesome step by step tutorial from Sandiebella.

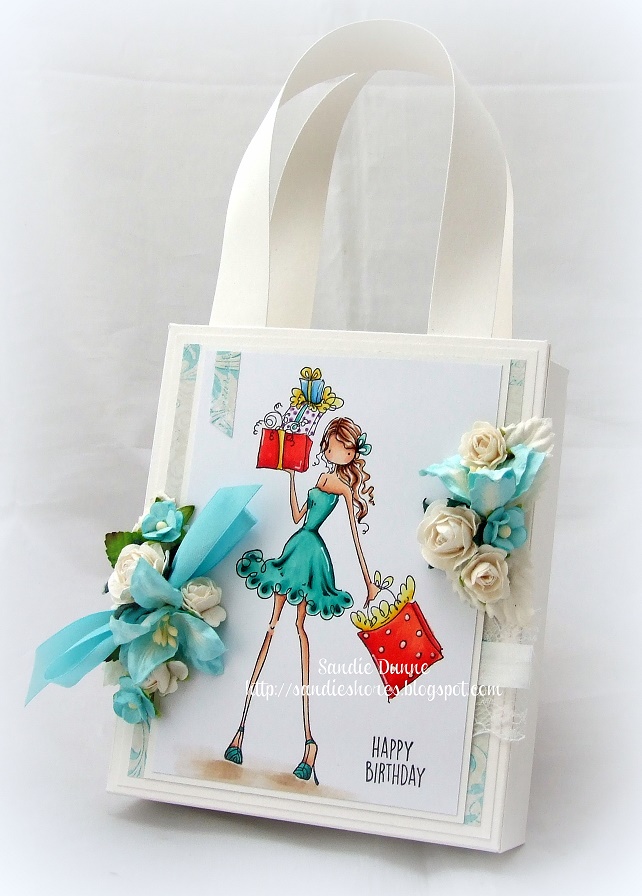
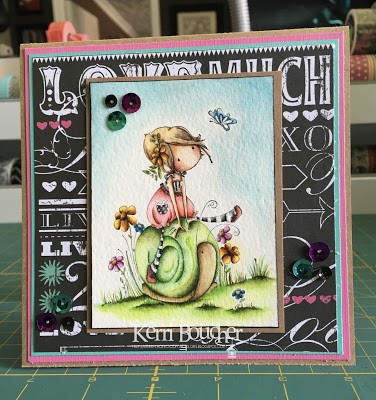
This week Sandie is sharing instructions for a gorgeous GIFT BAG, perfect to dress up with Stamping Bella stamps like the one on Sandie’s sample. Full scoring instructions are provided, so you can create this without any fancy tools. For those of you with a Silhouette cutting machine, Sandie has generously provided the necessary files as a bonus download!

Stamping Bella DT Thursday - Create a Beautiful Gift Bag with Sandiebella. Click through for full step by step instructions and a bonus download!

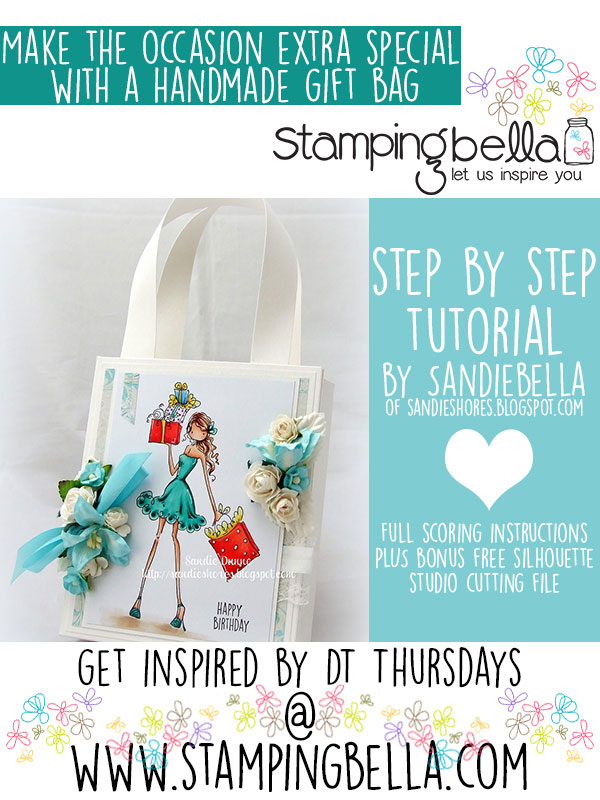
Step by Step Gift Bag Instructions

Stamping Bella DT Thursday - Create a Beautiful Gift Bag with Sandiebella. Click through for full step by step instructions and a bonus download!
Supplies
White card
Designer paper
Strong adhesive
Scoring board and bone folder
Embellishments of choice
How to:
Cut 2 pieces of white card measuring 7.25″x 8″. Instructions are the same for BOTH pieces.
On the 8″ side, score at 1″ and 7″
Stamping Bella DT Thursday - Create a Beautiful Gift Bag with Sandiebella. Click through for full step by step instructions and a bonus download!
On the 7.25″ side, score at 1.5″ and 6.5″. Then score at 0.75″ under the 1″ perpendicular score line. Bring the score down to 4.5″ as shown
Stamping Bella DT Thursday - Create a Beautiful Gift Bag with Sandiebella. Click through for full step by step instructions and a bonus download!
 Remove the top and bottom pieces on the 0.75″ section, as marked here.
Stamping Bella DT Thursday - Create a Beautiful Gift Bag with Sandiebella. Click through for full step by step instructions and a bonus download!
Cut on the 1.5″ score line, on the top and bottom, to the 1″ perpendicular line.
If desired, taper the ends of the 0.75″ tab.
Stamping Bella DT Thursday - Create a Beautiful Gift Bag with Sandiebella. Click through for full step by step instructions and a bonus download!
Fold and crease all of the scorelines
Stamping Bella DT Thursday - Create a Beautiful Gift Bag with Sandiebella. Click through for full step by step instructions and a bonus download!
Apply a strong adhesive to the tab and adhere to the 2nd piece of card
Stamping Bella DT Thursday - Create a Beautiful Gift Bag with Sandiebella. Click through for full step by step instructions and a bonus download!
Apply adhesive to the 0.75″ tab on the 2nd piece and fold over to form a box.
Stamping Bella DT Thursday - Create a Beautiful Gift Bag with Sandiebella. Click through for full step by step instructions and a bonus download!
Fold down the top tabs into the bag. You can use adhesive to secure them. Pinch inwards on the centre scoreline
Stamping Bella DT Thursday - Create a Beautiful Gift Bag with Sandiebella. Click through for full step by step instructions and a bonus download!
Cut 2 pieces of white card at 4.75″ x 5.75″ and 2 pieces of designer paper at 4.5″ x 5.5″
Stamping Bella DT Thursday - Create a Beautiful Gift Bag with Sandiebella. Click through for full step by step instructions and a bonus download!
Layer the patterned paper onto the white card
Stamping Bella DT Thursday - Create a Beautiful Gift Bag with Sandiebella. Click through for full step by step instructions and a bonus download!
Adhere the panels to the front and back of the box.
Stamping Bella DT Thursday - Create a Beautiful Gift Bag with Sandiebella. Click through for full step by step instructions and a bonus download!
Take your coloured image and mat it onto a piece of white card leaving about 1/8″ border all around
Stamping Bella DT Thursday - Create a Beautiful Gift Bag with Sandiebella. Click through for full step by step instructions and a bonus download!
Stamp the sentiment on the image and adhere the image to the box. Embellish as desired with lace, ribbon, flowers, etc.
Stamping Bella DT Thursday - Create a Beautiful Gift Bag with Sandiebella. Click through for full step by step instructions and a bonus download!
Once you are finished embellishing the box apply adhesive (1/4″ tape or wet glue) to one of the bottom tabs.
Stamping Bella DT Thursday - Create a Beautiful Gift Bag with Sandiebella. Click through for full step by step instructions and a bonus download!
Fold in the 2 side tabs and then fold in the large tabs, the one with the adhesive last. Stand the bag up and use a long bone folder, or similar, to burnish well from the inside.
Stamping Bella DT Thursday - Create a Beautiful Gift Bag with Sandiebella. Click through for full step by step instructions and a bonus download!
Cut 2 pieces of white card measuring 0.75″ x 11″
Stamping Bella DT Thursday - Create a Beautiful Gift Bag with Sandiebella. Click through for full step by step instructions and a bonus download!
Apply adhesive to the bottom 1″. I used 1/2″ tape and put 2 pieces.
Stamping Bella DT Thursday - Create a Beautiful Gift Bag with Sandiebella. Click through for full step by step instructions and a bonus download!
Adhere the handle to the inside of the box, down to the bottom of the 1″ fold. Repeat on the opposite side for the 2nd handle.
Stamping Bella DT Thursday - Create a Beautiful Gift Bag with Sandiebella. Click through for full step by step instructions and a bonus download!
Twist the handle around and adhere the other end.
Stamping Bella DT Thursday - Create a Beautiful Gift Bag with Sandiebella. Click through for full step by step instructions and a bonus download!
And that’s it, the bag is completed and ready to give to that special someone.
Stamping Bella DT Thursday - Create a Beautiful Gift Bag with Sandiebella. Click through for full step by step instructions and a bonus download!

Free Silhouette Studio File Download

I have also designed a free Studio file for those of you with a Silhouette machine. You can download it from HERE

Over to you!

We hope you’ve enjoyed checking out Sandiebella’s tutorial and are feeling inspired to try it out yourselves. If you do, make sure you drop by and share with us! You can get in touch in all the following ways:

  • On our Facebook page – tag us, post your Stamping Bella creations on the page.
  • In our Facebook Group Stamping Bella Sistahood – share your creations, chat with other sistahs!
  • On Instagram – tag @stampingbella and view our feed HERE.
  • Here on the blog – share your thoughts and links to your Stamping Bella creations down in the comments section!

Happy Stamping!

it’s DESIGN TEAM THURSDAY with KERRIBELLA- COLORING TUTORIAL USING DERWENT INKTENSE PENCILS!

Time for another Design Team Thursday! This week we’ve got a fabulous colouring tutorial for you, from our lovely Kerribella, showing you how to colour Stamping Bella images using Derwent Inktense Pencils. There aren’t any obvious skin tone shades in the pencil range, so if you’ve been struggling to choose colours to use and how to blend them to create a natural skin tone this may help!

Stamping Bella Colouring Skin with Derwent Inktense Pencils Tutorial. Click through for the step by step guide!

Hi, it’s Kerribella, and for DT Thursday today I am sharing my technique for watercolouring skintones with Derwent Inktense Pencils.

Supply List:

Inktense Colors:

  • Saddle Brown ( first and second coat )
  • Baked Earth ( third coat)
  • Madder Brown ( shadow Enhancer)
  • Carmine Pink or Crimson ( cheeks)
Stamping Bella Colouring Skin with Derwent Inktense Pencils Tutorial. Click through for the step by step guide!

After stamping your image using Staz On ink on watercolour paper, leave it to dry. Ensure that the ink is fully dry before colouring.
Take your Derwent Inktense pencils and starting with the Saddle Brown pencil draw a thin line of colour where you would find a shadow.

Wet your brush, making sure it is not dripping with water but just slightly wet. Work the line of colour out towards the center of the face. You may have to rinse your brush periodically as the center of the face should remain light. Before moving on let this dry. For this technique it is important to let the colour dry between each layer as you build up the colour.

Repeat this process for the rest of the skin areas.

You may wish to repeat the process twice to achieve the desired level of colour. I did, but try it and see what you prefer.

Stamping Bella Colouring Skin with Derwent Inktense Pencils Tutorial. Click through for the step by step guide!

Take your Baked Earth pencil and after making sure your layers are dry apply a thin line and work the colour into the center of the face.

Stamping Bella Colouring Skin with Derwent Inktense Pencils Tutorial. Click through for the step by step guide!

In the same way use a little Madder Brown to deepen your shadows, remembering to first ensure the previous layer is dry.

Stamping Bella Colouring Skin with Derwent Inktense Pencils Tutorial. Click through for the step by step guide!

Using either Crimson or Carmine Pink apply a very small amount for the cheeks and blend out.

Stamping Bella Colouring Skin with Derwent Inktense Pencils Tutorial. Click through for the step by step guide!
Here’s the completed image on a card!

Stamping Bella Colouring Skin with Derwent Inktense Pencils Tutorial. Click through for the step by step guide!

TOP TIPS:

  • Always remember to let each layer completely dry before continuing. This will allow you to build up colour without it becoming a mess, as Derwent Inktense Pencils are permanent when dry.

  • It is easier to add colour than to remove it, so use colour sparingly and build up slowly.

Kerribella

Over To You!

We hope you’ve enjoyed checking out Kerribella’s tutorial and are feeling inspired to try it out yourselves. If you do, make sure you drop by and share with us! You can get in touch in all the following ways:

  • On our Facebook page – tag us, post your Stamping Bella creations on the page.
  • In our Facebook Group Stamping Bella Sistahood – share your creations, chat with other sistahs!
  • On Instagram – tag @stampingbella and view our feed HERE.
  • Here on the blog – share your thoughts and links to your Stamping Bella creations down in the comments section!

Happy Stamping!