


For this week’s instalment of Stamp It Saturday I thought it would be useful to talk a little about that major stamping essential – ink.
Ink Pads – Overview
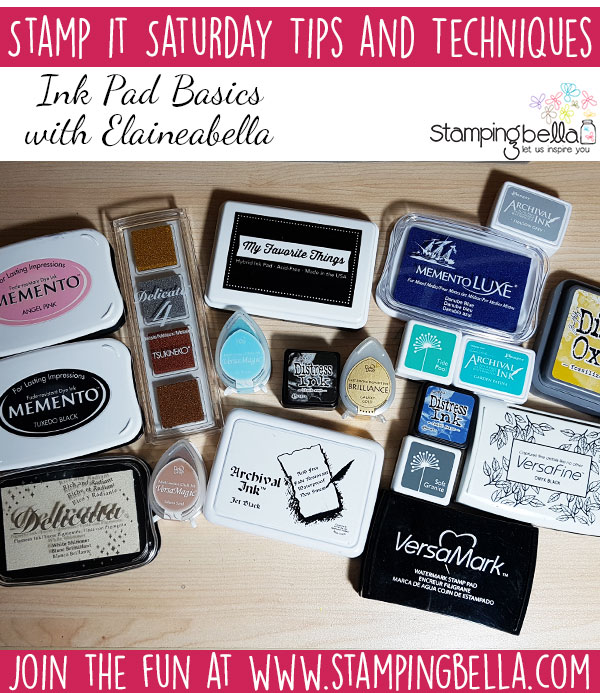
Whatever else you consider essential to your creative process, when stamping ink pads are an essential. There are so many out there however, it can be tough to know what the differences are and which ones to choose, especially if you’re just starting out.
There are many, many, different brands of ink pad available on the market now. A lot of them are quite similar in properties, differing mainly in terms of packaging and colour palettes. There are some key differences in the types of ink pad available however.
Ink Pad Types:
Dye Based Ink Pads:
Dye based ink pads usually come with a felt pad. The ink is thinner and more translucent than pigment ink and it works by soaking into the fibres of the paper. Dye based inks work best on white and other light coloured porous surfaces. These inks are typically quick drying.
Some dye based inks are water resistant, many are not – check the individual ink pads for this property.
Pigment Ink Pads:
Pigment ink pads usually come with a foam pad and the ink has a much thicker consistency than dye based inks. The pads will feel “juicier” and you may find you need a lighter touch when inking your stamps using pigment ink pads.
Pigment ink sits on the surface of the paper and is more opaque and vibrant than dye based inks. The ink stays wet for longer and may require heat setting on glossy surfaces. Pigment inks are great for heat embossing as you have more time to apply the embossing powder.
Chalk Inks are a particular type of pigment based ink that dry with a matte, chalky finish and are blendable while wet.
Solvent Ink Pads:
Solvent based ink pads are quick drying, permanent inks suitable for use on many surfaces both porous and non-porous. StazOn is probably the most well known and widely available solvent based ink. These inks are great for stamping on surfaces like glass or ceramic.
If you are particular about keeping stamps clean, you will need to invest in a cleaning solution to go with these inks. Please also be aware that some companies advise against using solvent based inks with clear photopolymer or acrylic stamps as they may react with the material the stamps are made from and damage them.
Embossing Ink Pads:
Embossing ink pads tend to be clear or slightly tinted pigment based ink, which is stickier and perfect for heat embossing, particularly if you want to create clear embossed lines. I use Versamark.
Hybrid Ink Pads:
There are a number of hybrid inks on the market now. These inks combine the properties of dye based (usually quick drying) and pigment inks to create a multi-purpose ink pad for use with multiple types of media. This is particularly useful when it comes to black ink pads – having just one ink pad for alcohol based marker colouring AND water-colouring is a nice space-saver!
Black Ink Pads:
Black ink pads are an important topic for most stampers. We use them so often, and it’s great to know which ones will do the job!
For quite some time I preferred Tsukineko’s Memento Tuxedo Black ink pad for stamping when colouring with Copics and other alcohol based markers. It works beautifully with these inks, as it is fast drying and does not react with the alcohol based ink at all because it is a water based dye ink. My one complaint – it just isn’t quite bold enough for me.
I now use the Black Licorice hybrid ink pad from MFT Stamps, which gives a bolder, crisper black. I’ve heard good things about the Simon Says Stamp Dye Based ink in Intense Black too, but have yet to try it myself.
Versafine Onyx Black ink is a wonderful black ink if you’re planning to use watercolour or coloured pencil. It gives a beautiful, black impression. This is an oil-based pigment ink and as such while good for water based media it does not play nicely with alcohol based markers. It’s great for heat embossing.
Choosing the Right Ink:
It is always worth testing any particular brand for yourself, or getting recommendations from friends or other trusted sources, as properties may differ due to differing ink formulations, but as a general rule of thumb the following applies:
- When colouring with alcohol based markers, look for an ink pad that is a water-based dye ink. Alcohol/solvent based inks will react with the alcohol in the markers.
- When colouring with water based mediums, look for an ink pad that is alcohol or solvent based.
Remember that drying times may differ – some inks may require longer to dry or may need to be heat set before colouring, others will be dry and ready to go almost immediately. The surface you stamp on will make a difference too – ink may dry faster on one brand of paper compared to another.
Speciality Inks:
Distress Ink Pads:
Distress inks are a water based dye based ink pad. The ink stays wet for longer than most dye based inks, and as such is great for blending and other techniques. Once dry these inks remain reactive with water, a property which can be used to great effect!
Distress Oxide Ink Pads:
The latest development in ink pads from Ranger, the Distress Oxides are a hybrid ink pad combining the properties of dye and pigment inks to create some interesting results. These are very different to the normal Distress Inks due to the pigment ink component. They are even more blendable than Distress Inks, and because of the higher opacity the pigment ink brings, can be layered for some cool effects.
Unlike most pigment inks, the Distress Oxides have a felt pad.
Delicata Inks:
Tsukineko’s Delicata ink pads are a range of metallic pigment inks. These are my personal favourites for metallic ink, they have a gorgeous lustre to them.
Do You “Need” It All? Regular or Mini?
No, probably not and I for one am firmly in the “mini” camp when it comes to ink pads!
Many of the brands of dye based inks out there are very similar, and you definitely don’t need them all. In fact, unless you do a lot of stamping with solid stamps and specially designed layering stamp sets, you may find that you don’t need a lot of different ink colours. They are oh so pretty, and there are crafters who have huge ink pad collections and do gorgeous things with them. Unless you know what you’re going to use them for and have techniques and projects in mind, however, I would recommend that you resist the temptation!
In my personal collection I have all of the Distress Ink colours in the mini size, the currently available 12 Distress Oxide colours (only available as the full sized pads), the colours currently available in the Ranger Archival mini ink pad size, a small selection of colours in the Hero Arts Shadow Ink cubes, a Versafine Onyx Black pad that I have had for years (and have never re-inked), the MFT Hybrid Ink in Black Licorice, Memento pads in Tuxedo Black, London Fog (grey) and Angel Pink, a Versamark pad, a Delicata set of metallics, a few chalk inks, some Memento coloured pigment ink pads and a selection of white pigment inks from a few different brands. Aside from the Distress Inks/Distress Oxides and the Delicata metallic inks, I only tend to reach for the MFT Hybrid Ink and the Versamark ink with any regularity. I tend to use the Archival Inks when playing in my art journals.
I switched to the mini sizes of ink pad where available because storing them is so much easier! I have absolutely no regrets about de-stashing the majority of my regular sized ink pads and replacing them with mini versions. If you’re just getting started, I would highly recommend collecting the mini versions rather than full sized pads.
Tips for Using Ink Pads:
- To avoid over-inking, tap the ink pad lightly over the surface of your stamp, rather than pressing your stamp into the ink pad. This is particularly useful when using pigment ink pads with their juicier foam pads.
- Try using your water-based dye inks like Distress Inks for water colouring. This is a great way to stretch your stash and get the most from your supplies, especially if you’re just getting started. Tap the ink pad on an acrylic block, a craft mat, plate or other non-porous surface, add a little water and pick the colour up with a brush.
Over To You!
Have you got any tips/suggestions regarding ink? What are your favourites? Any storage tips? Feel free to share with us in the comments section!
If you try out the techniques shown in any of the posts with your Stamping Bella stamps, be sure to share! We would love to see the results and hear how you feel about them. Show off your creations in the comments below and even better, share your own favourite tips with us. Let’s talk stamping!
If you are posting your images online, we would love to see them on Instagram and all the platforms mentioned above. To make it easier for us to find you just use #markergeekmonday and/or #stampingbella as a hashtag. Even better tag me @markergeek and @stampingbella . We love it when you connect, so don’t be shy!
If you’re on Facebook join us in our private chat group Stamping Bella Sistahood to share your creations there and chat all things Stamping Bella related!
Until next time, HAPPY STAMPING!
MWAH
Elaineabella
What a great, thorough article about inks. It absolutely took the confusion away. Thanks about the recommendation on MFT’s black pad. I, too, have been somewhat disappointed with the intensity of the Momento black. Congrats!
This was wonderful – I have been stamping for over 20 years and I still find these type of articles so very interesting and you did a superb job here. In all those years, we can imagine how many different products have surfaced and it is so hard to tell yourself you really do not need it ALL!!! LOL Hugs:)
Thanks so much for this information, it has helped me finally understand what to use since I am pretty new to stamping. You “bella” ladies are awesome!!
I also have been stamping for a LONG time, and I found this so helpful. Thank you, Elaine, for putting this out there.
Thanks for sharing Elaine! I so wish when I started out that I had bought the cubes. Storage can be a problem. As they become “used up” I’m only replacing certain pads and if possible in the small cubes. Thanks for sharing all the great information about ink pads! ?
Great post. I have been stamping for over 20 years (started with a home-based company so I have all of the ink pads). I also have all of the distress ink pad in the mini’s. I prefer the minis because I can’t seem to stop buying inks!!! I store all of my minis in these acrylic drawers from the container store. They hold a TON of ink and they stack nicely on top of each other and don’t take up that much space! I have 2 of them have a lot of room to purchase more mini ink cubes!!! 😉
What great information! I have a ton of ink pads and I don’t need half of them! Thank you for the space saving ideas!
Thank you Elaine……..OMG! This is the posting of my dreams….I’ve been having soooo much trouble with choosing the correct ink pad…NOW I think I’ve finally got it!!!!
I have just gone to ink pad heaven….thanks Elaine for finally clarifying it for me!!!
Elaine…my life is now complete, Thank you so much for this useful information.
Thank you! I always need to reread these articles
Thank you for always providing great teaching moments. I have gotten the best tips from you!
I am loving this but would love to see more on the new Distress Inks because I love ink pads and these look like they would so great to use. I just have to justify buying these new ink pads.
I have 2 favorite kinds of ink pads. I not only make greeting cards but I also stamp on fabric. What I love is an ink that you can use on fabric and paper and I have 2 that I really love! One is called MementoLUXE and it comes in some amazing colors. Its great on tee shirts and sheets (yes, I stamped my summer sheets for my twin bed) and I’ve used it for cards. It says it’s for mixed media.
I don’t think it’s called Fabrico anymore but I have some of those ink pads and their re-inkers which I have used. They do not need to be re-inked very often but I was glad to have all the ink to be able to do this. I bought the ink pads in the 90’s I think and they still work with a few re-inks. However, one ink pad did something I have never seen an ink pad do before and I have been stamping since the late 70’s. My green Fabrico ink pad peeled and has a hole in the pad! Any idea’s why this could have happened? The other Fabricos haven’t done this yet.
I have one ink pad that I bought in the 70’s I think, maybe early 80’s but I think it was the 70’s. We had a store in our town that sold school supplies like for teachers. The stamp pad was Hyacinth and it was scented which it isn’t anymore. I loved the color. On the pad it says Center Enterprises Inc. Hartford, CT and this company is probably not in business anymore. The store was in our town for probably 2 years but I’m not sure. It could have been 3 years or 1 year. What’s amazing about this pad is that it still works like the day I bought it and I have never re-inked it although I don’t have a re-inker for it but if I did, I would not have had to use it. Compare that to one of my MementoLUXE pads I bought last year. I don’t have a re-inker but it stamps very light and you can hardly see what I put it on. Go figure how a big stamp company makes a pad like that and one from the 70’s that was a very small company still works like the day I bought it.
One thing you didn’t mention in you’re amazing article which I am keeping by the way, is how to store your ink pads. I’ve heard you should store them upside down so the ink always stays up against the pad. Is this true or does it really matter?
I’m going to do what you said with the black ink pad. I like my Memento Black and I also like my Fabrico black but that one needs to be re-inked as it’s not as black as it used to be. Maybe I need a new one.
Also, why when I use yellow, which is my favorite color, does it not show up on fabric and paper? It shows up sometimes but most of the time you can’s see it. Why does my favorite color have to be the one that hardly shows up?