


This week’s Marker Geek Monday is a quick reminder to use your supplies to their and your best advantage, as I did on this card using stamps from the latest release. Read on to see what I mean!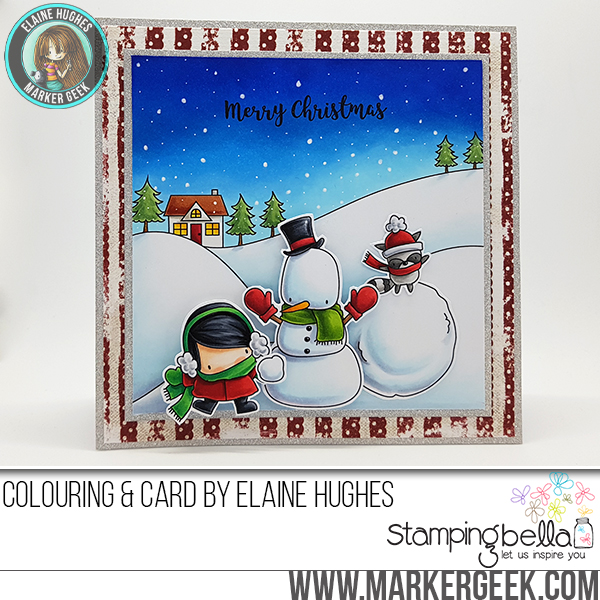
Stamps Used: Winter Backdrop, Holiday Sentiments Set, Little Bits Sledding, Little Bits Snowman Set (coordinating die sets also available)
Use Your Inks!
As you can see, I used the gorgeous new Winter Backdrop stamp on my card, and coloured a deep winter sky. I coloured the sky with Copic Markers initially, but wasn’t happy with the blending – it can be tough to achieve nice soft graduations of colour when colouring a larger area like a sky, and a couple of the shades of blue I chose didn’t want to play that nicely. How did I fix it? Ink blending! Just because you start an image with one medium, doesn’t mean you have to stick religiously to that medium, especially if another will do the job better, or make your life easier!
I grabbed some Ranger Distress Ink in a darker shade of blue, a mini ink blending tool and added some ink over the darkest area of my sky. You could also use Distress Oxides – these will be more opaque due to the pigment content, but they can be a little easier to blend (especially if the paper you have used isn’t great with ink blending). If you don’t have either of these, try the inks you do have!
TIP: make sure you start blending off the paper, on a craft mat, to get a soft build up of colour. Better to start with less and work up in layers! Blend gently to get a soft covering, gradually lightening as you get to the lighter area of sky.
Grab a White Gel Pen!
Adding some “snow” to your sky will also help to distract from any patchiness in your colouring. Grab a white gel pen and add random dots of differing sizes.
TIP: to make it look like it is snowing, make sure you add some spots over some of the objects in the scene.
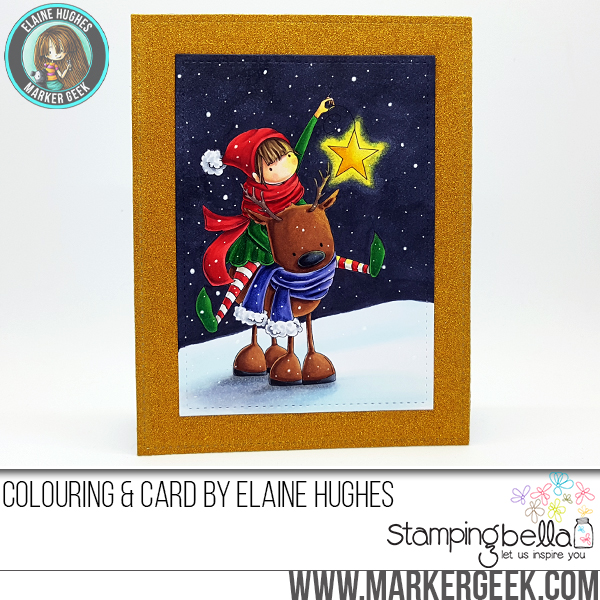
Stamp Used: Tiny Townie Rita & Her Reindeer (coordinating die also available)
As you can see in this card I added a few dots here and there over the girl and reindeer, as well as the ground. No need to go too crazy – just a few randomly placed spots here and there will help create the effect.
Over To You!
If you try out the techniques shown in any of the posts with your Stamping Bella stamps, be sure to share! We would love to see the results and hear how you feel about them. Show off your creations in the comments below and even better, share your own favourite tips with us. Let’s talk colour!
If you are posting your images online, we would love to see them on Instagram and all the platforms mentioned above. To make it easier for us to find you just use #markergeekmonday and/or #stampingbella as a hashtag. Even better tag me @markergeek and @stampingbella . We love it when you connect, so don’t be shy! Make sure you use the #SpotThisStampingBella hashtag on social media if you’re happy for me to feature your work in my Spotted On Sunday posts!
If you’re on Facebook join us in our private chat group Stamping Bella Sistahood to share your creations there and chat all things Stamping Bella related!
Until next time, HAPPY COLOURING!
MWAH
Elaineabella
Great idea on the background inks! Can’t wait for my new stamps to be delivered! This release is just too cute.
Thanks for sharing Elaine! 🙂
I love how you said you did the background and the snowflakes. I have to try that one on a Christmas card. Can’t wait to get my new stamps. Now I just have to use all my new stamps and have some fun.
Thanks for these very useful tips.