


Time for another Design Team Thursday! This week we’ve got a fantastic tutorial for you from our wonderful Micheleabella, sharing how she creates a beautiful brick background for her stamped images.
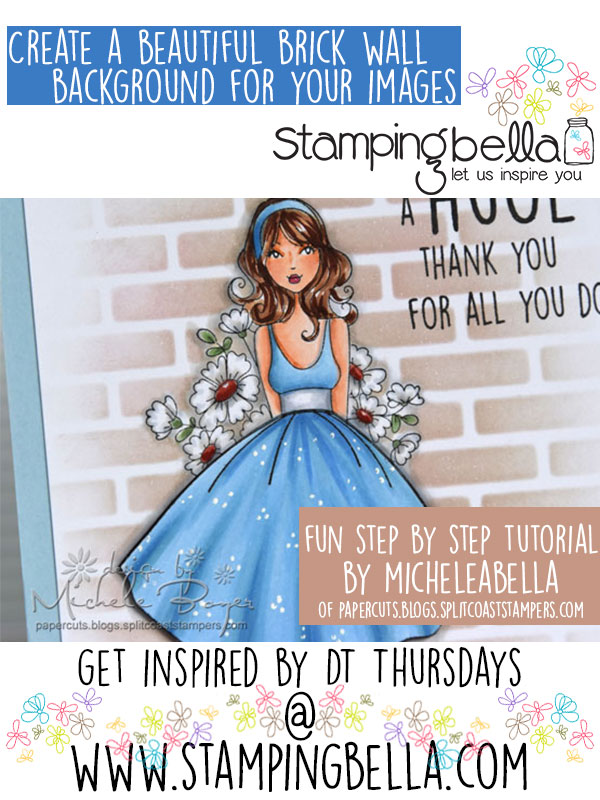
Hi everyone! It’s Michele here today. I had quite a few questions regarding how I created a brick background on a recent Stamping Bella card so I thought I’d share with you how I created that background.
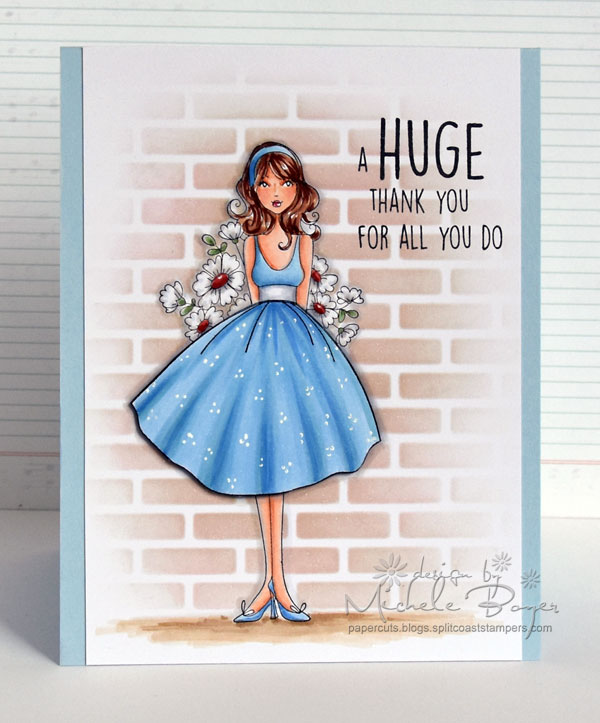
I used new flowersbehindmybackABELLA from the new Bella 2.0 line (LOVE), a couple Post It notes and removable tape, brick stencil, two inks and a blending tool.
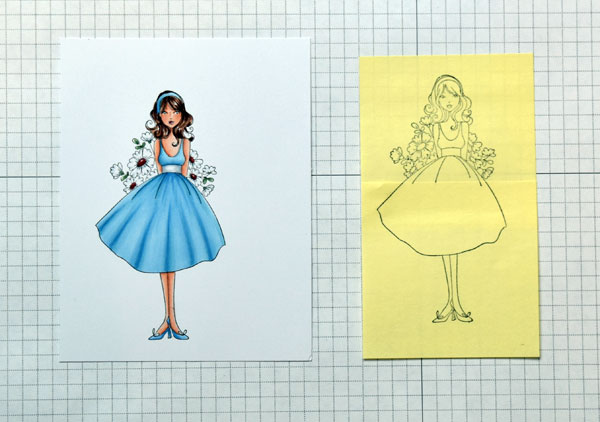
Stamp the image and color with desired medium. (I used Copic markers.) Adhere two Post It Notes together then stamp the image to use as a mask.
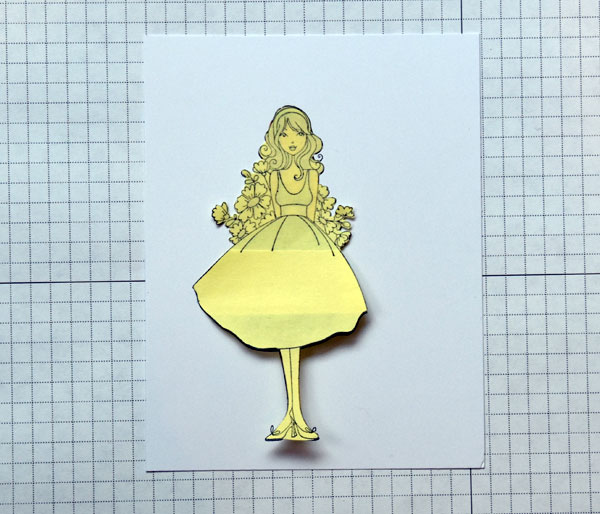
Carefully cut out the image, cutting directly on the stamped outline. In the areas such as the flower bouquet, it is not necessary to cut in between each flower. (I’ll address that issue in a bit.)..
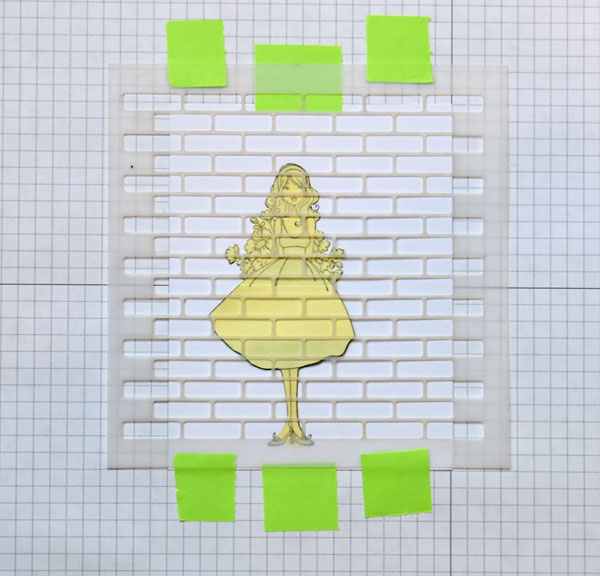
Using removable tape, securely adhere the masked image to scrap paper. Align the stencil over the image and adhere securely with additional removable tape.
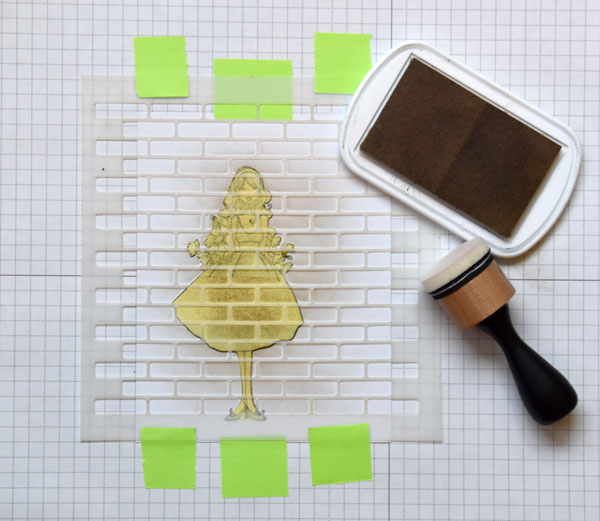
Using the desired base ink color (I used Natural), begin blending ink over the stencil. I achieved the best results by beginning the blending motion over the mask and moving onto the surrounding area using circular motions. As I moved further away from the image, I applied less ink to create the faded edges.
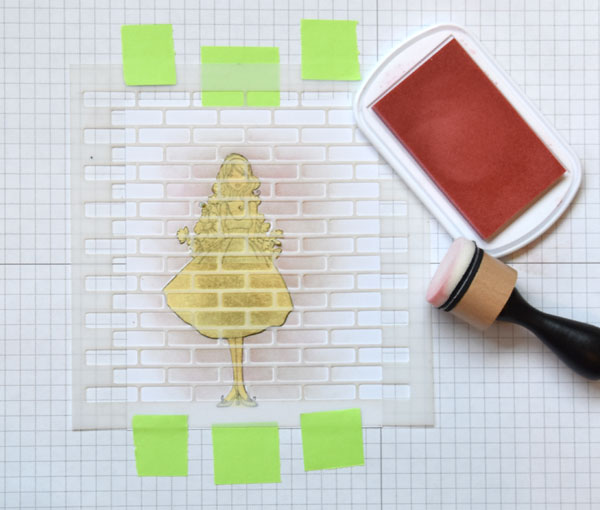
With just a bit of a second color of ink applied to the blending tool (I used a light pink), lightly sweep the blending tool from right to left, applying more ink close to the image. The goal is to apply color to the left side only of each open area to create depth. Additional colors can be applied if desired.
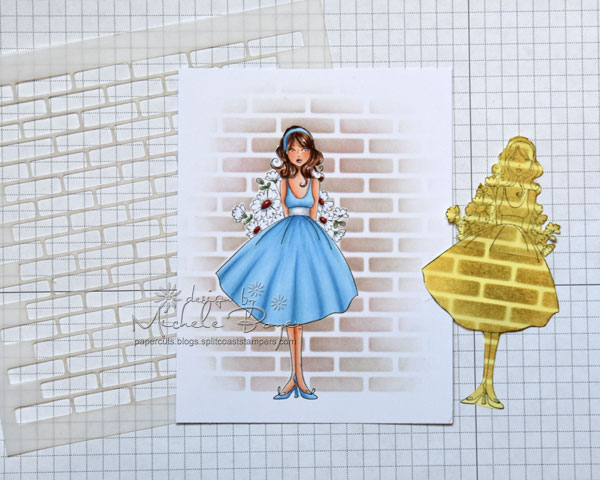
Remove the stencil and mask. There were a few areas where my mask wasn’t exactly aligned but that’s ok. (See the left edge of the dress and left edges of flowers.) I had planned to add shadow around the image anyway to create depth.
In the areas between the flowers where it was too difficult to cut the mask, I used a Copic marker, matched to the brick color, to fill in those white areas. No one will ever know.
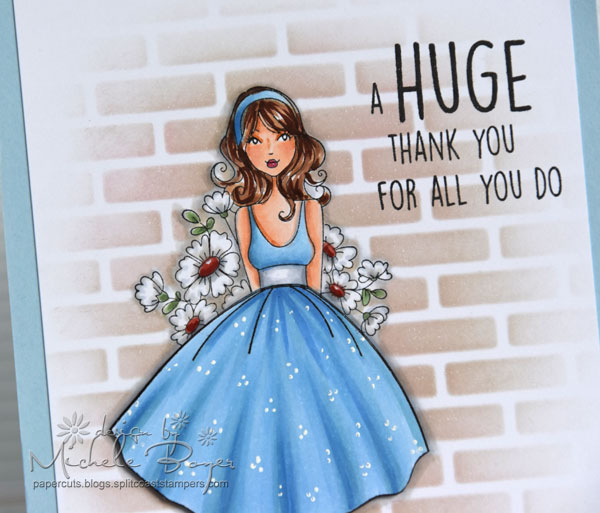
To create additional depth, I decided to stamp the skirt a second time. I colored, added some dots then adhered the top edge directly to the full image and placed thin, clear foam squares beneath the bottom edge.
Over To You!
We hope you’ve enjoyed checking out Shelabella’s tutorial and are feeling inspired to try it out yourselves. If you do, make sure you drop by and share with us! You can get in touch in all the following ways:
- On our Facebook page – tag us, post your Stamping Bella creations on the page.
- In our Facebook Group Stamping Bella Sistahood – share your creations, chat with other sistahs!
- On Instagram – tag @stampingbella and view our feed HERE.
- Here on the blog – share your thoughts and links to your Stamping Bella creations down in the comments section!
Happy Stamping!
Thanks for sharing this awesome technique! I love the ‘how to’ videos/posts. Keep em coming!
wonderful coloring and technique!
Thank you for this tutorial, it is beautiful!!
This is really cute. Great technique.
What a cute card! Thanks so much for sharing your technique! 🙂
I love what you did! Now I am wishing I had that stencil so I could try this. However, I have other stencils and maybe I can try using them for a background. I will have to experiment and see what I can do. Thanks for the idea!
This. Looks. So. Gorgeous. I’m gonna have a go at that skirt cheat too xx