


Time for another fab DT Thursday tutorial from Sandiebella!
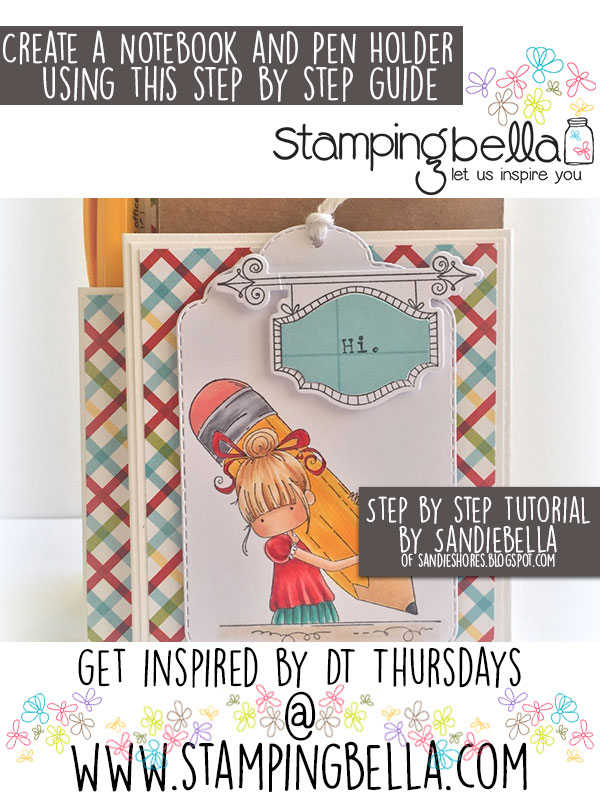
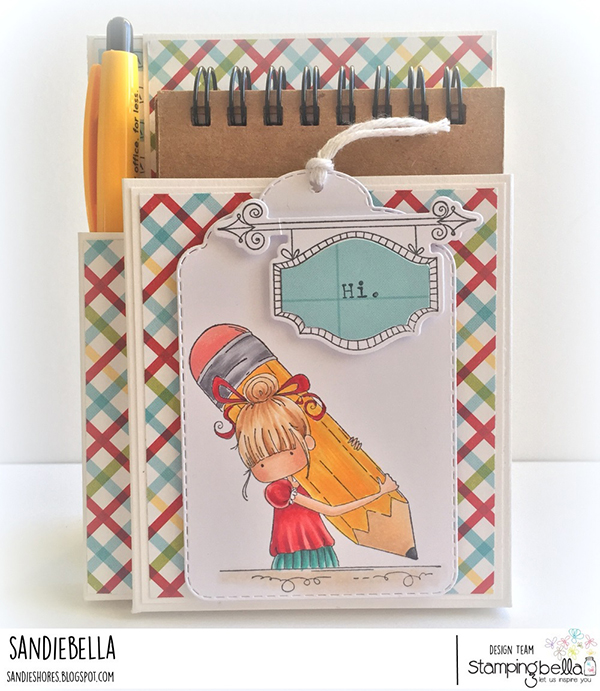
Notebook & Pen Holder
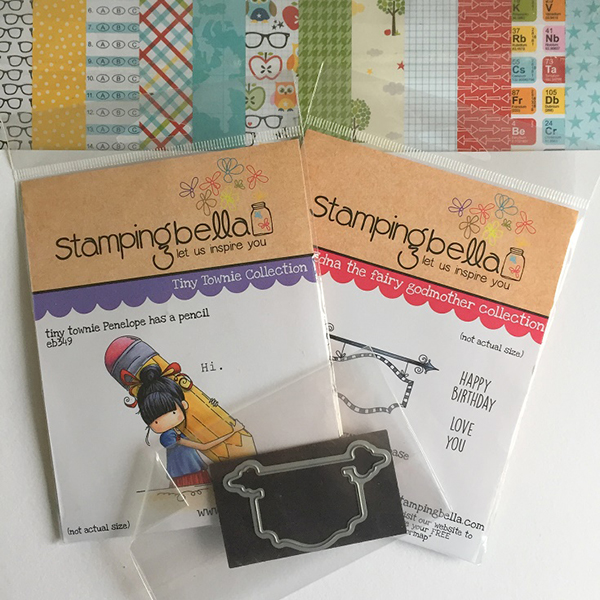
Supplies needed:
White card:
How To:
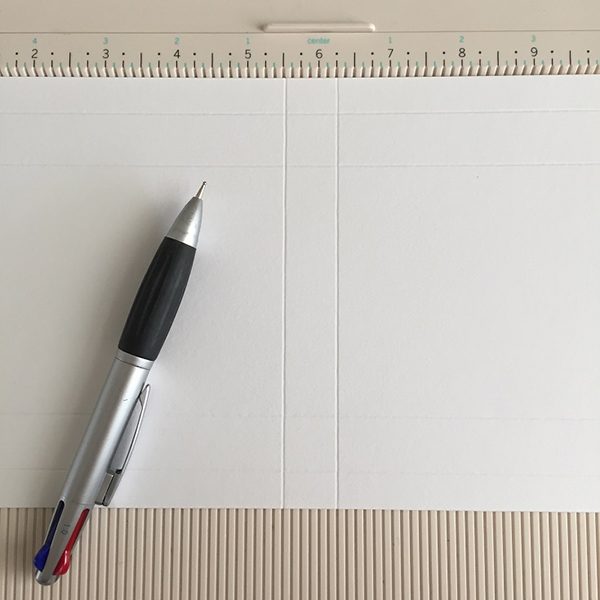
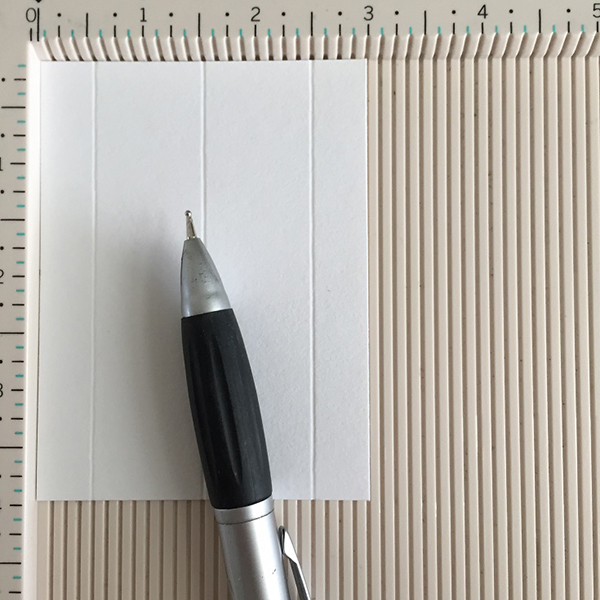
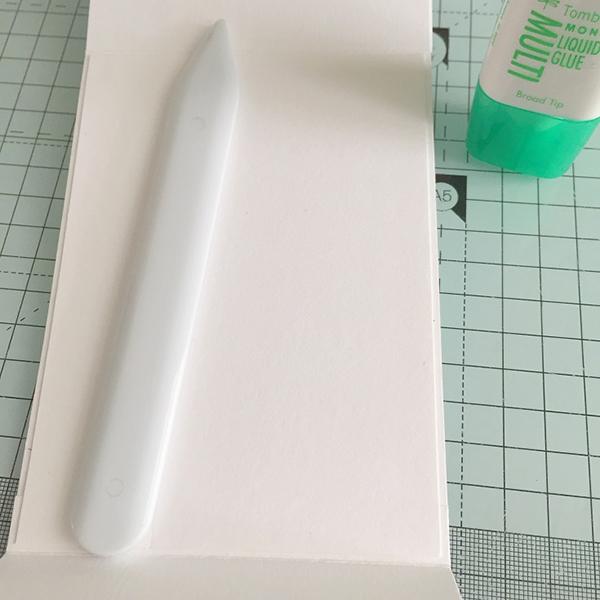
Score the 10.25″x 6″ piece of white card at 0.5″, 1.25″, 4.75″ and 5.5″ on the short side.
Score at 5.5″ and 6.25″ on the long side.
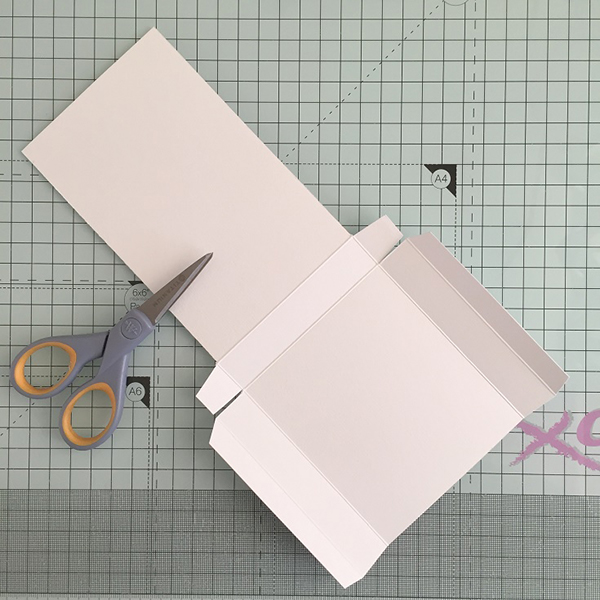
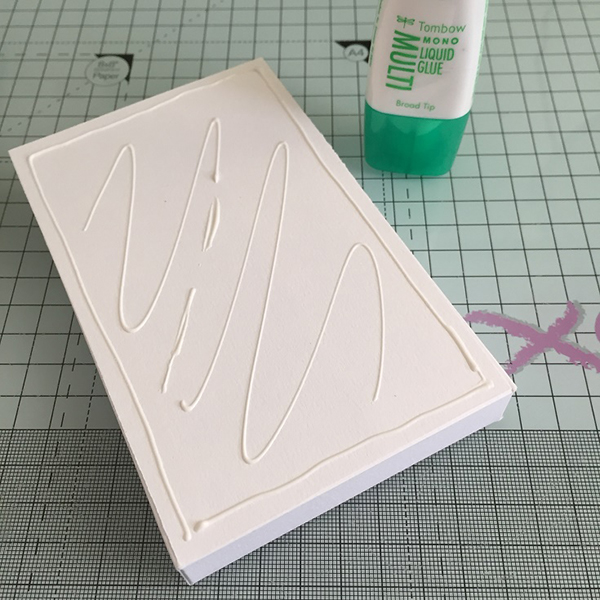
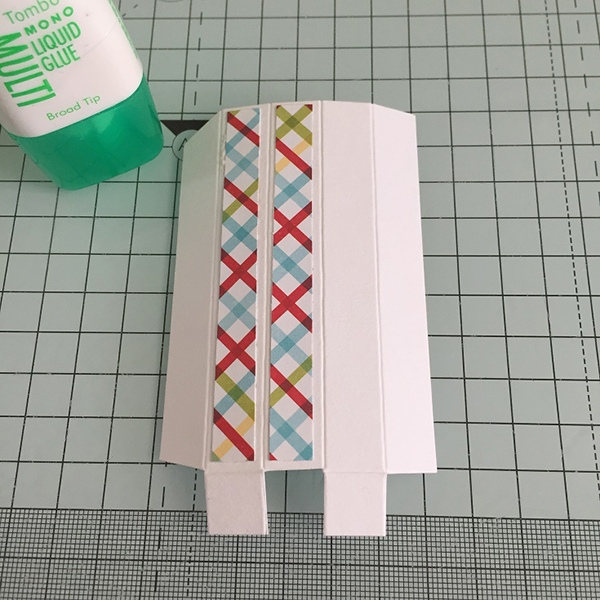
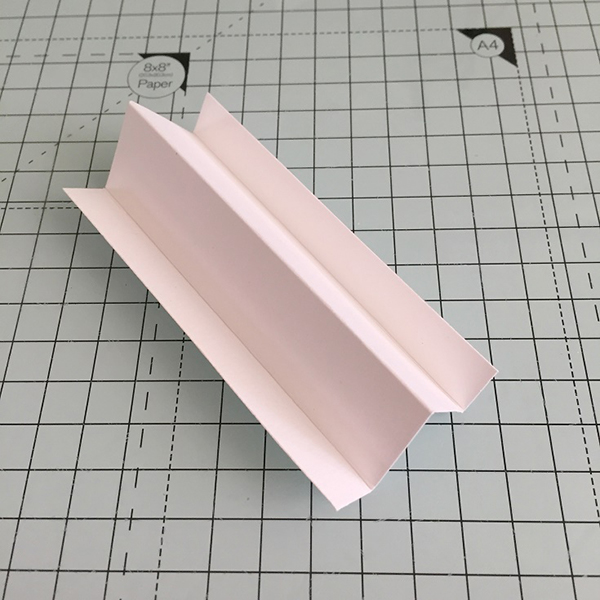
Cut away the 2 outer areas on each side of the 5.5 section. Cut the .75″ section to make 2 tabs as shown. Cut a small wedge from each side of the tabs and from the outer ends on the 4″ section.
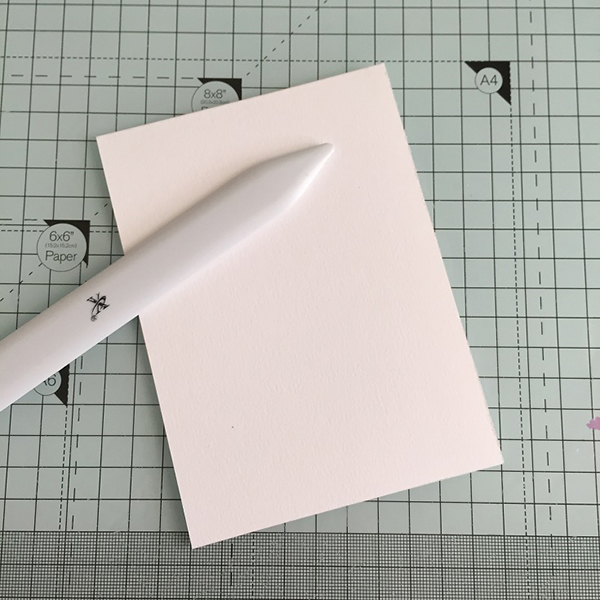
Fold and crease all of the scorelines with a bone folder.
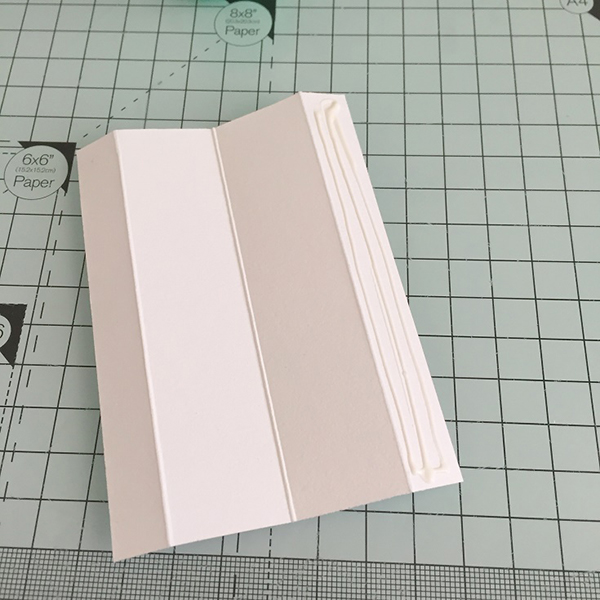
With the outside of the notebook holder facing up, apply adhesive to both tabs.
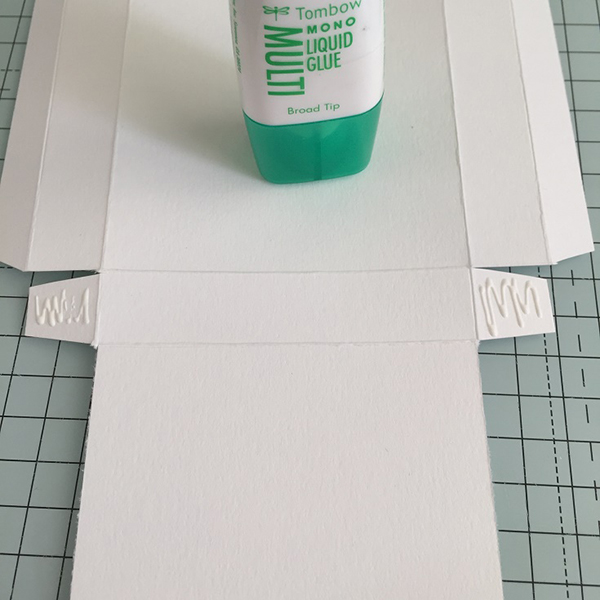
Fold the tabs in and adhere to the sides of the 4″ section, as shown.
Fold in the outer tabs on the 4″ section and apply adhesive to both.
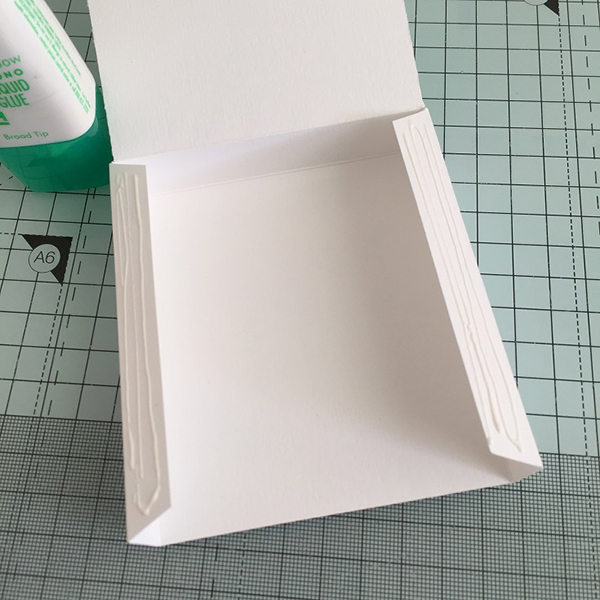
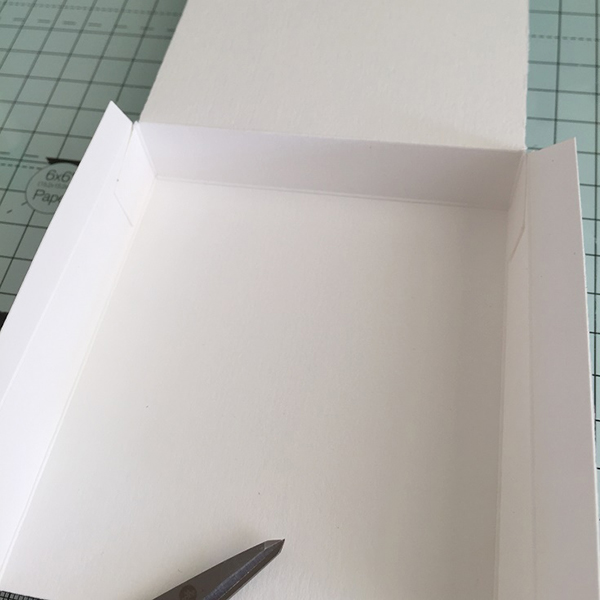
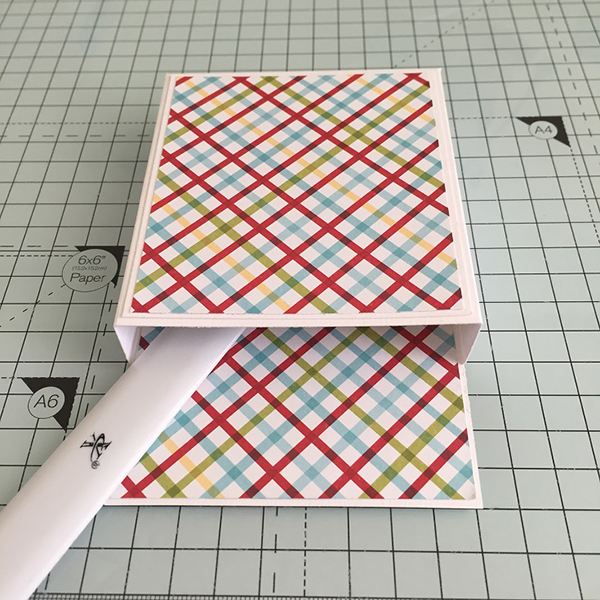
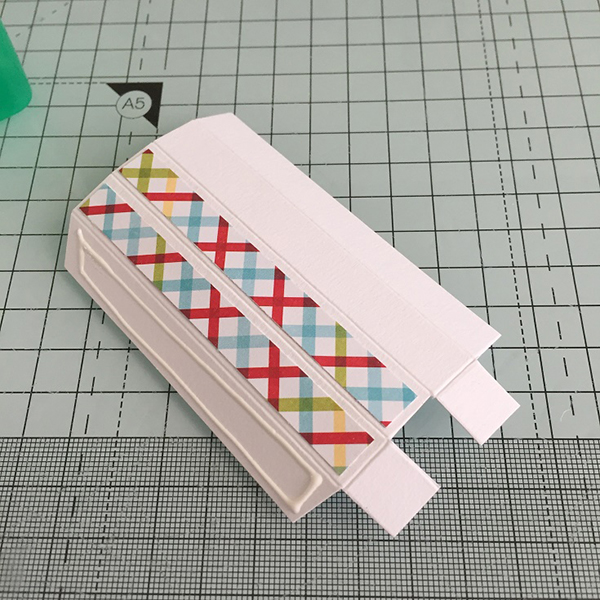
Fold the 5.5″ section down onto the adhesive to make a box, as shown.
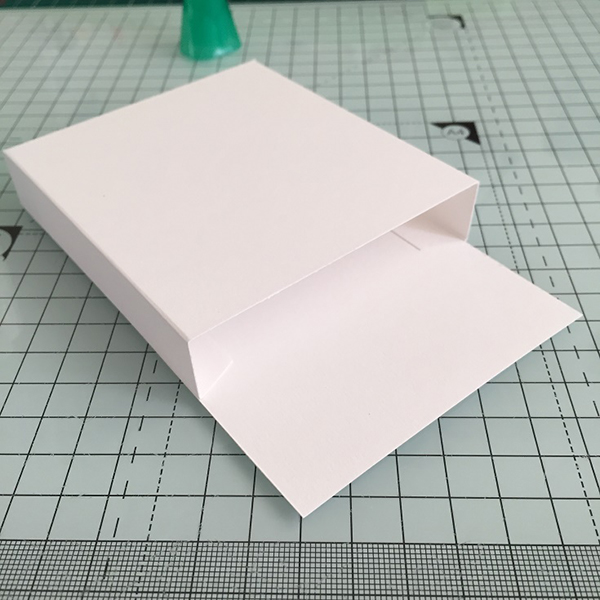
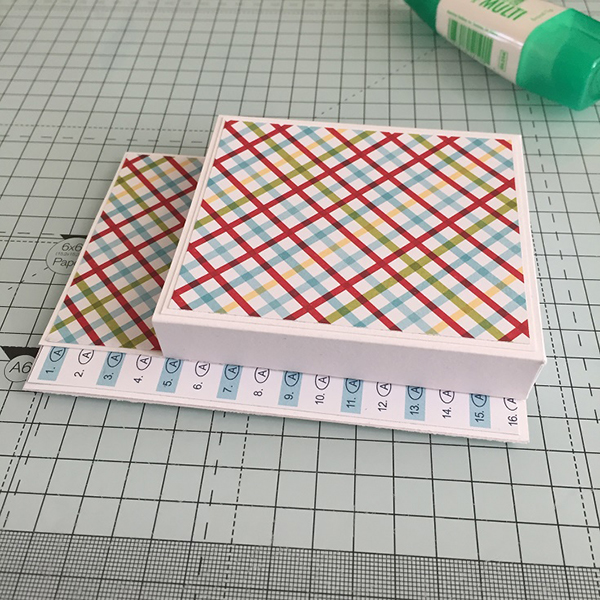
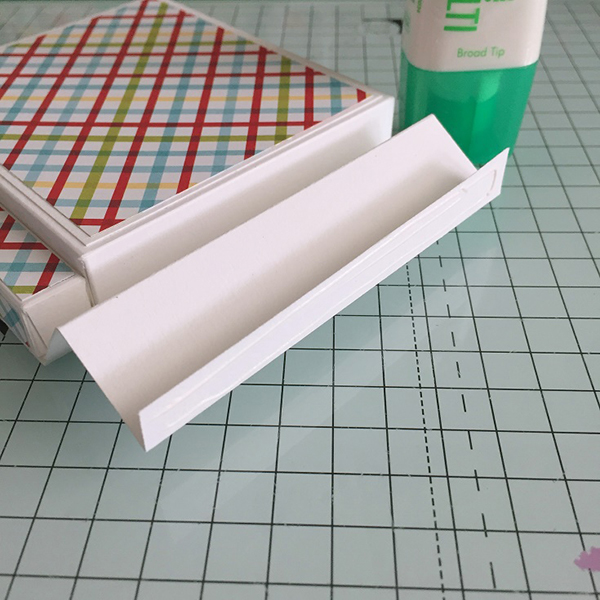
Take the white card and patterned paper you cut for the front, and adhere them together.
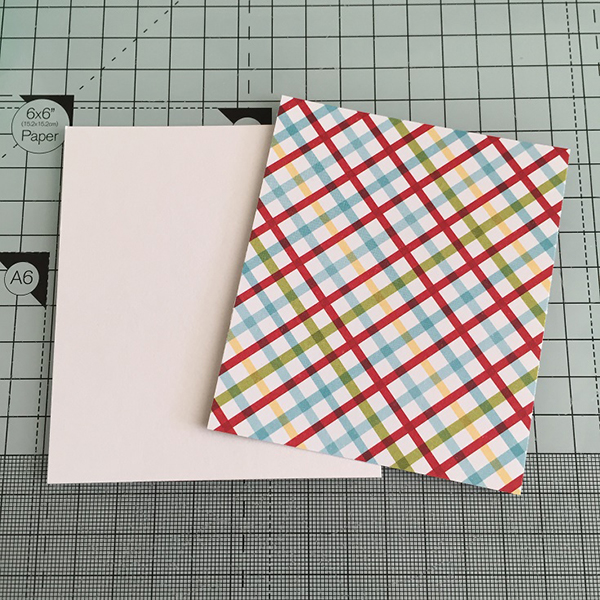
Adhere the patterned paper panel to the front of the notebook pocket.
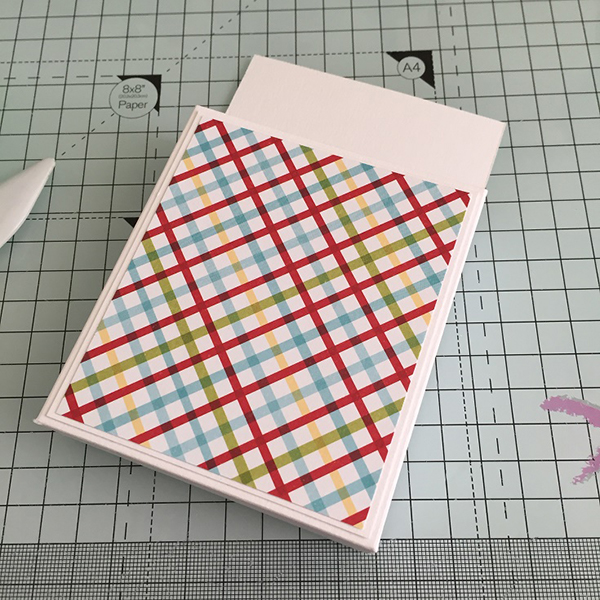
Take the piece of patterned paper you cut for the inside of the pocket, and using wet glue so that you have time to move it around, slip it into place and use a bone folder to burnish well.
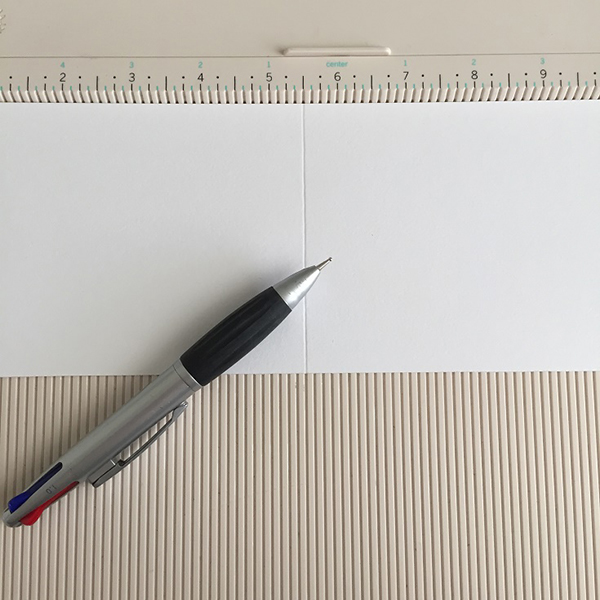
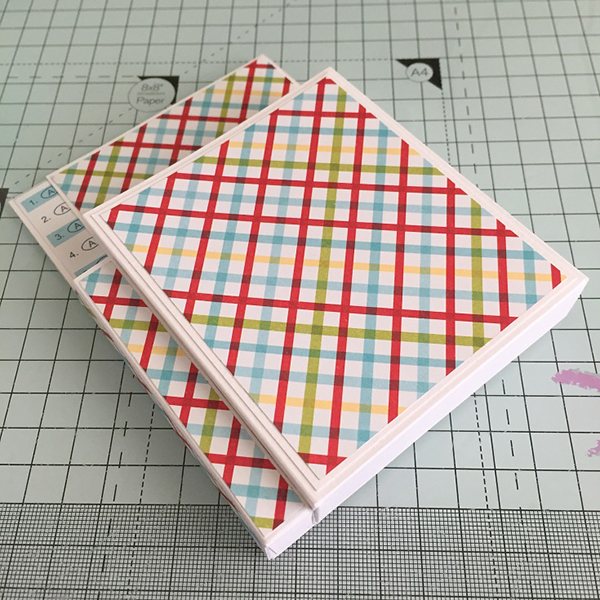
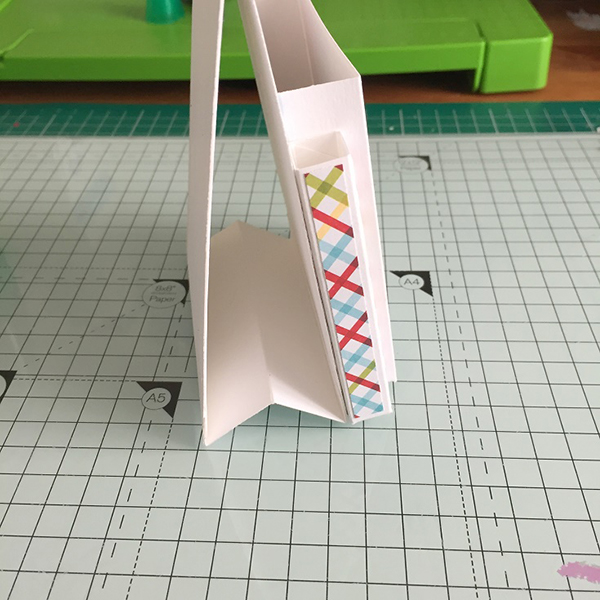
Score the 4″ x 11″ piece of white card at 5.5″ and fold in half. Use a bone folder to crease the scoreline.
Adhere the 5 3/8″ x 1.5″ strip on the left side of the base, leaving just a little border along the edge.
Apply adhesive to the back of the notebook pocket and adhere to the right side of the base front – lining up the right edges.
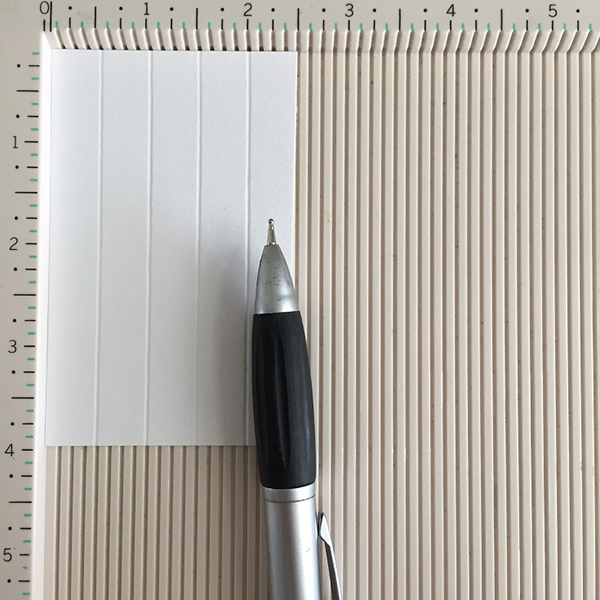
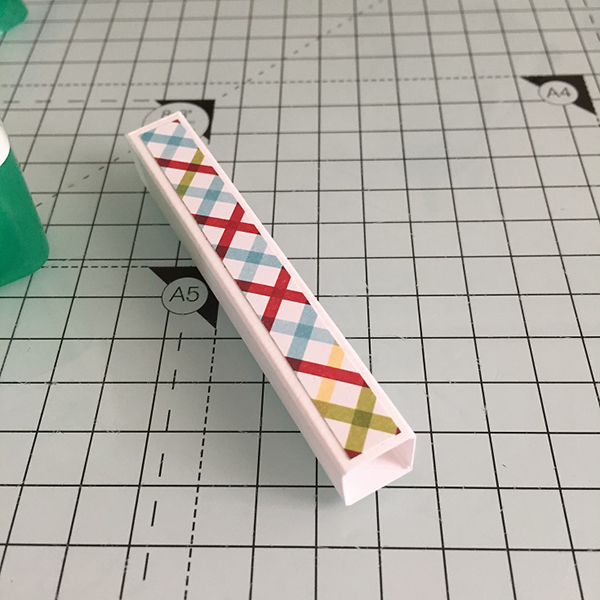
Score the 4″ x 2.5″ at 0.5″, 1″, 1.5″, and 2″
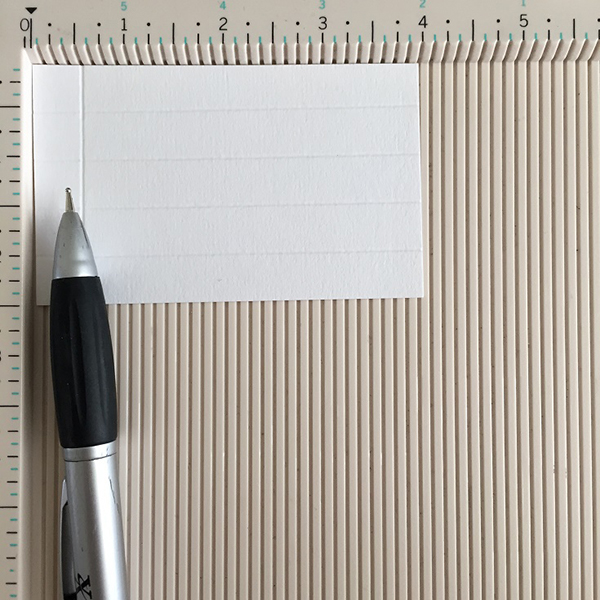
Flip 90 degrees and score at 0.5″
Cut a small wedge from the sends of the last 0.5″ section and cut the bottom section as shown.

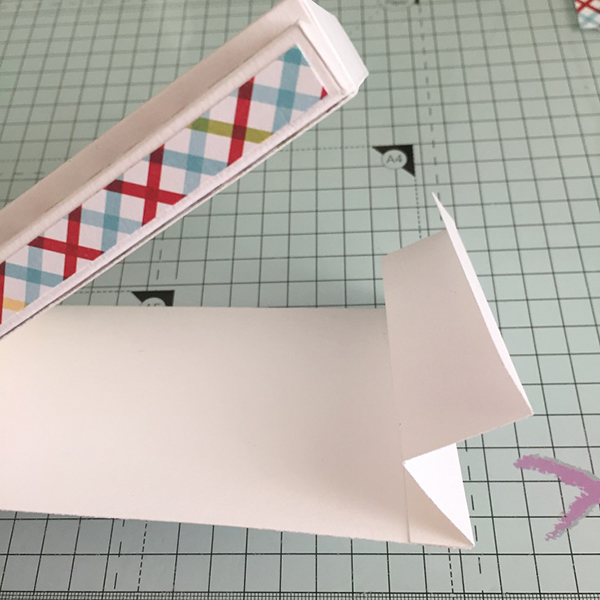
Apply the 2 pieces of patterned to front and left sections of the pen holder. The right side and back will be adhered to other pieces so they won’t be seen – no need to put patterned paper on those sides.
Apply adhesive to the end with the tapered edges, and make a ‘tube’. Fold in the 2 tabs at the bottom and adhere the top one to the underneath one.
Adhere the pen holder to the base, beside the notebook pocket.
Score the 4″ x 3″ piece of card at 0.5″, 1.5″ and 2.5″.
Fold mountain valley, ensuring the 1.5″ score line is mountain.
Turn it over and apply adhesive to one end.
Adhere it to the inside back of the base, lining it up with the bottom edge.
To give the base more stability, adhere the 5 3/8″ x 3 7/8″ piece of white card on the inside back.
Apply adhesive to the second side of the bottom, and adhere it to the inside front, lining up the edges.
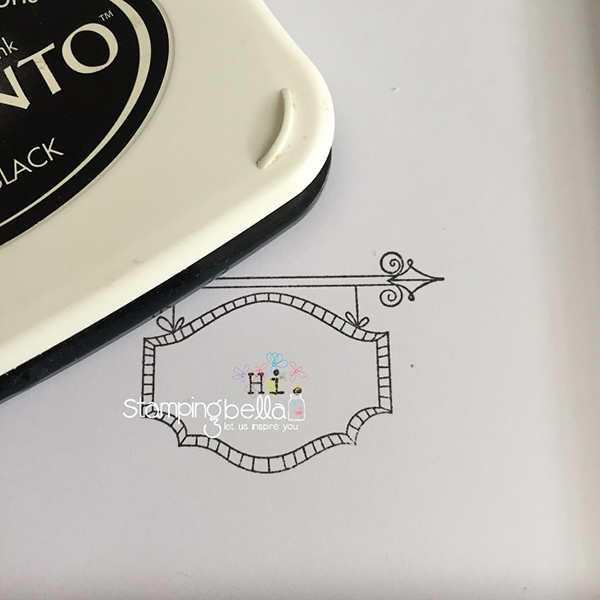
Stamp Penelope onto some white card

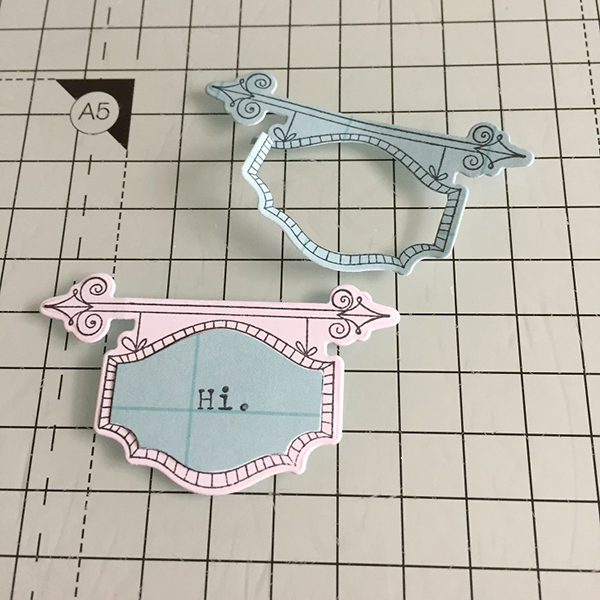
Stamp the Sign Base onto some white card and stamp the “Hi” sentiment from Penelope has a Pencil into the middle of the sign (I later changed this to add patterned paper to the centre of the sign)
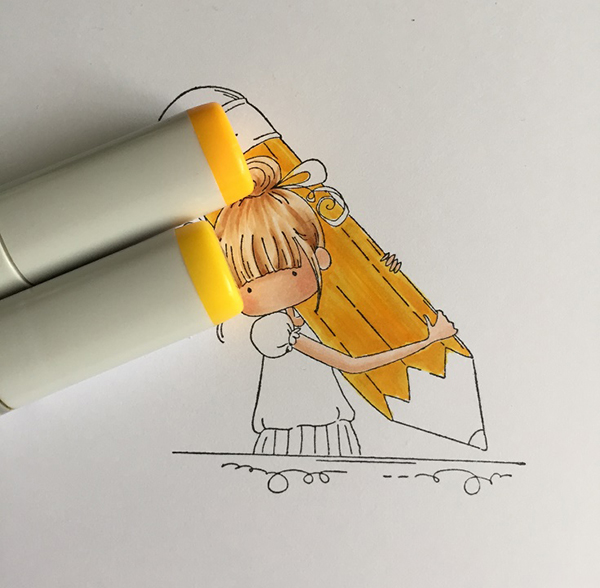
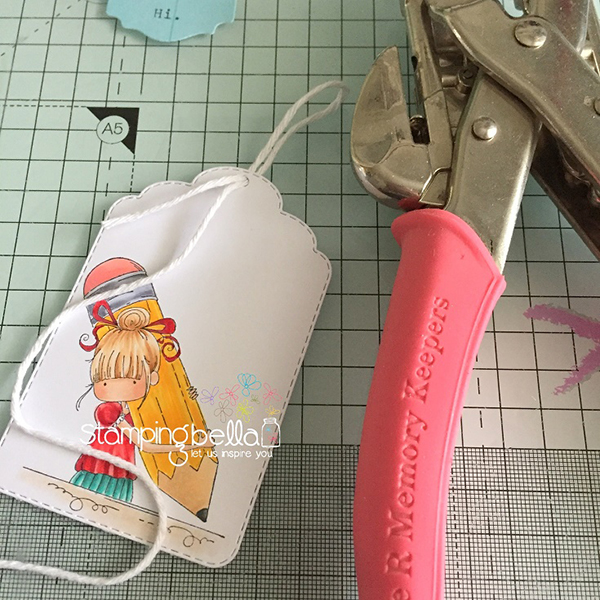
Colour Penelope using your desired medium and cut out using a tag die (or a shape of your preference)
Punch a hole in the top of the tag, and thead some white twine through.
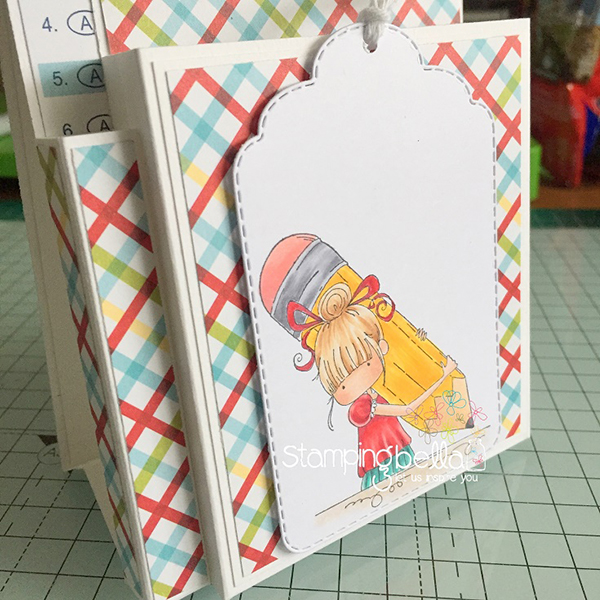
Using 3D foam, adhere the tag to the front of the notebook pocket.
Stamp the Sign base onto some patterned paper and cut out the centre piece, as shown.
Adhere to the centre of the white base sign you stamped previously.
Adhere the sign to the tag, using 3D foam.

Pop in your notebook and pen 🙂
You can also find a YouTube tutorial for a similar project over on YouTube courtesy of our SandyBooneabella HERE!
Over To You!
If you try out the techniques shown in any of the posts with your Stamping Bella stamps, be sure to share! We would love to see the results and hear how you feel about them. Show off your creations in the comments below and even better, share your own favourite tips with us. Let’s talk stamping!
If you are posting your images online, we would love to see them on Instagram and all the platforms mentioned above. To make it easier for us to find you just use #stampingbella as a hashtag. Even better tag @stampingbella . We love it when you connect, so don’t be shy!
If you’re on Facebook join us in our private chat group Stamping Bella Sistahood to share your creations there and chat all things Stamping Bella related!
Until next time, HAPPY STAMPING!
MWAH
Elaineabella
Wow! How much fun! Can’t wait to try for my twin grandsons! Thanks for sharing such complete fun ideas!
This is so cute! Thanks so much for the detailed instructions!
Very clever yall
So cute. Would make a great gift idea.
That is super adorable box. I love to try it and make it as a teacher gift. Thank you so much for the tutorial.
So sweet. Love the coloring!
This is really cute. That looks like the color of a real pencil. Thanks for showing it to us.
This is awesome! Thanks for so much for sharing! Bookmarked for future use! 🙂