I kept the background really simple for this one, so the focus would remain on the adorable Bundle Girl and the sentiment. It’s such an easy background to get started with, so if you’re nervous about adding backgrounds to your images, this is a great way to start. Watch the process in my video below.
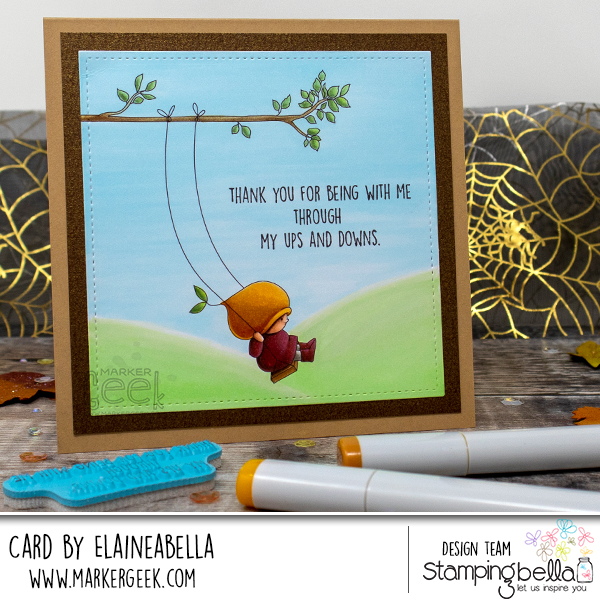
Stamps Used: Bundle Girl on a Swing (incl sentiment)
Watch me colour this stamp in the video below. If you enjoy watching please do like the video and subscribe over on my YouTube channel.
MWAH!
Elaineabella
So sorry for the missed post yesterday.. it’s been CUHRAZY around here! Hope you all had a great week 🙂
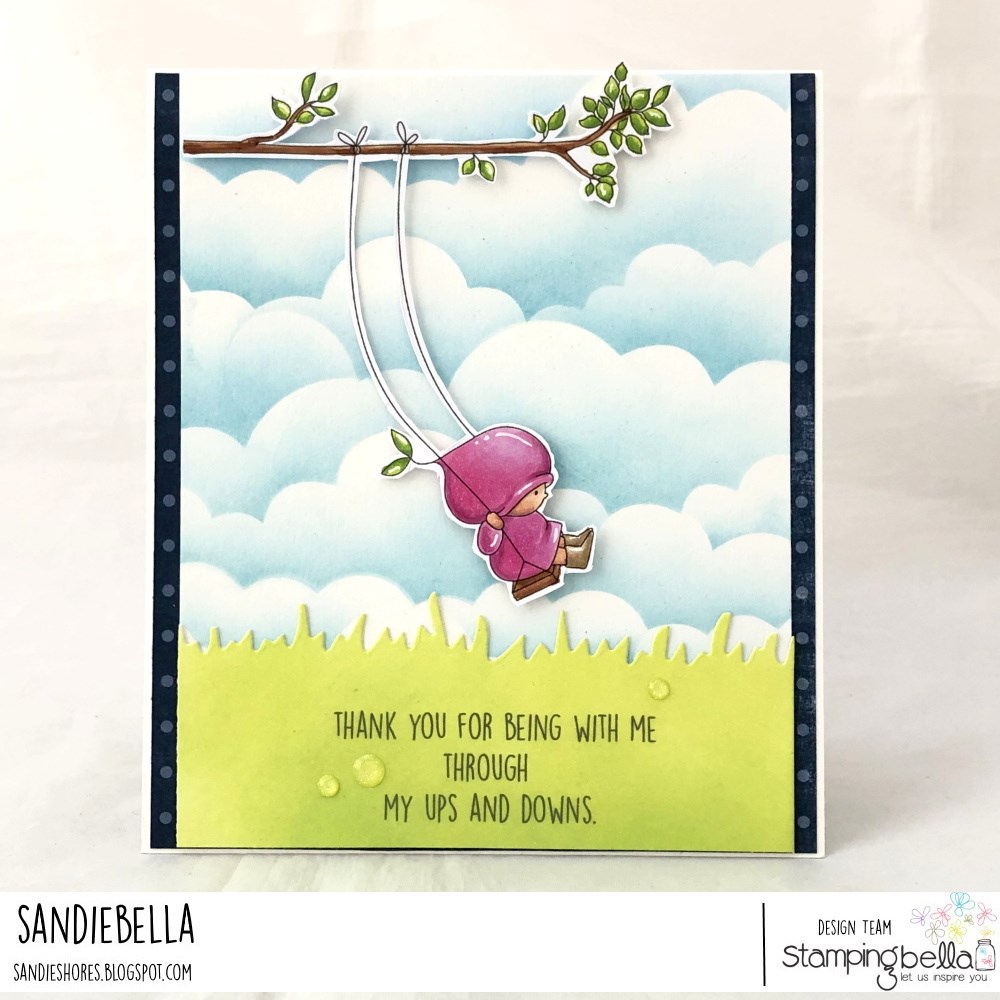
Love this card by our sandiebella using our new BUNDLE GIRL ON A SWING

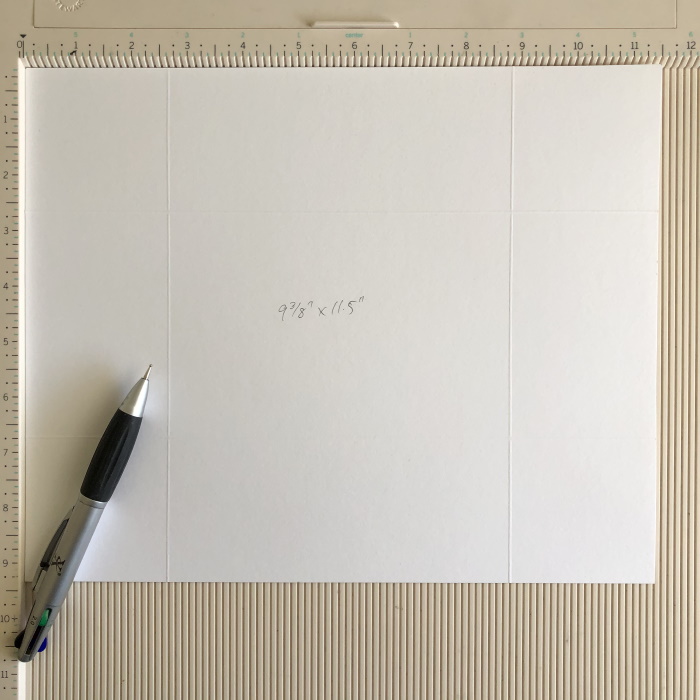
Score the 9-3/8″ x 11.5″ on the 11″ side at 2-5/8″ x 8-7/8″, and on the 9-3/8″ side at 2-5/8″ and 6.75″
Score all three 6.5″ x 8″ pieces at 2″ on all four sides.

Cut on the 8″ side on each of the score lines up to the intersecting line. Taper the edges of all 4 corner sections. Fold and burnish all the score lines.

Apply adhesive to the outside of each of the four corners and adhere to the inside of the longer side panels to create a box.


For each box cut two pieces of paper measuring 1-7/8″ x 3-7/8″ and two pieces measuring 1-7/8″ x 2-3/8″. Adhere to the sides of the boxes.

To make the box lid: take the 6.25″ x 8.25″ piece of card and cut on the long side up to the intersecting score line. Taper the edges of the four outer sections to make tabs.

Adhere the paper layers to the card layers and then adhere them to the top and sides of the lid.

Apply adhesive to the outside of the corner tabs and adhere them to the inside of the longer side panels.

Take the 9-3/8″ x 11.5″ piece of card and cut on the score lines to remove the four corners. Fold and burnish the score lines.


Once all the layers are stuck down, adhere the boxes as shown. Ensure each box is right up to the score line.

Set the box aside to work on the image.

Stamp Quinn onto white card and colour using your preferred medium.

Fussy cut the outline using a precision scissors.

Assemble a panel for the front of the box and adhere down using 3D foam tape/dots.


Stamp the sentiment and cut out using a scalloped die.

Embellish as desired.

Cut three pieces of acetate measuring 6″ x 4.5″ and score on all four sides at 1″

Cut on the score lines to remove the four corners. Cut a slight wedge from each side of the four outer tabs. Fold the score lines gently.

Push the acetate lid into the box – it will be a snug fit so that it stays in place.

Decorate the outer edges of the boxes.

Share your personal favourite Stamping Bella creations with us. We LOVE to see what you’ve been creating with Stamping Bella stamps. Share a link to your latest Stamping Bella card in the comments below, or an old favourite you made a while ago. Tell us what your favourite stamps are. Are there any additions you would like to see to the range? Let us know!
Another way to connect is by joining us in the Stamping Bella Sistahood Facebook Group and share your pictures.
If you are posting your images online, we would love to see them on Instagram and all the platforms mentioned above. To make it easier for us to find you just use #stampingbella as a hashtag. Even better tag me @markergeek and Emily @stampingbella . We love it when you connect, so don’t be shy!
Until next time, HAPPY STAMPING!
MWAH
Elaineabella
Gorgeous isn’t she? Perfectly wrapped up for a beautiful autumn day, enjoying all those rich autumn colours. I couldn’t resist giving her a tree to stand under.
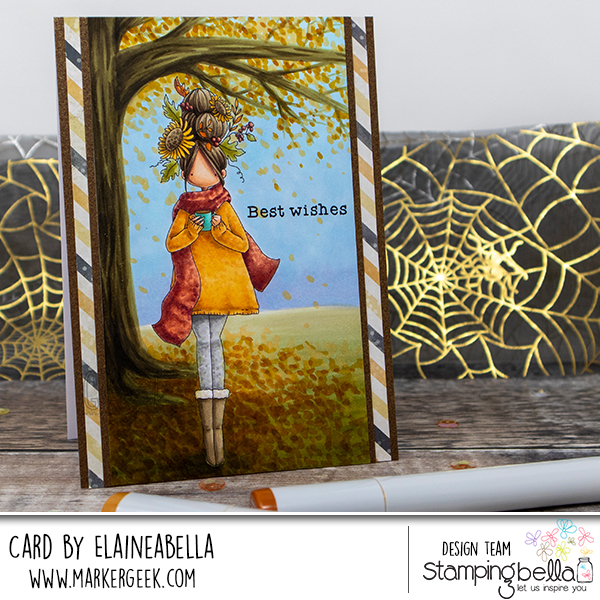
Stamps Used: Curvy Girl loves Autumn, Celebrate & Congratulate sentiment set
Watch me colour this stamp in the video below. If you enjoy watching please do like the video and subscribe over on my YouTube channel.
Stay colourful and cozy!
Elaineabella
A final Halloween themed Spotlight Tuesday this week, before we start to turn our thoughts to all things Christmas!
Today I’m throwing the spotlight on ODDBALL GHOST and wishing you a spooktacular Halloween!
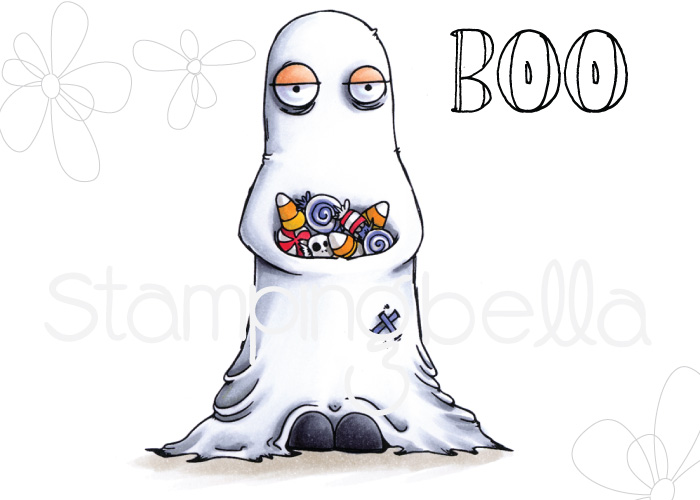
Watch me colour our weary ghostie in the video below. If you enjoy watching please do like the video and subscribe over on my YouTube channel.
Now let’s take a look at some of the amazing creations from the Babes!