For this week’s Stamp It Saturday post I thought I would share a few tips to help you get creating fun scenes with the Little Bits and their coordinating dies.
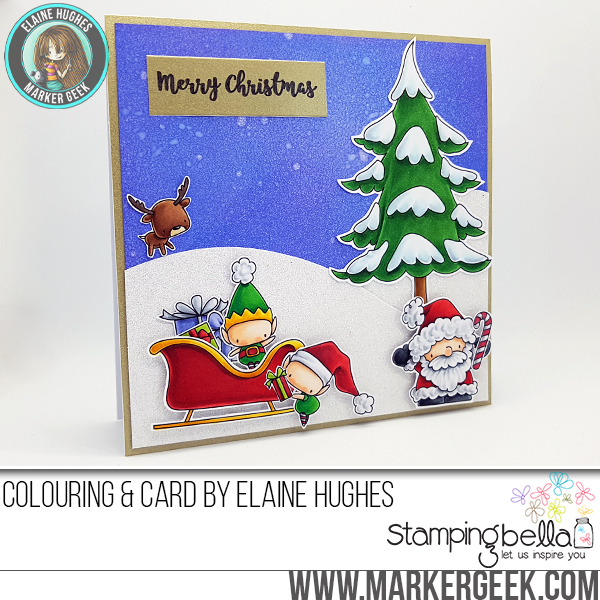
Here are a couple of cards I created for the Holiday 2017 release, featuring some of the new Little Bits stamps and one of the backdrops. On both cards I used the die cut images to assemble cute scenes.

Stamp & Die Sets Used: Little Bits Winter Tree & Deer Ball, Little Bits Set of Elves, Little Bits Santa’s Gifts, Holiday Sentiment Set
Stamp & Die Sets Used: Winter Backdrop, Little Bits Sledding, Little Bits Snowman Set, Holiday Sentiment Set
This approach is a lot simpler to replicate than masking and stamping, as you could easily stamp a number of each element, colour them in batches, die cut and then assemble in the same way.
Using Cut it Out Dies – tips for using the coordinating cut it out die sets to get great results.
If you try out the techniques shown in any of the posts with your Stamping Bella stamps, be sure to share! We would love to see the results and hear how you feel about them. Show off your creations in the comments below and even better, share your own favourite tips with us. Let’s talk stamping!
If you are posting your images online, we would love to see them on Instagram and all the platforms mentioned above. To make it easier for us to find you just use #markergeekmonday and/or #stampingbella as a hashtag. Even better tag me @markergeek and @stampingbella . We love it when you connect, so don’t be shy!
If you’re on Facebook join us in our private chat group Stamping Bella Sistahood to share your creations there and chat all things Stamping Bella related!
Until next time, HAPPY STAMPING!
MWAH
Elaineabella
Comments are closed.
I am so wishing that die cutter that someone was supposed to give me was at my house right now that I look at these 2 cards. These cards are so great! Thanks for letting us see what we can do with these little cuties!
Thanks so much for these very valuable tips.
Thanks for sharing!