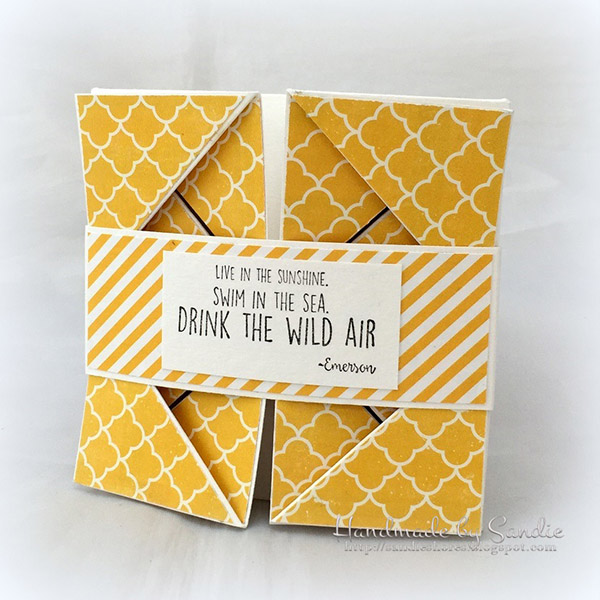
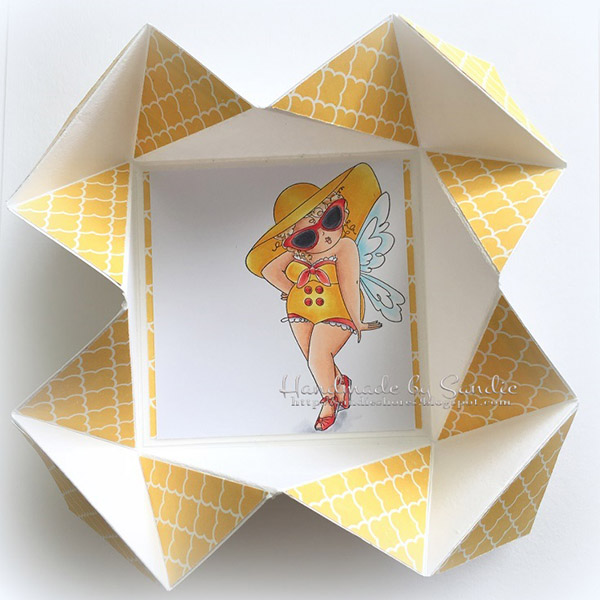
We’ve got another awesome DT Thursday project from Sandiebella for you today! Enjoy!


Taking a pencil and ruler, find the centre and mark with an X
Fold each of the outer corners towards the centre, using the pencil mark as a guide. Crease well with a bone folder.
Pinch in the corners. The folds meet at the center of each side As the fold will go against the direction they were originally folded in, make sure they were creased well.
Repeat on all four sides, creasing well as you fold. Gently push in each of the four sides of the square as shown. You will end up with a smaller square that looks like it’s made of four squares.
Next, you need to open the center. The four corners of the 8 inch square are now all meeting in the center. Take each inside corner and fold it back to the outside corner as shown.
This is how it should look at this point.
Opened up
Cut 6 squares of patterned paper measuring 2 7/8″ x 2 7/8″ and cut diagonally. You will also need one piece of white card measuring 3 7/8″ x 3 7/8″ and one piece of patterned paper measuring 3.75″ x 3.75″, for the inside centre panel.
Adhere all the pieces of paper in place.
When closed, none of the white card shows. You can also arrange the patterned paper so that the card shows in the centre when closed. An example of that is shown at the bottom of this post.
Cut a piece of white card measuring 3 5/8″ wide. Stamp your image onto the card, aligning it to the right – this will leave space to write a personal note. Colour with your desired medium, and trim the length to a maximum of 3.75″
Adhere the image onto the centre panel.
To make a belly band, cut a piece of white card measuring 11″ x 1.5″ and score at 3.5″, 3 5/8″, 7.75″ and 7 7/8″
Fold on the scorelines and adhere the ends
Cut 2 pieces of coordinating patterned paper measuring 4″ x 1 3/8″, for each side of the belly band.
Stamp the sentiment onto some white cardstock, and cut to your desired size.
Adhere the sentiment to the front of the belly band. Slide the belly band over the card, into the centre to hold all 4 sections closed.
To arrange the patterned paper so that the card shows in the centre, you need to cut two pieces of patterned paper at 2 7/8″ square, and cut them diagonally, for each corner. For the triangles on each side of the centre panel you will need one piece of patterned paper measuring 3 7/8″ and cut it on both diagonals. The centre panel remains the same – card measuring 3 7/8″ square and patterned paper measuring 3.75″ square.
You can also use ribbon to tie the card, instead of using a belly band.
If you try out the techniques shown in any of the posts with your Stamping Bella stamps, be sure to share! We would love to see the results and hear how you feel about them. Show off your creations in the comments below and even better, share your own favourite tips with us. Let’s talk stamping!
If you are posting your images online, we would love to see them on Instagram and all the platforms mentioned above. To make it easier for us to find you just use #stampingbella as a hashtag. Even better tag @stampingbella . We love it when you connect, so don’t be shy!
If you’re on Facebook join us in our private chat group Stamping Bella Sistahood to share your creations there and chat all things Stamping Bella related!
Until next time, HAPPY STAMPING!
MWAH
Elaineabella
Comments are closed.
Just gorgeous, love it.
Jane the Craft Bucket x
Oh this is awesome! I love them both! 🙂
Oh Sandie, you are uber talented!! I want to run to my craft table and make this right now!
Hi Sandie, I am making this awesome card right now but want to check a measurement with you! I cut the design paper squares at 2 7/8″ and cut them in half diagonally but they are too big to layer on the white card. Should the squares be 1 7/8″ to start? I’m following along with the yellow Edna card. Thanks!!