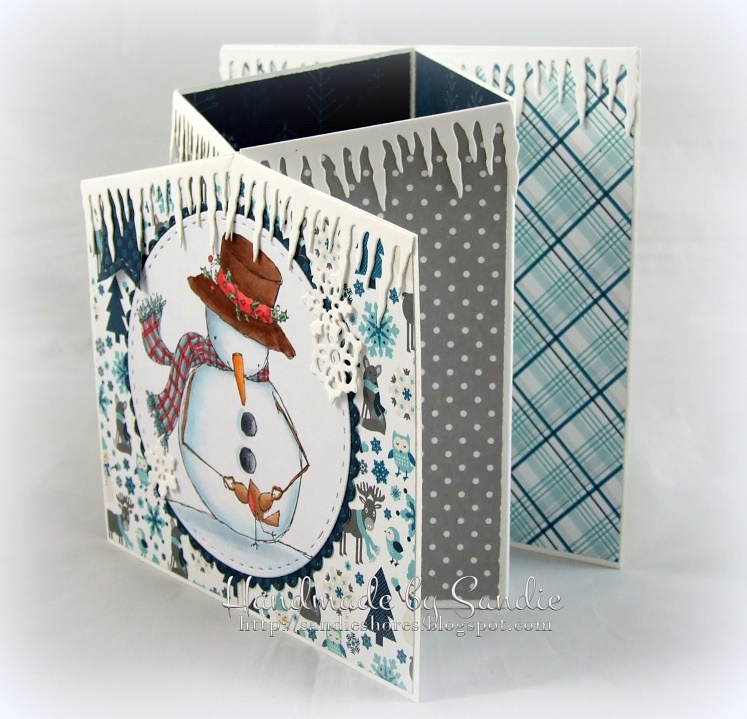
It’s Thursday, again! Good job we have another fun card making project from Sandiebella to help distract us from the weeks whizzing by. Click on through for Sandiebella’s fab step by step tutorial.

Score the 11″x 5.75″, on the 11″ side, at 2.75″, 5.5″ and 8.25″
Using a ruler, measure 1.5″ down on one end of the 5.75″ side and mark with a pencil.
Position the card in your trimmer to that it cuts from the 2.75″ scoreline, diagonally, to the 1.5″ pencil mark. (not the best angle to get a photo)
This is how it should look. Repeat on the second piece of 11″ x 5.75″ card.
Mountain/Valley fold the pieces, ensuring the middle section is folded upwards (mountain)
Repeat for the other piece of card.
Adhere one piece of card ot the 5.5″ wide x 5.75″ tall piece of card, ensuring the fold is in the middle.
Repeat for the other side,
To make the designer paper layers, cut the paper at 2 3/8″ and position it onto the section you are cutting for. DO NOT ADHERE.
Using a pencil, mark the paper on each side, about 1/8″ down from the top of the card, to get the angle you need to cut at.
Repeat for any sections you are going to cover.
Adhere all of the paper down.
Stamp the image and colour using your preferred medium.
Cut out, using a circle die.
Cut a scalloped circle, slightly larger than the image circle.
Adhere the image to the scalloped circle.
To hold the card in place, I applied a small strip of double sided tape to the centre of the front panels. This is not compulsory, I just found it held the card closed and made positioning the image easier.
Adhere the image to the centre.
Embellish as desired. I added some snowflakes and icicles.
Hopefully I’ve inspired you to sit down and try your hands at this lovely project.
We also encourage you to share your personal favourite Stamping Bella creations with us. We LOVE to see what you’ve been creating with Stamping Bella stamps.
Another way to connect is by joining us in the Stamping Bella Sistahood Facebook Group and share your pictures.
If you are posting your images online, we would love to see them on Instagram and all the platforms mentioned above. To make it easier for us to find you just use #stampingbella as a hashtag. We love it when you connect, so don’t be shy!
Until next time, HAPPY STAMPING!
Comments are closed.
great tutorial! Love it!!
Where did you get the icicles? Is it a die or a packaged embellishment? Love the card.
Hi Sheron, this is a actually a seaweed die, but works great as icicles too 😀
Oh wow, I can’t imagine it as seaweed now that I’ve seen how good it is as icicles! Thanks.
Oh this is soo coool! I have this one bookmarked too! I’m definitely going to try this one! 🙂
What a pretty card and i like how it’s folded. Does it cost more to mail this card? It looks a little hard to make for me but I will study it and see. Maybe I can actually make one! If I do, I will make sue I let you guys see it.
Hi Gail, this card folds flat so it doesn’t cost more to mail. 🙂