


Happy Thursday! A very quick reminder before I leave you with Sandiebella and her amazing step by step for today… We’re in the final day of our Black Friday sale, so make sure you don’t forget to place those orders! SHOP HERE.
Happy shopping and happy crafting!
Elaineabella
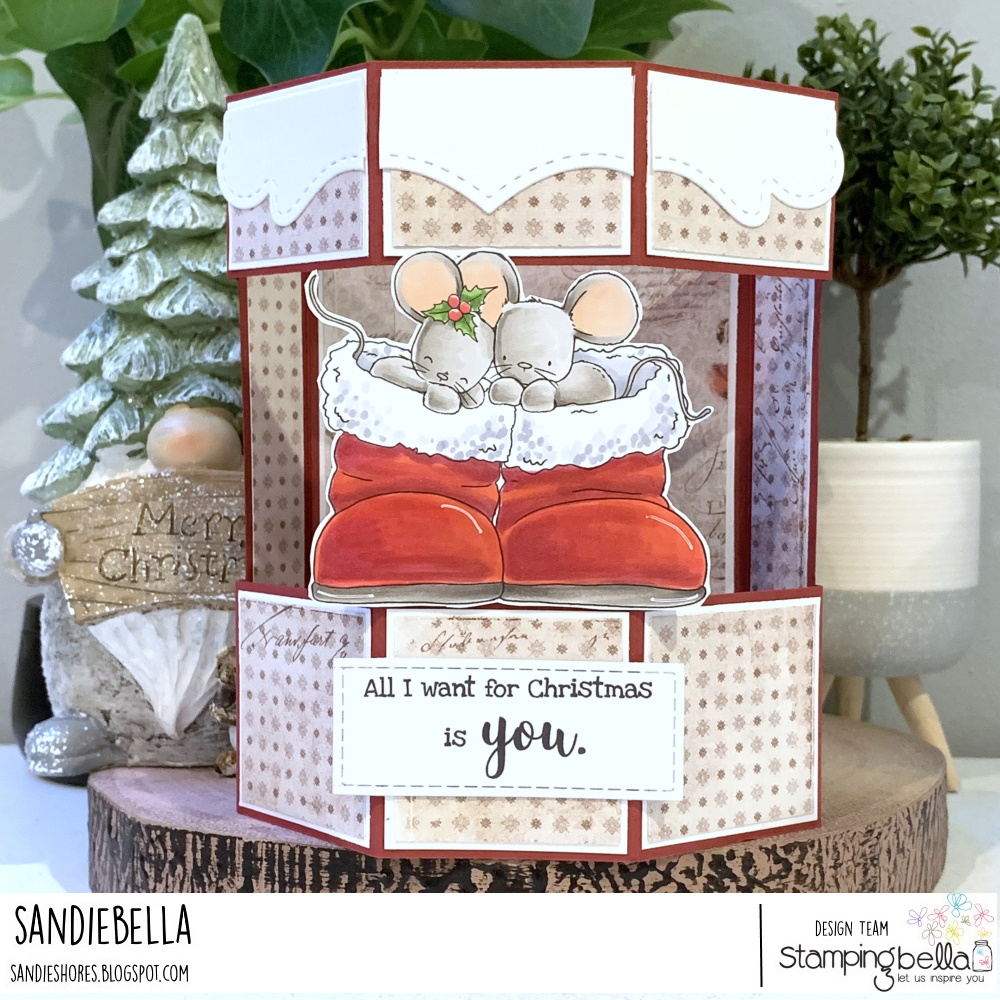
Half Hexagon Box Card
Supplies:
How to:


Fold all the score lines and crease well.

Adhere all the mats and layers onto the five inner sections of the12″ strips. There are no layers on the 2″ sections on each end.

Adhere the other piece of card to the 4″ x 6″ piece of red card. Add some paper leaving some white space for a written message.

Adhere the

Turn the 12″ x 2″ strip of card with the paper side facing down. Open up the 5.5″ x 6″ piece and, again with the paper side facing down, centre the bottom of the base between the 5″ and 9″ score lines. There will be a small gap either side.

Apply adhesive on the 1″ and 2″ sections.

Fold in the glued sections ensuring the 2″ score line is in line with the score line on the base.

Repeat on the other side.

Stand up the card base, fold back in the 7/8″

Cut two strips of the paper measuring .75″ x 5-7/8″ and adhere to the sides of the base, as shown.

Take the 1.5″ x 12″ piece and repeat the steps as for the 2″ x 12″ piece.


Adhere the 4″ x 6″ panel to the back.

Cut a piece of acetate measuring 1.75″ x 6″

Using strong double sided tape, adhere the acetate to the back of the top and bottom front panels

Add some decorative border along the top of the card.

Stamp the sentiment onto white card and cut out using a stitched rectangle die

Adhere the image to the acetate strip using foam tape, and then adhere the sentiment to the 2″ strip.

This card is adorable! So cute! LOVE IT!
Too adorable for words!
Gorgeous! I just love it!!! 🙂
WOW! Thank you for sharing this!