The world is a little bit crazy right now, but one thing can be relied upon – our Sandiebella! She’s got a fab step by step again this week, so if you’re stuck at home looking for ideas – we’ve got you!
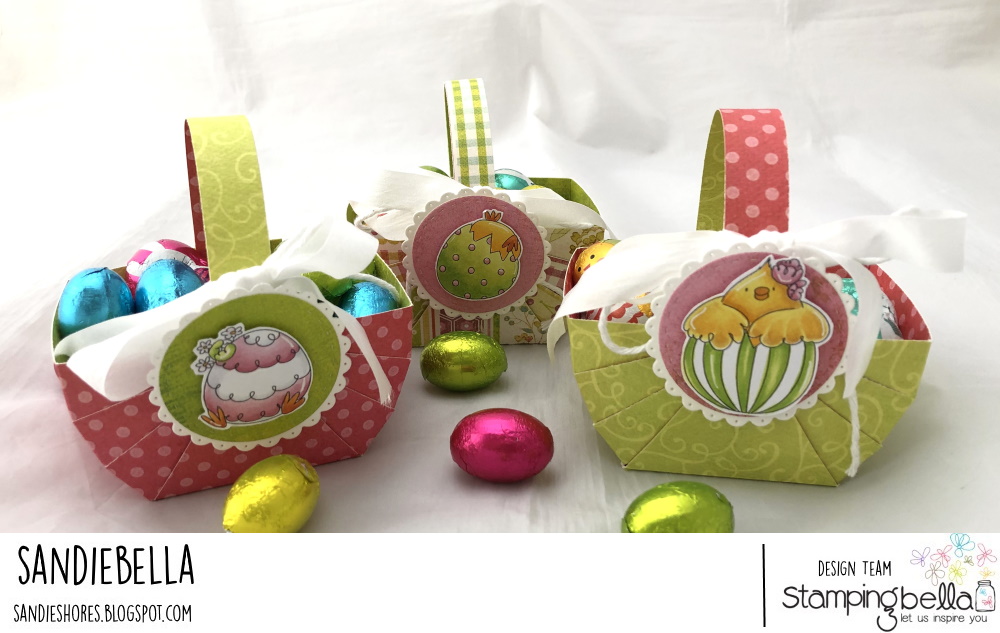
The Good Egg Chicks Easter Baskets.
Supplies:
Circle and scalloped circle Dies
Double sided tape and foam tape/dots
For each basket, cut a piece of 6″ x 6″ heavy double sided paper. Score at 1 7/8″ and 4 1/8″ on one side.
Flip 90 degrees and score at 1 7/8″ and 4 1/8″ again.
Leaving the paper in the same position, score down to the 1 7/8″ scoreline at 5/8″, 1.25″, 4.75″ and 5 3/8″. Flip the paper 180 degrees and, again, score down to the 1 7/8″ scoreline at 5/8″, 1.25″, 4.75″ and 5 3/8″
Using the embossing tool, make a little notch at the 3″ mark, both top and bottom.
Take a scissors and cut all the scorelines on each of the four corners, as shown.
Cut from the 3″ notch you made on the top and bottom, diagonally down to the 1 7/8″ scorelines, as shown
Fold all the scorelines to loosen the paper. To make the basket shape, take the outside strips first and fold them so they meet, then take the middle strips and fold them in, then finally the inside strips.
Fold up the triangle and staple to secure them. Alternatively, you can use a dab of wet glue on the strips and the triangle.
Repeat on the other side.
To make the handle, cut a strip of paper 0.75″ x 7″ and run it over a bone folder to curl it.
Apply a piece of double sided tape to each end, on the side that will be facing out
Before the handle is attached, punch tow 1.5″ circles from coordinating paper. Fold them in half and crease with a bone folder.
Apply wet glue on the inside front and back of the circle and adhere over the sides of the basket, covering the staples.
Adhere the handle to the inside edges of the basket.
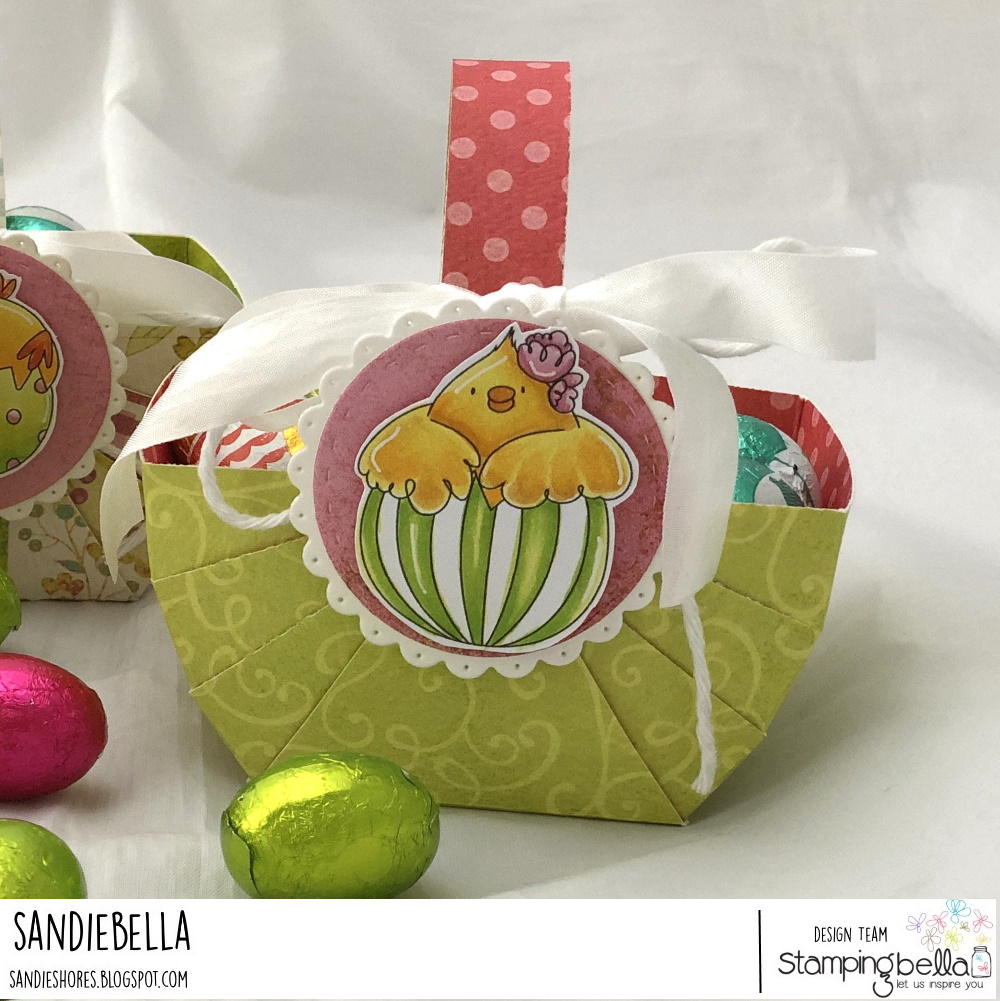
For each basket, cut a 2″ scalloped circle from white card and a 1.75″ stitched circle from paper.
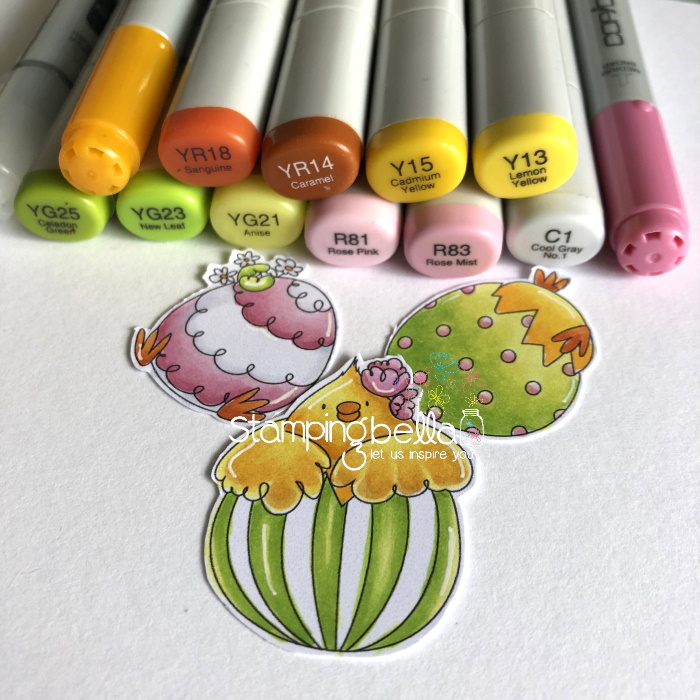
Adhere the paper to the scalloped circle and then layer on the Chicks using foam tape/dots.
Adhere the circle to the side of the basket, leaving about 1/3 of it above the basket edge.
Tie some white ribbon in a bow around the handle and slide it down behind the scalloped circle. Fill the baskets with chocolate eggs or bunnies.
Over To You!
Share your personal favourite Stamping Bella creations with us. We LOVE to see what you’ve been creating with Stamping Bella stamps. Share a link to your latest Stamping Bella card in the comments below, or an old favourite you made a while ago. Tell us what your favourite stamps are. Are there any additions you would like to see to the range? Let us know!
Another way to connect is by joining us in the Stamping Bella Sistahood Facebook Group and share your pictures.
If you are posting your images online, we would love to see them on Instagram and all the platforms mentioned above. To make it easier for us to find you just use #stampingbella as a hashtag. Even better tag me @markergeek and Emily @stampingbella . We love it when you connect, so don’t be shy!
Until next time, HAPPY STAMPING!
MWAH
Elaineabella


Adorable. Great instructions…So easy to follow. Thanks.