


Sandie has an absolutely gorgeous step by step today.
Swing Easel Card
Supplies:
How to:

On the inside of top of the card base, measure in from each side and mark at 1″. Draw a line from each of the 1″ marks to form a square.

Measure in 1-1/8″ from each side and draw another square inside the first one.

On the outside square, cut along the side from the 1″ pencil mark down to 2.25″, and then from 2.75″ to the end of the square. Repeat on the opposite side. Also cut on the inside square down to the same point on both sides.

On the top and bottom of the squares, cut the whole way across. At this point the only thing holding the 1/8″ piece between the squares is the 0.5″ section on each side.

Cut across the 1/8″ pieces at 2.25″ and 2.75″ mark to remove them

Score each side of the card front 1.75″, 2.25″ and 2.75″

Mountain valley fold the scorelines so that the 2.25″ is valley.

Cut a piece of patterned paper measuring 4 7/8″ x 4 7/8″. On the back of the paper, mark in 7/8″ from all four sides with a pencil and then draw lines to connect them

Cut out the centre square with a craft knife.

Flatten out the card front and adhere the square over the front. Score again on the 1.75″, 2.25″ and 2.75″ score lines and mountain valley fold again.

For the inside of the bottom, cut a piece of white card measuring 4 7/8″ x 4 7/8″ and a piece of paper measuring 4.75″ x 4.75″ and layer them on.

Fold the top of the card back over and this is how it should look. Set the card aside.

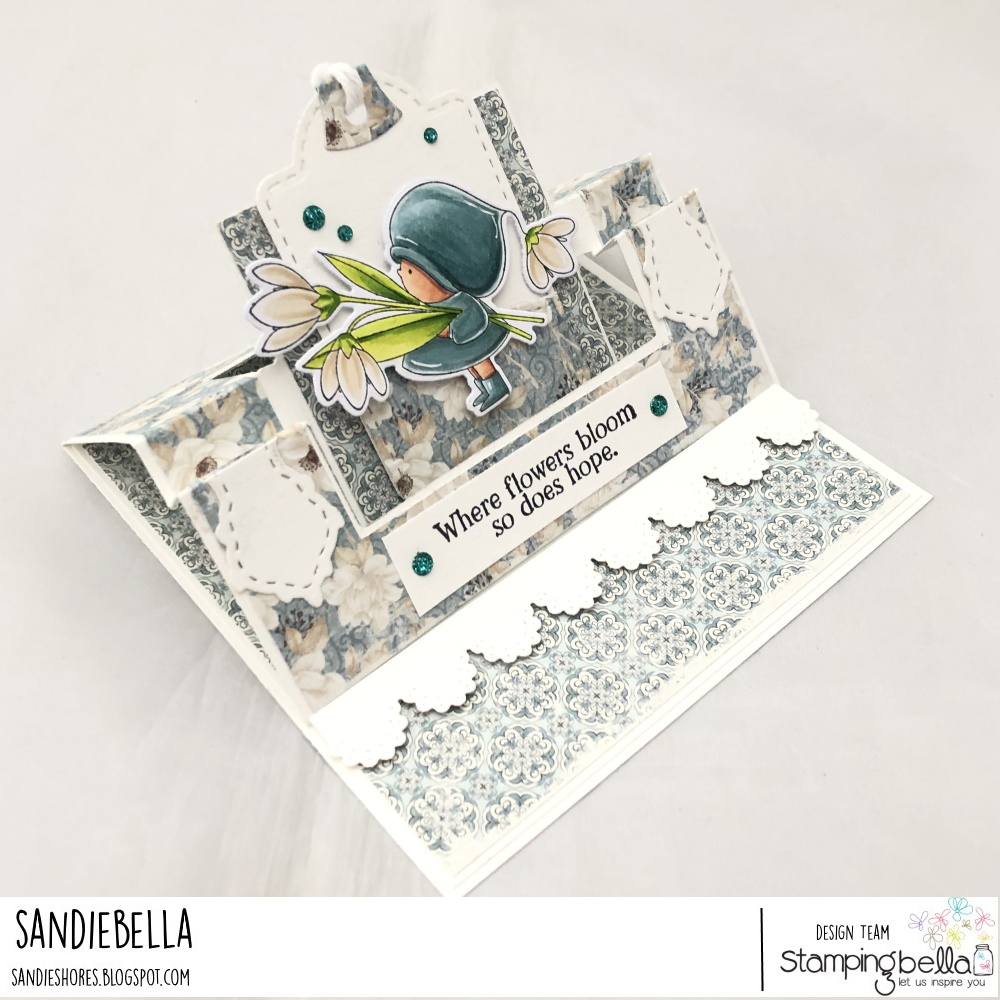
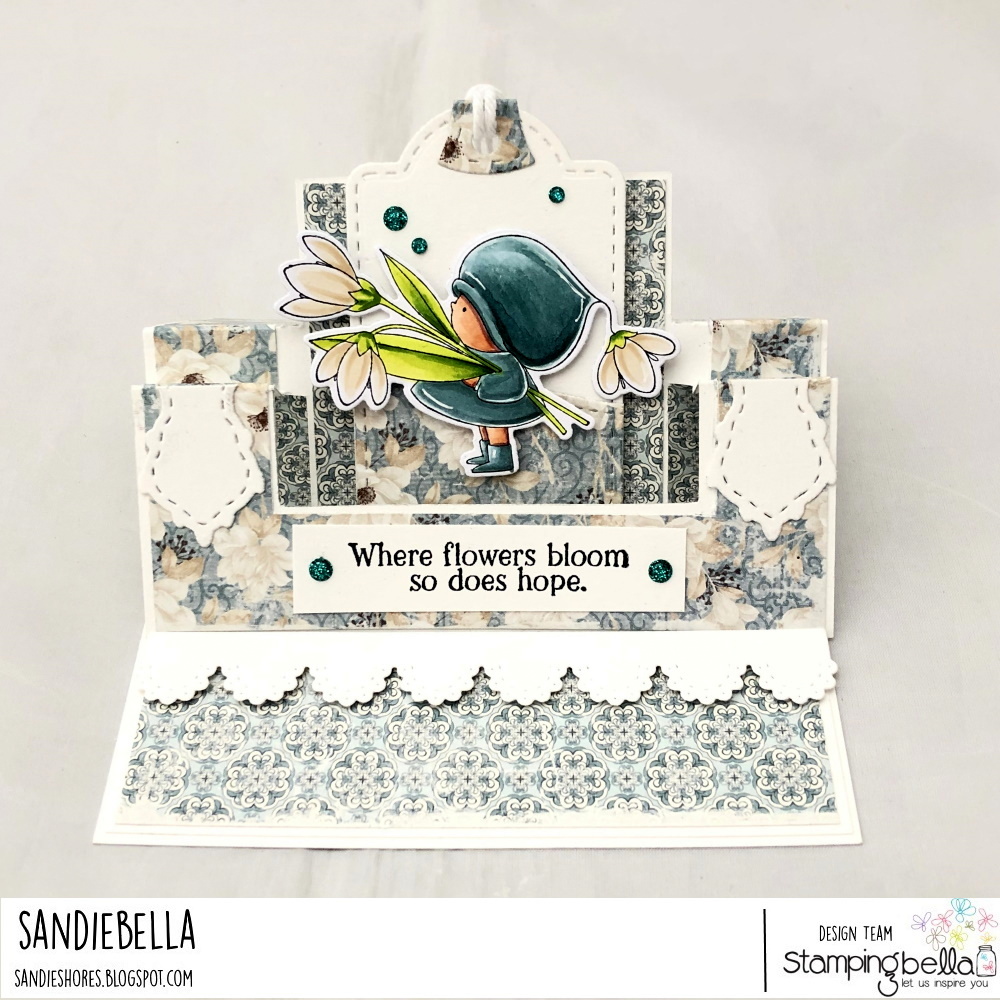
Stamp Bundle Girl with a Snowdrop onto white card and colour using your desired medium.


Cut out using the coordinating die, or fussy cut with a precision scissors.

Decorate the front of the card as desired, then adhere the Bundle Girl onto the centre panel. Cut a border the width of the card base. Using foam tape adhere the border onto the inside card base in front of the popped up front to hold it in place. Stamp the sentiment onto a piece of white card and adhere to the card front.

Over To You!
Share your personal favourite Stamping Bella creations with us. We LOVE to see what you’ve been creating with Stamping Bella stamps. Share a link to your latest Stamping Bella card in the comments below, or an old favourite you made a while ago. Tell us what your favourite stamps are. Are there any additions you would like to see to the range? Let us know!
Another way to connect is by joining us in the Stamping Bella Sistahood Facebook Group and share your pictures.
If you are posting your images online, we would love to see them on Instagram and all the platforms mentioned above. To make it easier for us to find you just use #stampingbella as a hashtag. Even better tag me @markergeek and Emily @stampingbella . We love it when you connect, so don’t be shy!
Until next time, HAPPY STAMPING!
MWAH
Elaineabella
Love this. The card style and stamp are both gorgeous.
Such a lovely card and thank for the wonderful tutorial. Greetings Marja
Thank you for sharing how to create a swing easel card!
Thank you for this excellent tutorial. Love your card, it’s adorable
love it!
Thanks!
Do you know what I like about this card? It’s a very cool card on it’s own but if you don’t have this stamp, you could use any stamp where you put Bundle Girl. I am going to pass this on for sure!