


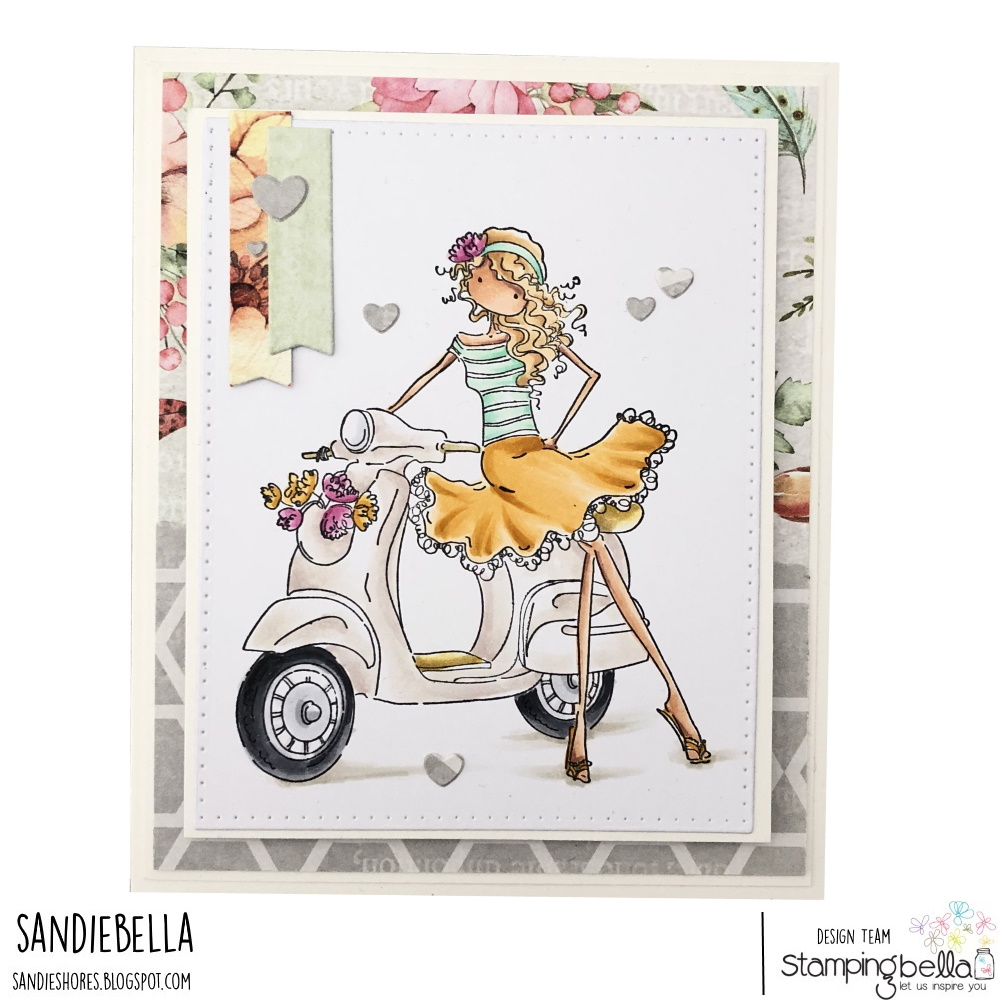
Sandie has another fab tutorial for us today, showing how to create this gorgeously fresh and fun Double Concertina Card!
Double Concertina Card

Supplies:
How to:
 Score the 10.5″ x 6″ piece at 5″ and 10″

Score the 10″ x 6″ piece at 5″

Score the 11.75″ x 4″ piece at 0.5″, 2″, 5 7/8″, 9.75″ and 11.25″

Fold the outer 2 sections mountain position and fold the 5 7/8″ score line in the valley position.

Fold the other 2 pieces on the 5″ scoreline. Both pieces will be connected by the 0.5″ section later.

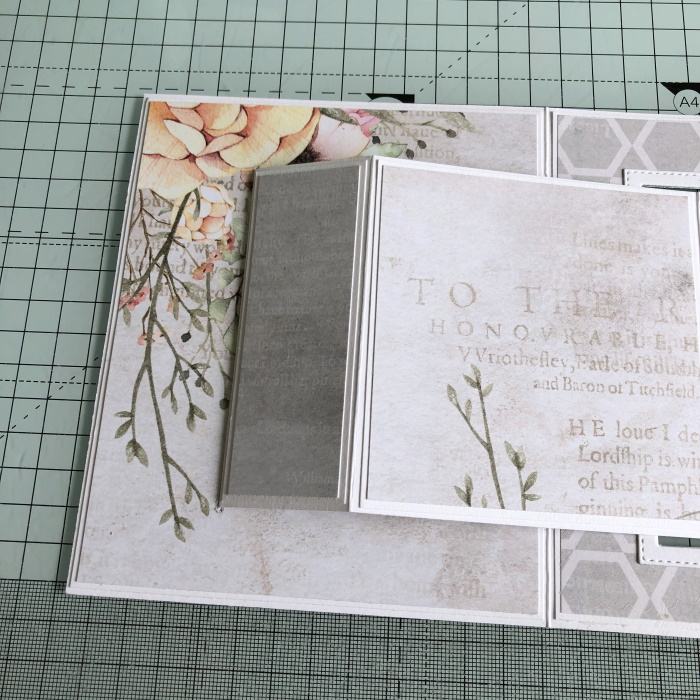
For the layers cut:


Adhere the middle panel card and paper layers together. Don’t adhere them to the card base.

Place the rectangle die in the centre of the panel and run through a die cutting machine.


Lay on top of the other panel and use a pencil to mark the position of the rectangle and cut out using the die.

Adhere the panels down. Position the die into the rectangle cut out and cut run through the die cutting machine to remove the centre of the card base.

Apply double sided tape to the 0.5″ strip and adhere both pieces of the card base together.


To make a frame for the ‘windows’, use the same die you used to cut out the centre and a slightly bigger die. Secure them on the card using washi tape and cut.


Adhere the frames around the windows

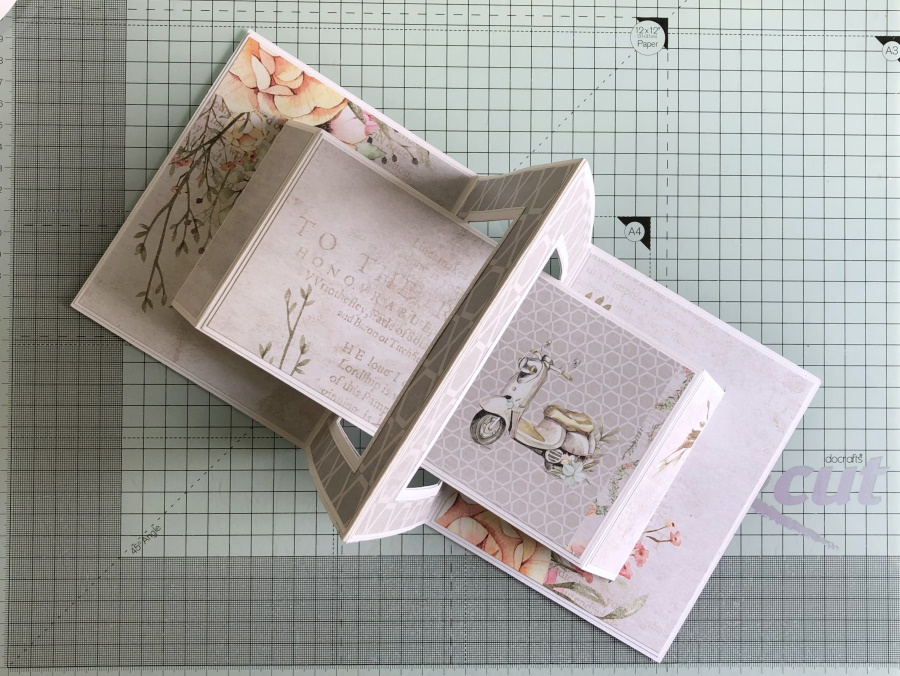
Adhere all the layers of card and paper to the 11.5″ piece of card.

To make it easier to feed through the slit in the paper, cut a small wedge from each end.

Adhere the card layer to the first inside panel.

Position the paper over it but do not stick it down. Fold back the 2 smaller sections on the 11.5″ piece and line the edge of the third section to the edge of the card layer – positioning it across the card so that there is an equal gap on the top and bottom of the window.

Carefully flip over the mechanism without moving the paper layer or the position of the mechanism itself. With a pencil, mark at the top and bottom of the 0.5″ scoreline.

Cut an opening in the paper from one pencil mark to the other, then move out approx 1/16th of an inch and make another cut – remove the piece. Repeat this with the paper layer for the other end of the card before you stick anything down.

Push the 0.5″ section through the paper, turn over and apply double sided tape to the under side.

Remove the tape backing and fold down.

Apply wet glue to the back of the paper layer and adhere down.
Slide the mechanism though the mountain folded centre panels.

Again, push the 0.5″ piece though the paper and secure at the back before adhering the paper down.

This is how the card should look.
Stamp Vienna onto white card and colour using your desired medium.


Assemble the front panel and decorate as desired.

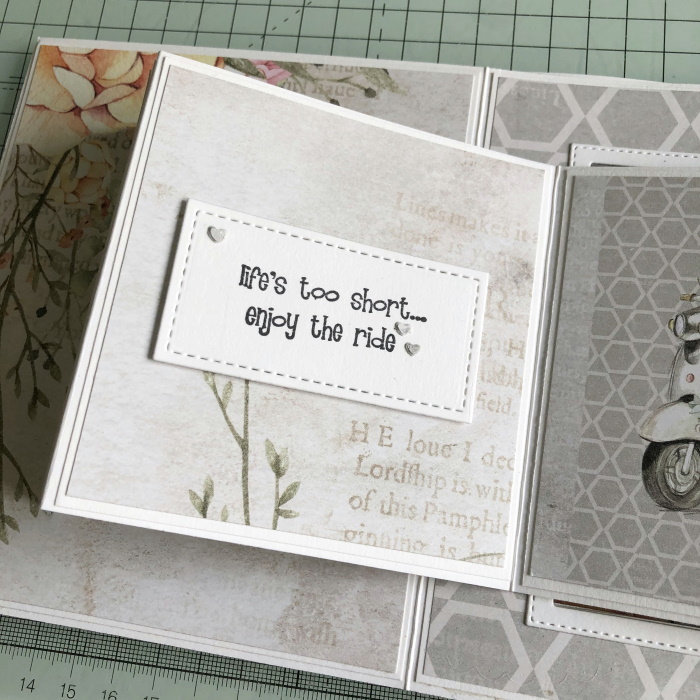
Stamp the setiment onto white card and cut out using a stitched rectangle die.

Adhere to the inside panel and embellish
Adhere the layers to the back of the card.

Adhere the card front down onto the card base.

Over To You!
Share your personal favourite Stamping Bella creations with us. We LOVE to see what you’ve been creating with Stamping Bella stamps. Share a link to your latest Stamping Bella card in the comments below, or an old favourite you made a while ago. Tell us what your favourite stamps are. Are there any additions you would like to see to the range? Let us know!
Another way to connect is by joining us in the Stamping Bella Sistahood Facebook Group and share your pictures.
If you are posting your images online, we would love to see them on Instagram and all the platforms mentioned above. To make it easier for us to find you just use #stampingbella as a hashtag. Even better tag me @markergeek and Emily @stampingbella . We love it when you connect, so don’t be shy!
Until next time, HAPPY STAMPING!
MWAH
Elaineabella
Your card is simply Gorgeous!
Love, love, love Thursdays!
Thanks for the inspiration!
Tout simplement magic.
Merci pour le tuto
Amitiés from Switzerland