


This week’s step by step from our fantastic Sandiebella is the first of two in a little series. This week Sandie is showing us how to create the box, next week she will share how to create the little album to go inside!
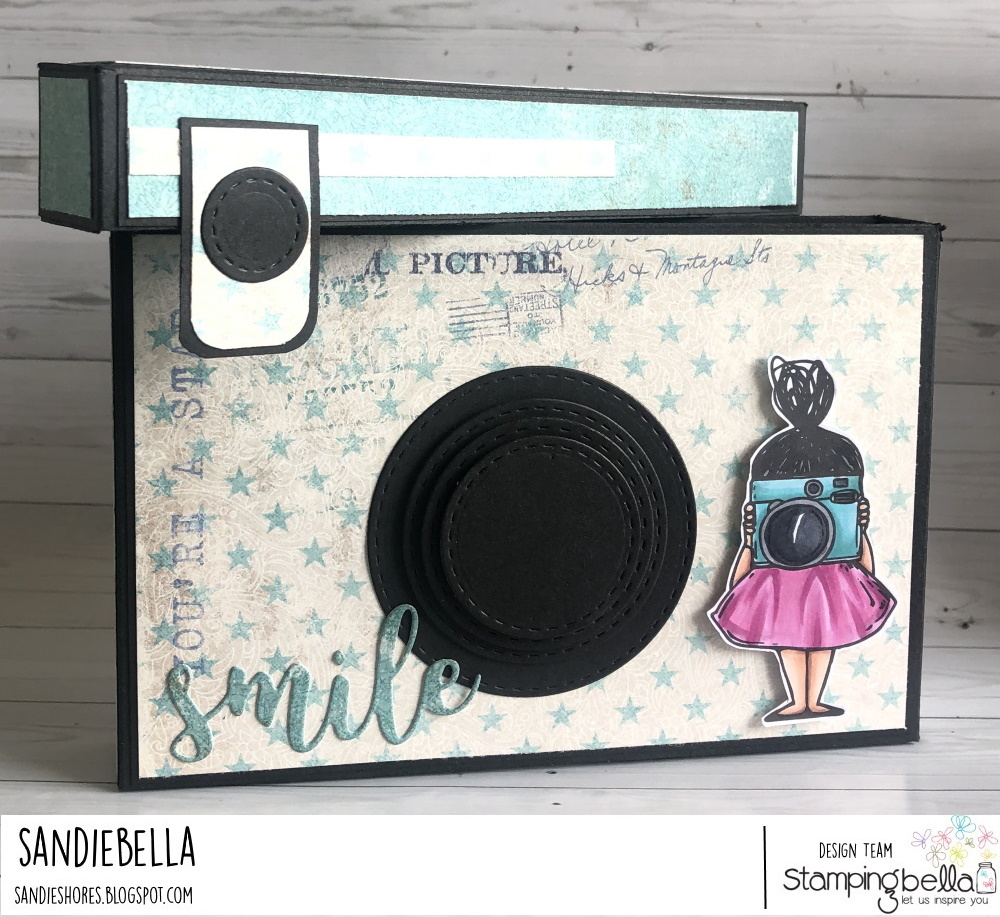
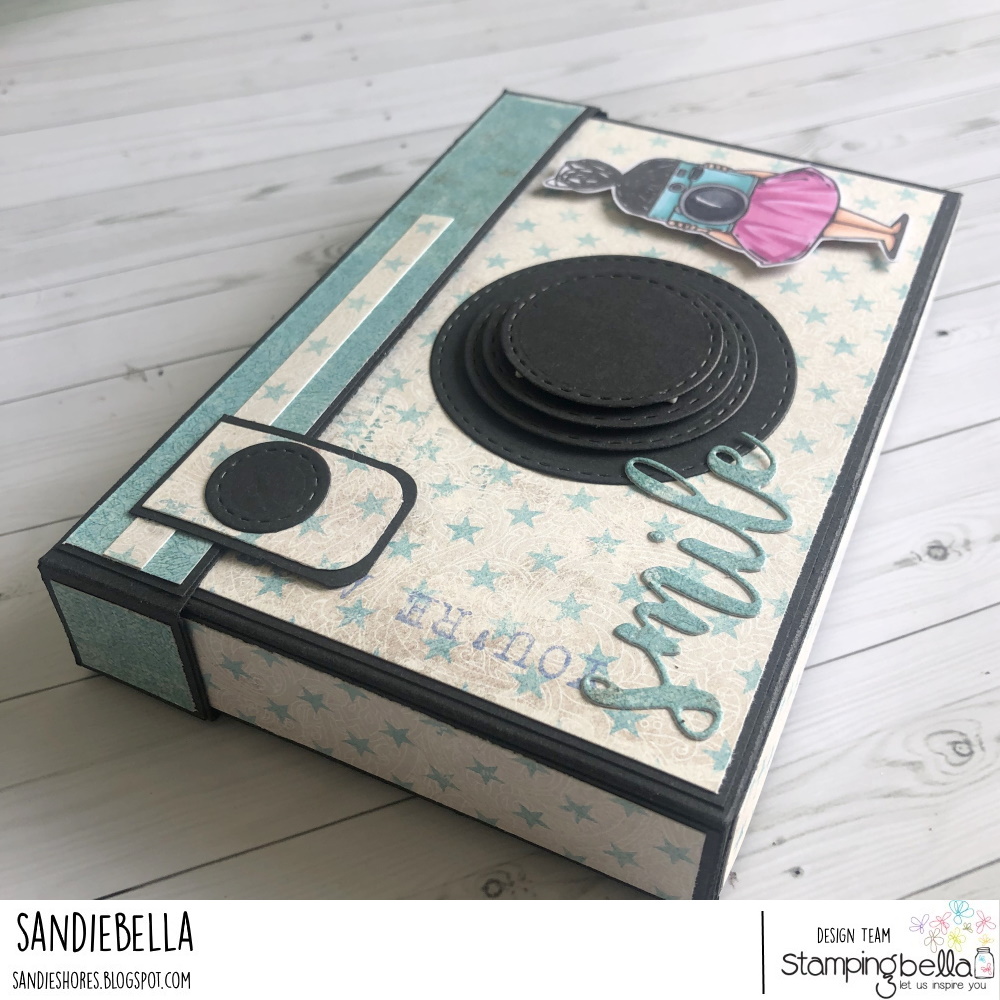
Camera Photo Album Box
Supplies:
How to:

Score the 3″ x 8-1/4″ piece of black card at 1″ and 2″ on the short side, and at 1″ and 7-1/4″ on the long side.

Fold and crease all the scorelines.

Cut the 4-5/8″ and 5-5/8″ score lines up to the intersecting line on both sides of the box base. On the lid, cut on the 3″ side on the 1″ and 2″ scorelines up to the intersecting scoreline, on both ends.

Taper the edges of the 1″ tabs on both pieces.

On the 8-1/8″ side of the large piece, cut the corner 0.5″ section, up to the intersecting scoreline on one end.

On the opposite end, remove the corner 0.5″ pieces. The side with the corners removed will be the back of the box.

For the lid, taper the centre tabs and cut them down about 1/8″


Apply adhesive to the outside of the tabs and fold one side of the lid inwards, adhering the ends to the centre tabs.


Apply adhesive to the inside ends of the opposite side and fold inwards to create the lid.

To create the layering panels, cut:

Adhere the paper to the corresponding black card piece.

Adhere the panels to the front and back of the box, being mindful of any patterns that need to go in a certain direction. Adhere the 4″ x 7/8″ side panels on the 1″ sections beside the front panel. Adhere the 6″x 7/8″ panel along the centre 1″ section.

On the lid, adhere the three 6-1/8″ panels to the front, back and top. Cut two 7/8″ squares for the ends.

Add a decorative strip on the front of lid (optional)

Apply adhesive to the outside of the 1″ tabs on the box base. Fold in the back of the box over them, and adhere the to the tabs.


Apply adhesive to the inside of the 1″ sections on the box front, fold up and adhere over the back panels.


Tape in the edges of all the ends of the 0.5″ sections.

Apply adhesive to the inside of the 0.5″ sections and fold inwards. Burnish well with a bone folder.


To create the lens for the front of the camera, cut four stitched circles, in various sizes.


Put the lid on the box and then adhere the lens to the front of the box

Cut a piece of card measuring 1.5″ x 1″ and a piece of paper measuring 1-3/8″ x 7/8″ and round the corners on one end of each. Adhere them together. Apply glue to only the top half, and then glue them to the box lid, so that approx half is on the lid and half is on the box. Add a 0.75″ stitched circle for the camera ‘eye’


Set the box aside.
Stamp Rosie with the camera from A Tale of Two Rosies onto white card and colour using your desired medium.
Copics used:
Camera – BG45, BG53, BG57. C3, C5, C7
Fussy cut around the image.

Using foam tape, adhere Rosie to the box to the right of the lens.

Add the Smile sentiment, and any other embellishments.
Over To You!
Share your personal favourite Stamping Bella creations with us. We LOVE to see what you’ve been creating with Stamping Bella stamps. Share a link to your latest Stamping Bella card in the comments below, or an old favourite you made a while ago. Tell us what your favourite stamps are. Are there any additions you would like to see to the range? Let us know!
Another way to connect is by joining us in the Stamping Bella Sistahood Facebook Group and share your pictures.
If you are posting your images online, we would love to see them on Instagram and all the platforms mentioned above. To make it easier for us to find you just use #stampingbella as a hashtag. Even better tag me @markergeek and Emily @stampingbella . We love it when you connect, so don’t be shy!
Until next time, HAPPY STAMPING!
MWAH
Elaineabella
I just love this box! I’m looking for more off the page projects and this is Brilliant! As always I adore Elaine’s coloring, I always learn something new.
More squidgies!!! I’m still smitten with those adorbs little people and can’t get enough of them! ?
Happy Wednesday!
Love this! How ingenious and different! Thanks for sharing!
I adore this camera album box.
Thank you for the tutorial and the coloring- superb as always.
Looking forward to the album.