Sandy Allnockabella!
Hello once again, sistahs! It’s Sandy Allnock with one more Bella 2.o for you…this time with Allboxedupabella! 

Hey all! Elaineabella here today with a fun new feature here at Blogabella shining a spotlight on some of the treasures in our collection of stamps. Last week we took a closer look at the Cool Chicks line, with all their crazy antics. Since they do have a habit of popping up everywhere to create mischief, you may even spot one or two of them today. 😉 If you missed that post click through and check it out: Spotlight On The Cool Chicks Rubber Stamps at Stamping Bella.
Today I’d like to shine the spotlight on a wonderfully sweet collection of stamps that was introduced last year. They can be soft and sweet, but also a little quirky and humorous: THE WOODSIES.
We’ll start with my absolute favourite from the collection: Gilbert Has a Snack.
When I was little I had guinea pigs, and rabbits but the guinea pigs were my favourites. They are the sweetest little characters that chatter away, so I’ve got a total soft spot for Gilbert. Look at those little feet poking out under that watermelon slice. JUST LOOK! So much cute, I cannot. And the bee. I have a soft spot for bees too. I’m a sucker for cute, ok?
Here’s a card from yours truly. I just thought it was such a perfect image for a sweet little “just because” notecard. Now I’m feeling like I may need to colour little Gilbert again soon.
Another stamp from this line that I’m particularly fond of is Petunia and Penny Take a Break.
They are just so cute and roly-poly. They look like they’ve just been “pigging out” together and are taking a break hanging out under the flowers trying to recover. Yeah, we’re on to you Petunia & Penny.
Here’s a card from our fabulous Sandiebella. So pretty! As you can see, The Woodsies are perfect for both clean and simple and more detailed layered cards alike. Be bold with colour or go for soft and sweet, it’s all good!
Speaking of soft and sweet, have you seen Bedelia the Bunny?
Such a sweet, pretty bunny. She comes with a lovely “thank you” sentiment as you can see, but she works beautifully for all sorts of occasions.
Look at this lovely card by Tracybella. Love how she’s given Bedelia pink cheeks, and that little pink nose, oh my!
Here’s where you will see some familiar little faces… Nice to See You Petunia.
Just what do those chicks think they look like? The second one from the left, with the big round glasses? He’s an idiot. Look at him. Absolutely clueless. You may remember him from last week’s post, where he’d wandered into Sage the Scientist’s lab. I imagine he wanders into a lot of situations, completely oblivious. Love it.
Here’s a gorgeous card by Stephabella. Perfect paper choices!
We also have some beautiful festive stamps in The Woodsies range. Petunia loves Christmas is my favourite, so cute with that wreath!
Petunia is really, really happy about Christmas. So happy she’s fallen asleep in a wreath. 😉
Look at this beautiful card by Kerribella. Love how she’s echoed the gorgeous bow in the image.
Warm and Fuzzy Penguins comes in a close second for my festive favourite.
This is one of those images which is ridiculously cute PLUS there’s a little subtle humour. Take a closer look – that poor penguin being rolled into a snowball with his little feet waving in the air. The one on the right is just waddling along, all happy with his warm and festive hat. He’s got no worries, well, until he clocks that giant snowball headed his way. How many penguins are going to get taken out by that thing?! The two in front don’t care, they’re in loooooooove and they’ve got a huge scarf big enough for two. 😉
Love the non-traditional colours Shelabella chose for her card. Pink trees!
If you’re looking for some colouring tips and suggestions to get you going with this fun line of stamps, we’ve got them for you!
I’ve also created a little playlist on YouTube where I will add any videos I upload featuring The Woodsies stamps. Watch the current selection below or in HD over on YouTube.
Hopefully I’ve inspired you to add some of The Woodsies to your own stamp collection, or to stamp up any that you already have! They are perfect for cards for all ages, genders and occasions. I know all the cards I have sent featuring them have been well received.
Share your personal favourite Woodsies creations with us. We LOVE to see what you’ve been creating with Stamping Bella stamps. Share a link to your latest Stamping Bella card in the comments below, or an old favourite you made a while ago. Tell us what your favourite Woodsies stamps are. Are there any additions you would like to see to The Woodsies collection? Let us know!
Another way to connect is by joining us in the Stamping Bella Sistahood Facebook Group and share your pictures.
If you are posting your images online, we would love to see them on Instagram and all the platforms mentioned above. To make it easier for us to find you just use #markergeekmonday and/or #stampingbella as a hashtag. Even better tag me @markergeek and @stampingbella . We love it when you connect, so don’t be shy!
Until next time, HAPPY STAMPING!
MWAH
Elaineabella
Time to get another week started off the way we mean to go on – with lots of colour! It’s me -Elaineabella – here to share some more colouring tips with you for Marker Geek Monday. This week I’ve got some quick tips to help you with colouring some of our fairy themed images.
Before we get started, I’d also like to mention that if you enjoyed my recent Marker Geek Monday Copic Colouring Pleats and Folds Step by Step with Video post, and you also like to colour with pencils you may want to pop on over to my blog and read my recent post: Flowersbehindmybackabella Colouring with Polychromos Pencils vs Prismacolor. There is a video showing the process and also some discussion about the differences between Polychromos pencils and Prismacolor pencils, and my personal preference. While you’re there I invite you to subscribe or bookmark the blog for regular Stamping Bella inspiration!
With a growing number of fairy images in the Stamping Bella range (see the Edna Collection and Tiny Townie Fairy Best Friends) I thought it would be fun to share a quick minimum fuss way to create pretty fairy wings using Copic or other alcohol based markers. I’ve got a step by step image for you to follow, and a colouring video below so you can see the process in action.
It really couldn’t be easier to achieve a lively, appealing effect.
TOP TIP: If you want to enhance the appearance of transparency, add some subtle hints of colours that appear in your background. If you are colouring Edna in a background with some trees behind her, add some light green dotting to suggest that you can see a hint of the trees through the wings. Don’t be heavy handed with this – you just want to create the suggestion, you don’t want the wings to blend in with the background.
Watch the video below or in HD over on YouTube.
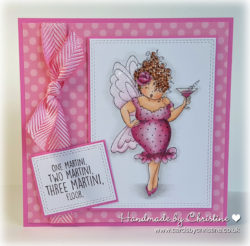
You can also watch a video of me colouring the entire Edna Needs a Martini image below or in HD over on YouTube.
Here is a full Copic Colour Map for the Edna Needs a Martini colouring featured in the videos. Remember that if you purchase Stamping Bella stamps you can obtain colour maps for the versions shown on the product packaging – go HERE to find out how to do that. Between those and the bonus colour maps featured here on the blog, you can build up a great library of colour combinations to try out with your own Copic collection.
If you try out the techniques shown in this post with your Stamping Bella stamps, be sure to share! We would love to see the results and hear how you feel about them. Show off your creations in the comments below and even better, share your own favourite tips with us. Let’s talk colour!
If you are posting your images online, we would love to see them on Instagram and all the platforms mentioned above. To make it easier for us to find you just use #markergeekmonday and/or #stampingbella as a hashtag. Even better tag me @markergeek and @stampingbella . We love it when you connect, so don’t be shy!
If you’re on Facebook join us in our private chat group Stamping Bella Sistahood to share your creations there and chat all things Stamping Bella related!
Until next time, HAPPY COLOURING!
MWAH
Elaineabella
Hiya sistahs!
we are back from our 5 days at the Cape.. it was soooo amazing,. we whale watched… we went to Province Town, Martha’s vineyard.. ate steamers.. and lobsters.. shell hunted.. it was the best 5 days! Now we are back in Montreal for 2 days and then back to our HOME BASE: Toronto… A whirlwind I tell ya!
Hope you all had an amazing week too
This week’s theme was a Mojobella sketch
lets see what our baberoonis came up with shall we?
AliceWERTZabella used DONTTALKTOMEBEFOREMYCOFFEEabella
Carlabella used LIZZY LAPTOP
Danabella used UPTOWN GIRL REBECCA loves to READ
and the inside with the sentiment
FAYE-W-J-abella used Uptown girl PIPPA loves to PLANT
Kerribella used TINY TOWNIE HAYLEY the HERO
Sandiebella used UPTOWN GIRL FAITH the FAIRY
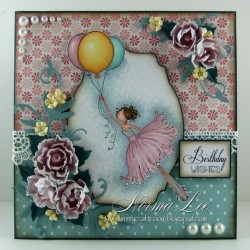
Shelabella used BALLOONABELLA 2.0
Stephabella used UPTOWN GIRL MOLLY
How amazing are these? LOVVEEEE
Now for our INLINKZ CONTRIBUTORS CLICK HERE and scroll to the bottom of the post
and now for our emailed contributors!


Next week’s theme is ONE LAYER WONDER card.. only ONE layer sistahs using a CURRENT Stamping Bella Stamp (you can search in the search box on top right to see if your stamp Is current)
We would LOVE to see your creations!

Gasp. Pencil!? What? Yes, this is a Sandy-Allnock-Guest-Post, but this time for Cakeabella, I got out my Prismacolor pencils!

 PS In case we didn’t meet last week – I’m a crazy colorist and I post a couple videos a week, so if you’re a visual learner, come on over and visit on my blog and YouTube channel and we can have some fun. Oh and be sure to visit on Instagram too…since I’ll be sharing more Stamping Bella fun there all month, too!