WELCOME TO BLOGABELLA

inspiration EVERYWHERE!

Hiya sistahs!
Just wanted to show you a little something I found in the dollar store. I love walking up and down the aisles in there… the craft section.. the stationery section.. office supplies.. I always find something to play with!

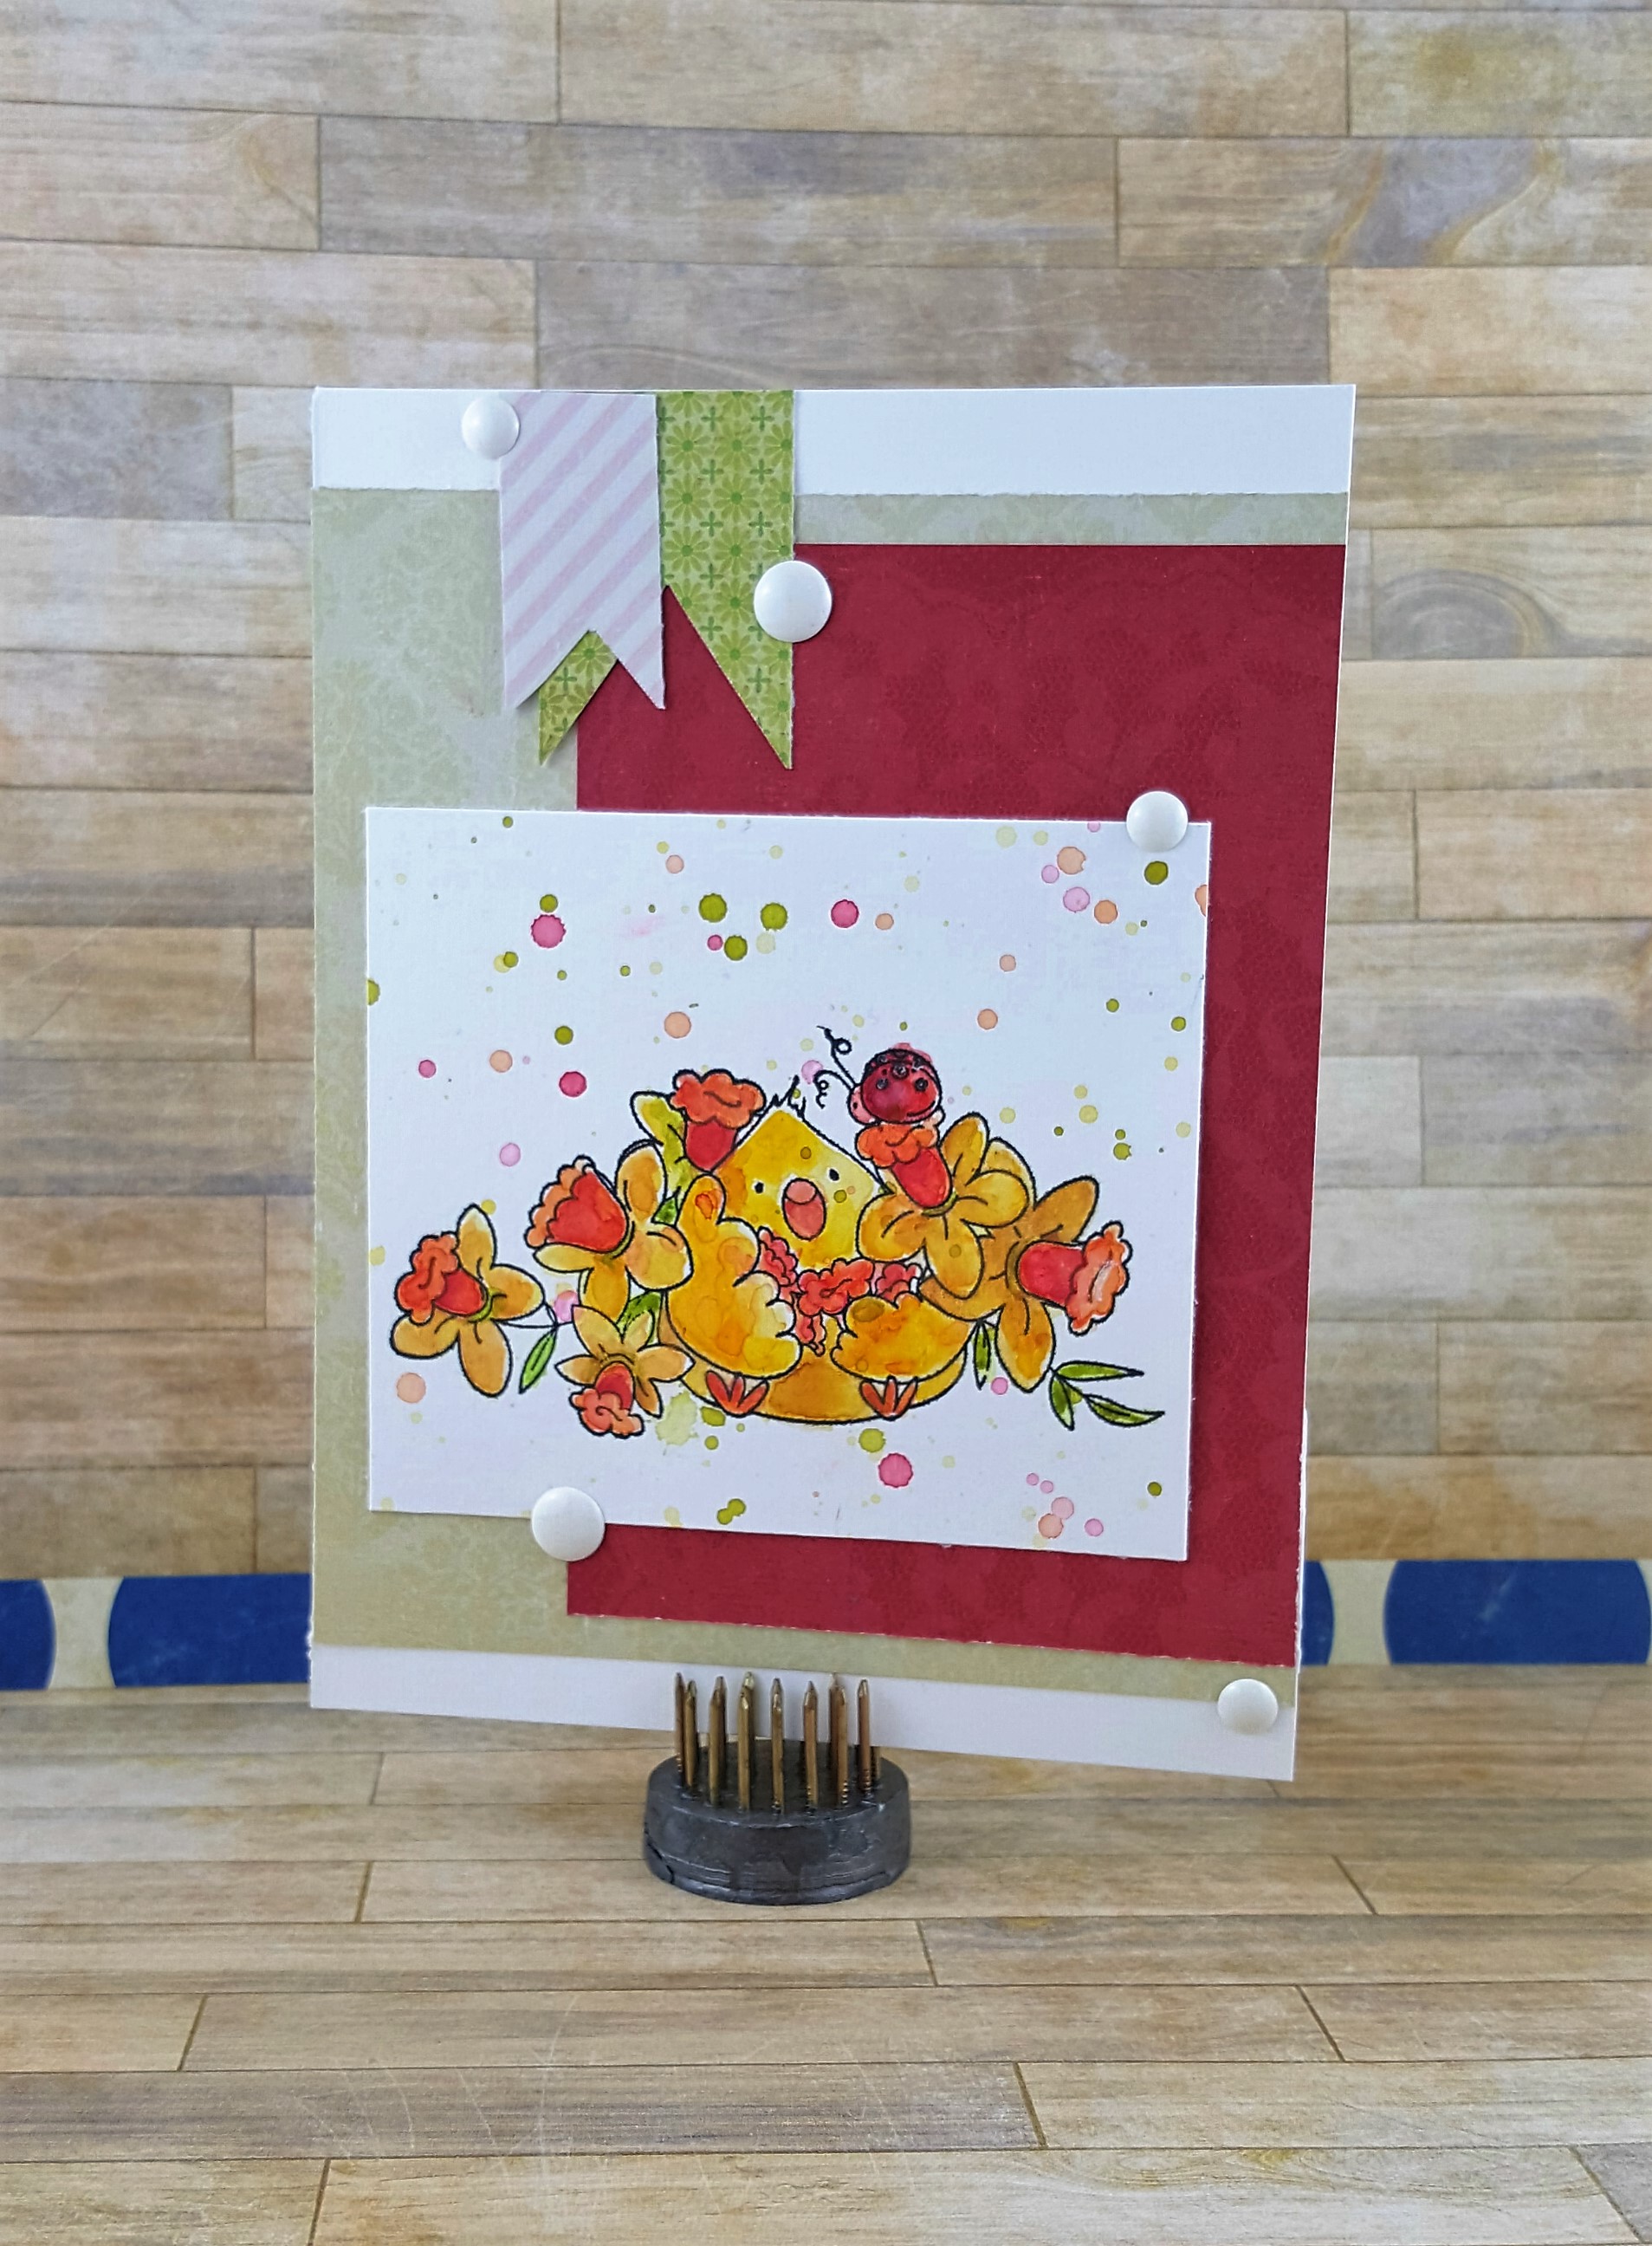
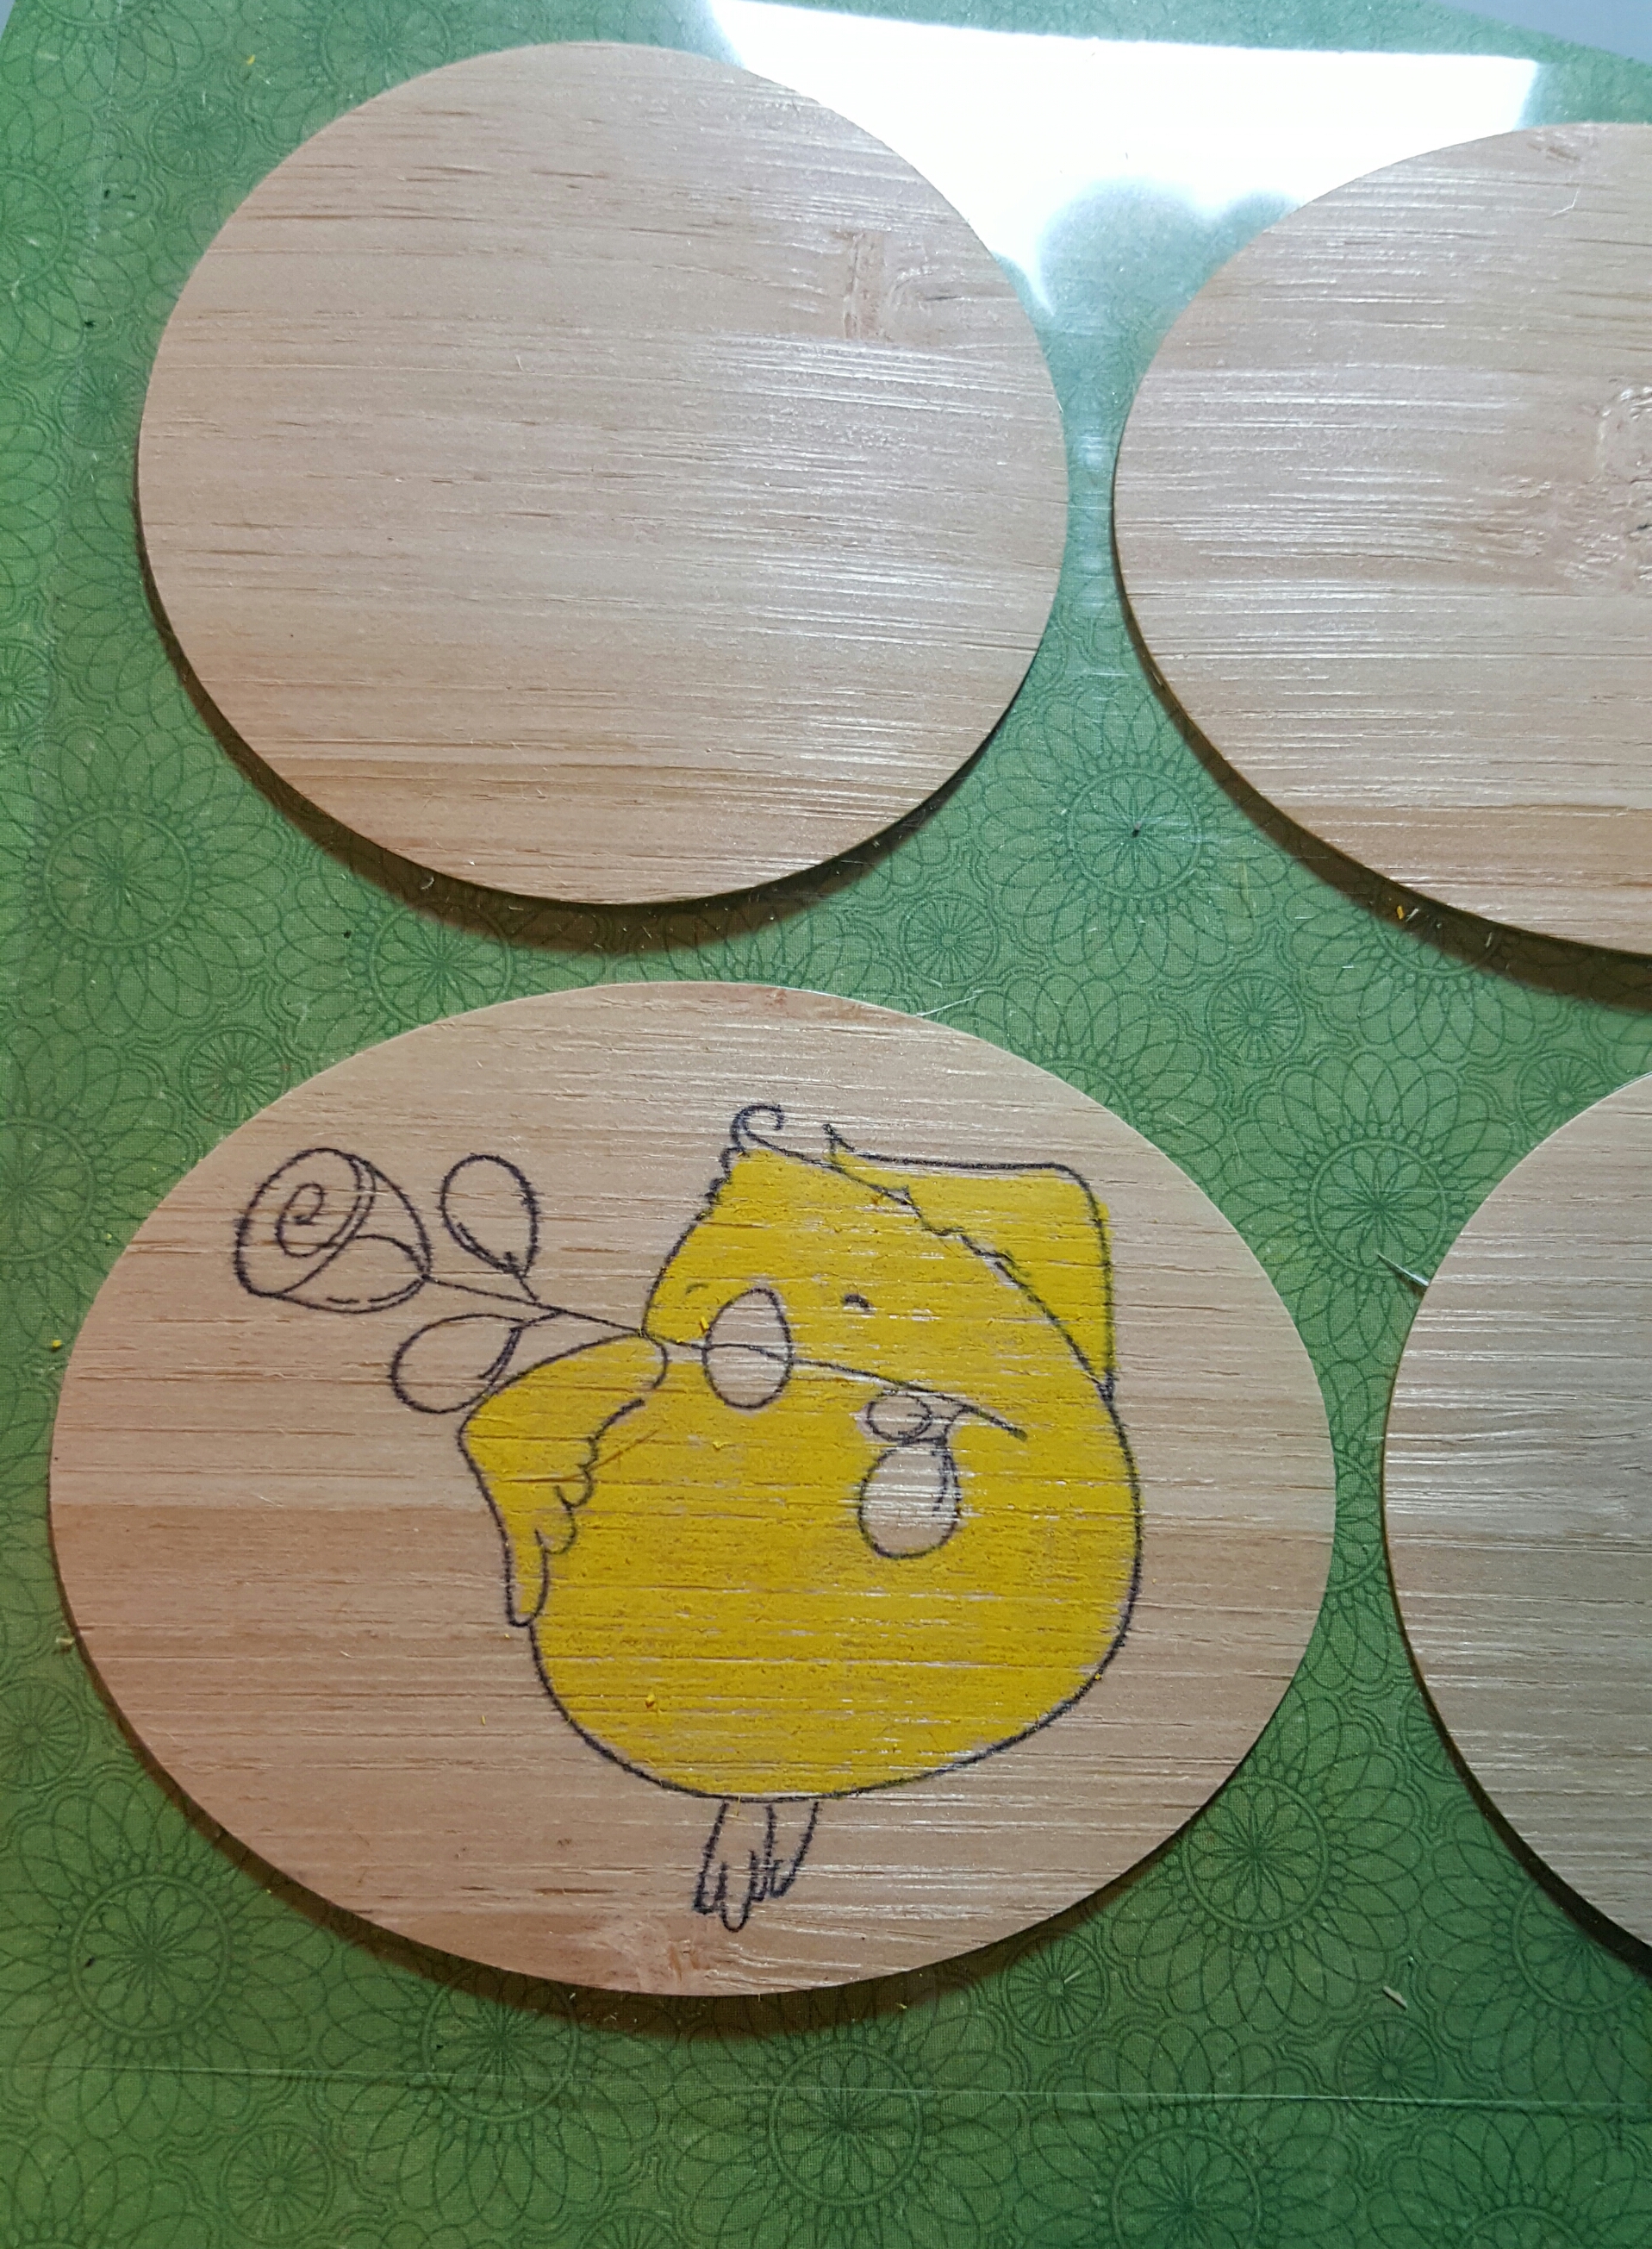
This week I found these amazing wood veneer stickers! They came in different shapes.. I opted for the classic round and oval shapes.

I found them in our local dollar store chain called DOLLARAMA.

venneershapes1

arent they cute?

So I says to myself.. self?  wouldn’t these be AMAZING to stamp on?  Kinda like textured Kraft paper (I LOVE coloring on Kraft)

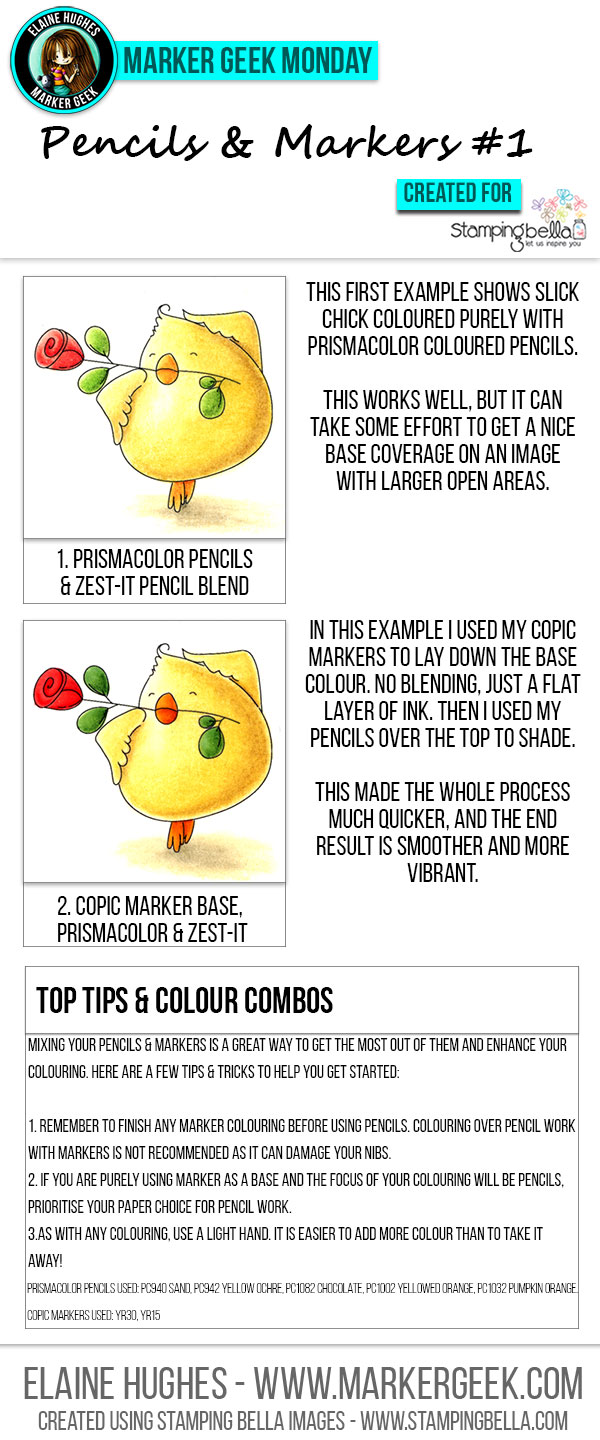
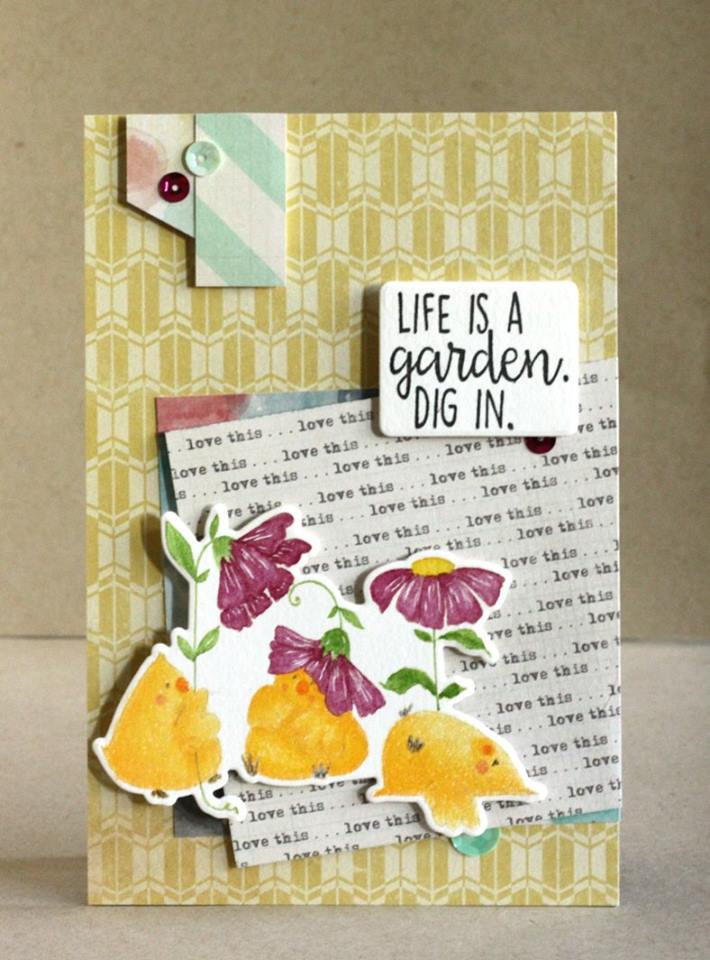
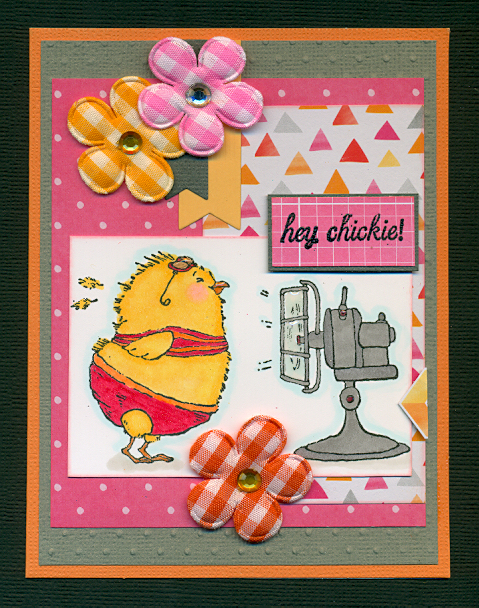
So I decided to take my black archival ink.. you can use Staz On too I’m sure.. and stamped SLICK CHICK 🙂

veneershapes2

is he not deelish? and that tuft of hair he slicked back?  LOVE.

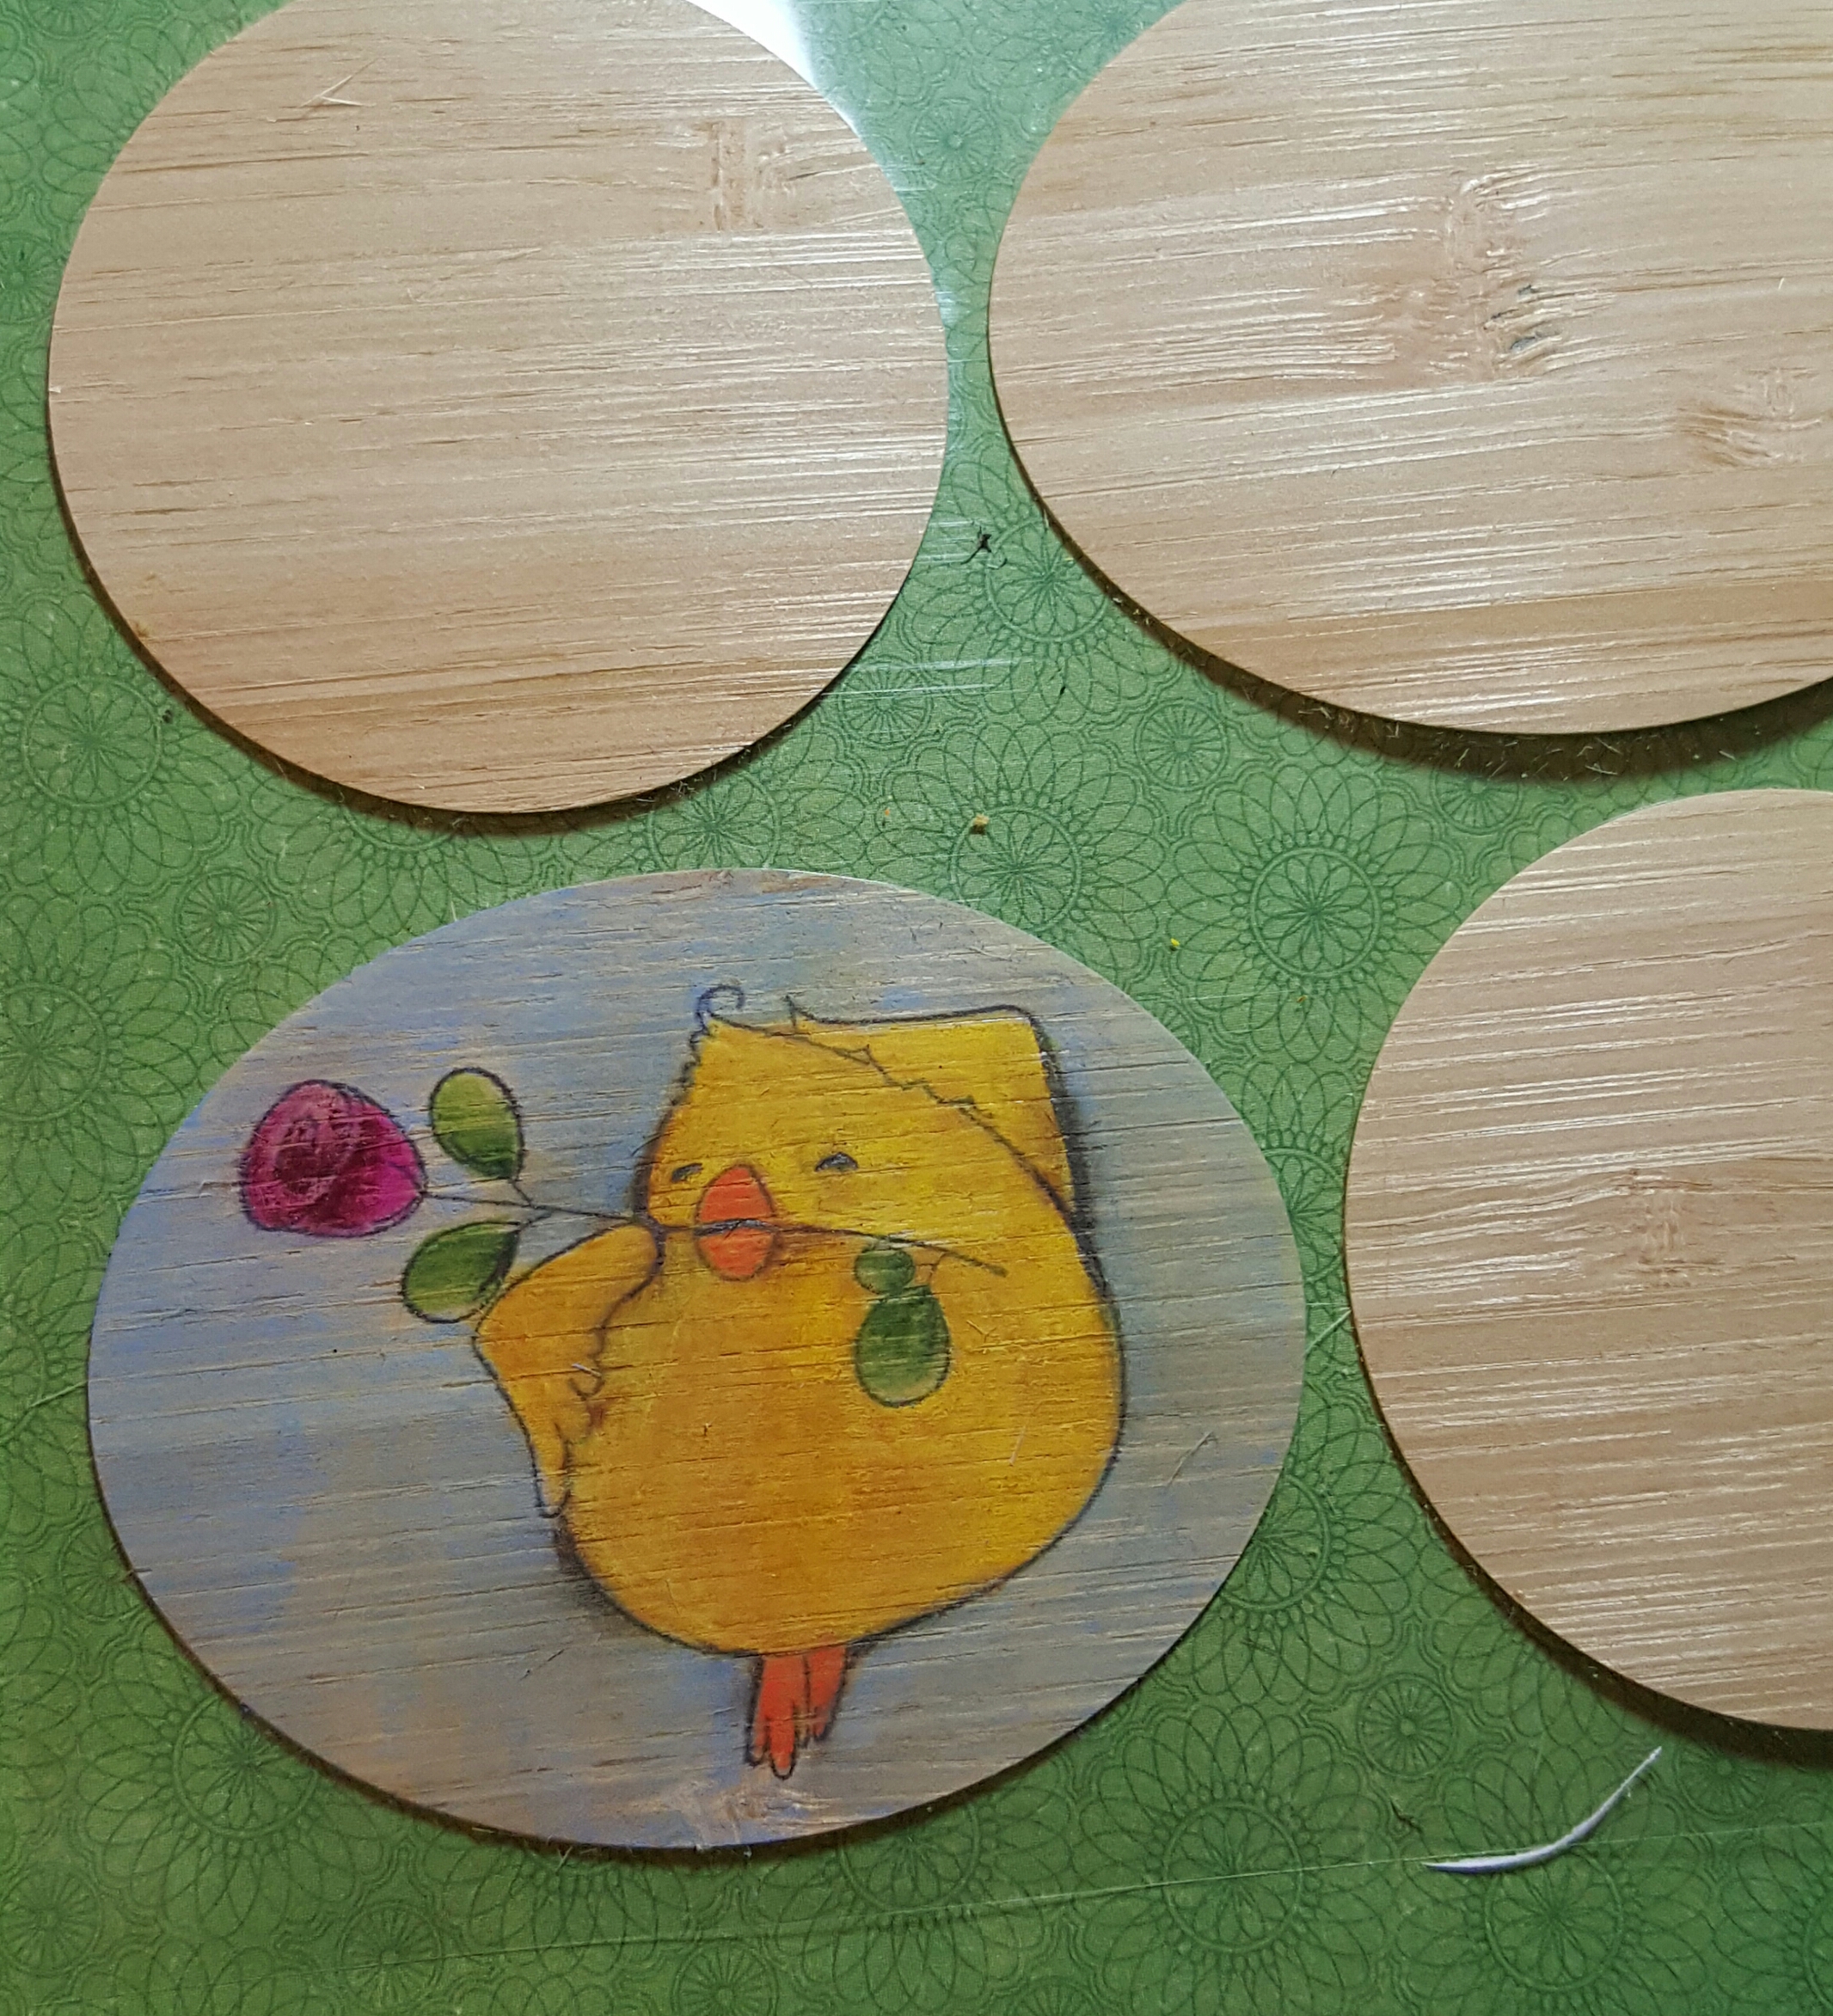
I then took out my Prismacolor pencils and decided to colour him in..  it was really fun.. nice and smooth.  and love to see the pop of colour!

veneershapes3

I then decided to use my mineral spirits.. some graphite and more pencils to just experiment and play.  Did this come out perfect?  nope.. because I was playing!  And I had so much fun playing!  I realized I really do love colouring on this veneer and THAT was what the experiment was about.. it’s the JOURNEY sistahs.. DA JOURNEY!  I an going to stick him in my journal because it’s always nice to receive flowers isn’t it? LOL.

veneershapes4

I will continue to play with my veneer shapes.. experiment.. maybe gesso it.. maybe try watercolors.. copics.. let’s see where this takes me!

So what I am saying is… always look around for inspiration and PLAY!  Take risks.. wonder..  and you will see how much fun that process can be!

Mwah to da sistahs who love da DOLLAH store and taking risks  as much as I do 🙂

Em

It’s MARKER GEEK MONDAY!

So many of you have requested info on working with pencils, that although markers are my personal “go to” medium I’m doing my best to create some pencil related content for you! I do love using coloured pencils, and in fact many moons ago they were my first love for colouring stamps. I’m quite enjoying getting reacquainted, so although I am not ready to hang up my marker bag watch out for some fun coloured pencil posts here and there.


In this first pencil related post I’m showing you one way to mix your pencils and markers to get great results for your coloured images. I have used one of the most popular pencil brands – Prismacolor – which were the pencils I started with years ago (I still have the same set) together with my Copic markers. NOTE: any alcohol based markers will work for this.


april18


As you can see, because the marker base allowed me to concentrate on shading and detail colouring with the pencils I was able to get some deeper, more vibrant colours overall. In the first example, I was reaching the limit in terms of being able to layer with my pencils, because I had to work fairly hard to get a nice base coverage to work from, this resulted in a less vibrant look.


Using markers as a base for pencil work can reduce the time it takes to colour an image like this with larger open areas for colouring.


When working with Prismacolor pencils I tend to use Zest-It Pencil Blend with paper stumps to blend. This is an alternative to odourless mineral spirits such as Gamsol.


My preferred paper for pencil work varies, but when using a solvent to blend I use a fairly smooth paper like the Winsor & Newton Smooth Surface Cartridge pad (100lb/220gsm) or a Bristol Board. Basically, a fairly smooth surface with a little “tooth”. The more “tooth” or the rougher the paper, the more layers of coloured pencil you should be able to add.


When using alcohol markers purely as a base layer, it is better to prioritise your paper choice for pencil work. If you aren’t doing any marker blending, you don’t need a paper that works well for that but you will want one that takes pencil nicely. The papers mentioned above work really well for this. If you intended to use pencils to enhance or tidy up details on an image coloured mainly with markers, you would need to choose a paper that works well for marker blending.


I hope you have enjoyed this first look at incorporating pencils! Next week I will be showing a comparison of some different pencil brands, so watch this space…


MWAH!


~Elaineabella


it’s Bellarific Friday!

Hiya sistahs!  I have to say when I scroll through the blog, it makes me so happy to see little nuggets sprinkled throughout the week.  I am going to try my best to keep that up!  Do you like it too??

Well it’s friday… time to think of what diet to start on Monday LOLOL.. and also a GORGEOUS… OUTSTANDING… roundup of INSPIRING creations!

Our theme this week was an INSPIRATION photo.. so anything that inspires you from this photo is an entry!  The colours.. the floral theme.. the crafty theme.. the sewing theme.. you get da picture

Inspiration 2 April 15

Let’s see what our baberoonis came up with shall we?

AliceWERTZabella used our MASON JAR of FLOWERS Stamp and Cut it out bundle (did you know that if you buy our CUT IT OUT die and matching stamp as a bundle, you save 15%?  just sayin’)

aliceWERTZabella

Danabella also used our Mason jar of Flowers STAMP and CUT IT OUT bundle

danabella

Same image.. 2 completely different looks.. that’s why STAMPING IS MAGICAL sistahs!!!

Faye-W-J-abella used MEET EDNA CUT IT OUT and STAMP BUNDLE

fayewjabella

Kerribella used TINY TOWNIE HEIDI needs a HUG

kerribella

Lesliebella used the BUNNY WOBBLE and the PEONY stamp and CUT IT OUT BUNDLE

lesliebella

Sandiebella used I HEART YOU

sandiebella

Shelabella used Tiny Townie FAIRY BEST FRIENDS

shelabella

Stephabella used Edna blows a kiss and her SIGN BASE

stephabella

Tracybella used TINY TOWNIE DOROTHY the DREAMER

tracybella

TracyMACabella used our TINY TOWNIE BONNIE loves BOWS STAMP and CUT IT OUT DIE BUNDLE

tracyMACABELLA

Aren’t these AMAZING sistahs?

Drool.

And now for our AMAZING SISTAHOOD!

First, please click on THIS LINK.. scroll to the bottom and you will see all of our INLINKZ contributions!  They are AMAZING!

And now for our emailed contributions!

christineL

Christine’s card using Edna blows a KISS. I got so excited yesterday that I posted it a bit early lol


Mari

Mari used FLOWER GARDEN

Amazing contributions!! thank you my sistahs!!!

Now for next week’s theme?

A MOJOBELLA SKETCHYPOO!!!

MojoBella sketch 9 - April 22

If you are not sure how to enter our challenge, please CLICK HERE for instructions

Mwah to da sistahs who don’t need to think of monday diets LOL

Em


recap/inspiration THURSDAY!

Hiya sistahs!

I just love posting stuff from da sistahood.. so I think I am going to go through our FACEBOOK GROUP and on INSTAGRAM (if you tag @stampingbella and #stampingbella) once in a while and share the GORGEOUSNESS here.. ok?  you DOWN wit dat?  Ok good.

First I wanted to show a card I spotted on FB by Deborah Deruyck using Uptown girl VIENNA on her VESPA… these pleats?  I CANNOT.  If someone doesn’t teach me how to pleat RIGHT NOW I am gonna have a conniption (sp?) fit.  LOL

How stunning is this? so clean and crisp no?  Thank you so much Deborah for sharing this with us.. you are so talented!

viennaDEBORAHDERUYCK

I also wanted to share a card by the talented Christine LEVISON.. using EDNA blows a KISS.. I LOVE EDNA!!!! and CHRISTINE!  Christine told me her mom’s name was Edna so our character holds a dear place in her heart 🙂  I love stories like that!

ednablowsakissCHRISTINELEVISON

Thank you so much ladies for thinking of Stamping Bella before you sit down and create 🙂 it means the world to me!

MWAH and see you tomorrow for bellarific friday!

it’s not too late to enter.. check out the inspiration photo challenge HERE

Em

It’s VIDEO TUESDAY sistahs!

Hiya sistahs,

Today I decided to film a quick video on our “CUT IT OUT” snippers tool 🙂   I have had a lot of questions, so I decided to test it out myself!

We had a few issues with autofocus again.. I will get to the bottom of it.. I PROMISE!

Hope you enjoy my goofiness

“Cut it out” dies used in the video:

The Bunny Wobble and the PEONY

and

Tiny Townie FAIRY HAPPY BIRTHDAY

MWAH

Em

I hope you subscribe to my new YOUTUBE channel!

MWAH

It’s MARKER GEEK MONDAY!

Some of my very favourite Stamping Bella stamps are from the fun range the COOL CHICKS! Love those little guys, and it never ceases to amaze me just how much character they have. They keep popping up with the Tiny Townies too, in fact you never quite know where they’ll appear to inject a little humour. So, this week I thought I’d share some Copic combos for colouring the chicks. The stamp set I used is Heidi Needs a Hug (this stamp was also featured in my Copic Hair Combos post) and this little chick is a separate stamp, so you can use him to create a scene with Heidi or even let him wander off and offer a flower wherever it might be needed!


april10


While you’re playing with yellow combos, add a little extra detail to your chicks using techniques from my Basic Fur with Markers post (texture doesn’t have to be just for fur y’know). If you check out another sweet chick from the Stamping Bella range – Mimi the Chick Misses You – you will see that I textured her using the colourless blender refill technique. Some of the Cool Chicks are a little tiny for this, but others like Slick Chick would be perfect for getting some extra detail happening!


Have a go and let us know how you got on by sharing your work here in the comments section, over in the Stamping Bella Sistahood chat group on Facebook, directly on the Stamping Bella Facebook page or on Instagram by using the tag #markergeekmonday . We love hearing from you and sharing the enthusiasm for Stamping Bella!


MWAH!


~Elaineabella

It’s Bellarific friday and some winnahs announced!

Hiya sistahs!  Hope you had a great week!

Crazy Tuesday this week has DEFINITELY kept us busy 🙂  Thank you for your support!

I am a bit behind with announcing our winnahs for contributing on da blog.. and so sorry for that!

Here is the winnah for FEB 2016 –

Cindy Major! you win a $25 gift certificate for THIS card using Uptown girls VICTORIA and JULIETTE posted on Feb 25th!  Please email me and I will send you your vouchah!

cindy major

Here is our winnah for MARCH 2016!

Annette! You win for using Uptown girl BRITTANY the BIRTHDAY GIRL on THIS CARD posted on March 25th!  Please email me for your $25 vouchah!

annette

Just gorgeous!

And now for this week’s theme!  This week we had a gorgeous MOJOBELLA sketch.. I decided to play too  this week!

MojoBella sketch 8 - April 8

AliceWERTZabella used our GARDENING CHICKS stamp and “CUT IT OUT” die bundle 🙂

alicewertzabellaGARDENINGCHICKS

Angelabella used TINY TOWNIE HEIDI needs a HUG

angelabellaHEIDI

Danabella used THE BUNNY WOBBLE and the PEONY

danabellabunnywobbleandpeony

I used the CHICK and the ladybug

emily

Faye-W-J-abella used Uptown girl CLAUDIA has a candy.  THOSE PLEATS!!!

fayeCLAUDIA

Lesliebella used PAMPERED

pamperedlesliebella

Kerriebella used THE STUFFIE GANG

thestuffiegangKERRI

Sandiebella used OWLIVER loves to CELEBRATE

sandieowliver

Shelabella used TINY TOWNIE BIRTHDAY PARTY

shelabellaTINYTOWNIEBIRTHDAYPARTY

Stephabella used Uptown girl TESSIE the TEACHER

tessiestephabella

Tracy used Bedelia and Betsy go for a walk

tracybedeliaandbetsy

TracyMACabella used GIGI the GIRAFFE stuffie

tracymacabellaGIGI

How inspiring are these cards??? YUUUUMMMMMMMMMMMMM

and Now for our sistahood!

To see our contributions on INLINKZ, click HERE and scroll to the bottom of the post

And now for the emailed contributions 🙂


mariaL

Maria used UPTOWN GIRL SUNNY

Gorgeous contributions!  thank you to da sistahoood!!!

Now for next week’s theme?

A BEEYOOTIFUL inspiration photo!

Inspiration 2 April 15

Use the color scheme.. the floral or craft theme… Use this photo to inspire you!

Mwah to da sistahs who love bellarific fridays ALMOST as much as I do 🙂

Em


it’s CUH RAZY TUESDAY!!

and you know what that means sistahs?? THAT MEANS… CUH razy prices on special images we have chosen!  This is our way to thank you for your loyalty over the years!  These CUHRAZY prices allow you to shop til you drop without an ounce of guilt… Imagine retail therapy and feeling GREAT about it!  WOOHOOO!!  I love crazy TUESDAYS!  When does it happen?  Every FIRST TUESDAY of EVERY MONTH!

So if you want to start collecting our images, or start a little stash for someone special.. this is the way to go.

This month’s CRAZY TOOSDAY specials are:

CRAZYTOOSDAY


and after 24 hours…. POOF our Crazy Tuesday becomes ho hum Wednesday!  So don’t wait sistahs 🙂

MWAH!

it’s MARKER GEEK MONDAY! WOOHOOO!

This week I thought I’d share some Copic combos for colouring the adorable elephant images in Stamping Bella’s Stuffie stamp range. The image I used is I’ll Always Have Your Back Stuffies (is that little baby not the sweetest thing ever?).


April4


I have used combos from all four of the Copic Grey families, but I just had to thrown in a bonus smooshy pink elephant at the end, I’m sure you will understand. 😉


This seems like a great opportunity to chat about the different grey families, so you can either put the markers you have to use, or so you can make better informed choices when you come to add to your collection!


  • The first example shows a combination of Neutral Greys. As the name suggests, these are neutral in tone. I love using the darker Neutral Grey shades for colouring black hair (as seen in my Marker Geek Monday Copic Hair Combos post) as they give a true black look.


  • The second example shows a combination of Cool Greys. These have a blue tone and work really well for colouring and shading cool colours and objects.


  • The third example shows a combination of Toner Greys. These have a slightly brown tone. I often use the Toner Greys for simple grounding of characters etc.


  • The fourth example shows a combination of Warm Greys. These have a really warm brown tone to them and are great for shading warm colours and natural objects/materials.


If you’re just getting started with Copic markers, I’d recommend thinking about the images you’re most likely to be colouring and picking one or two of the grey families to purchase first. I started out with just the Cool and Warm Greys, and was perfectly happy for quite some time. Now, I tend to reach for the Toner and Neutral families more often.


GENERAL TIP: You don’t need every single grey marker in a family (or in any colour family). A great way to build your collection is to leave a gap of one or two shades between the colours. You can achieve plenty of depth and variety by layering the colours together in different amounts.


The little pink elephant that slipped in at the end was coloured using the “smooshy, squiggly” texturing style discussed in my previous Marker Geek Monday Three Ways to Colour a Stuffie Bear post. After all, these little elephants are in the Stuffies range, so why not colour them to look cute and textured like cuddly plushie toys?! You could also use this texturing technique with the grey colours too, to mix the realism with a little fun! A bright or baby blue ellie would be adorable too, pair that or the pink (or a soft yellow version) with an appropriate sentiment and you would have a perfect card for a new baby!


Have a go and let us know how you got on by sharing your work here in the comments section, over in the Stamping Bella Sistahood chat group on Facebook, directly on the Stamping Bella Facebook page or on Instagram by using the tag #markergeekmonday . We love hearing from you and sharing the enthusiasm for Stamping Bella!


MWAH!


~Elaineabella