Hi!
Tamara here with you.For this week’s post I made a girly gift bag. This project first started as a card. I coloured the image, cut all the papers and then just before gluing it down, I changed my mind and made a gift bag. This bag is just big enough to add some candies or a small gift inside.Image used on this project is called Tiny Townie Unicorn and she’s GORGEOUS!!! Love, love, love Tiny Townie stamps. They are so awesome!!Sentiment used comes with the image. I cut it apart and only used the first line “Everyone needs a little”, the sentiment then goes on “magic, even if they’re all grown up”. I replaced the stamped word magic with die cut and left out the rest of the sentiment.Image used on this project is called Tiny Townie Unicorn and she’s GORGEOUS!!! Love, love, love Tiny Townie stamps. They are so awesome!!Sentiment used comes with the image. I cut it apart and only used the first line “Everyone needs a little”, the sentiment then goes on “magic, even if they’re all grown up”. I replaced the stamped word magic with die cut and left out the rest of the sentiment.
To decorate the card I added a few chipboard stars and lots of glitter to her flowers and outfit. Image was stamped using Archival Ink – Jet black and then coloured up with Distress Ink pads.
Distress Ink pads colours used:skin: vintage photocheeks: worn lipstickhair: antique linen, walnuts staindress: victrian velvet, black soot
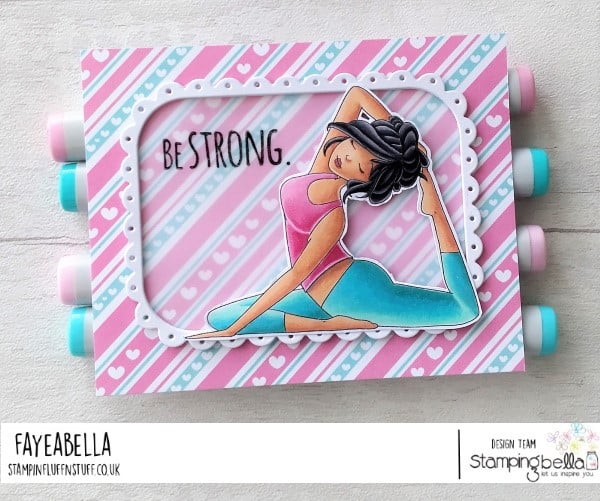
HELLLOOO sistahs! Happy Bellarific Friday! Today we feature our MOCHI GIRLS!
Here’s Fayeabella’s card using our MOCHI YOGA GIRL

Hiya sistahs.
so sorry for this delay .. it’s been CUH-RAZY around here!
Let’s get into it shall we?
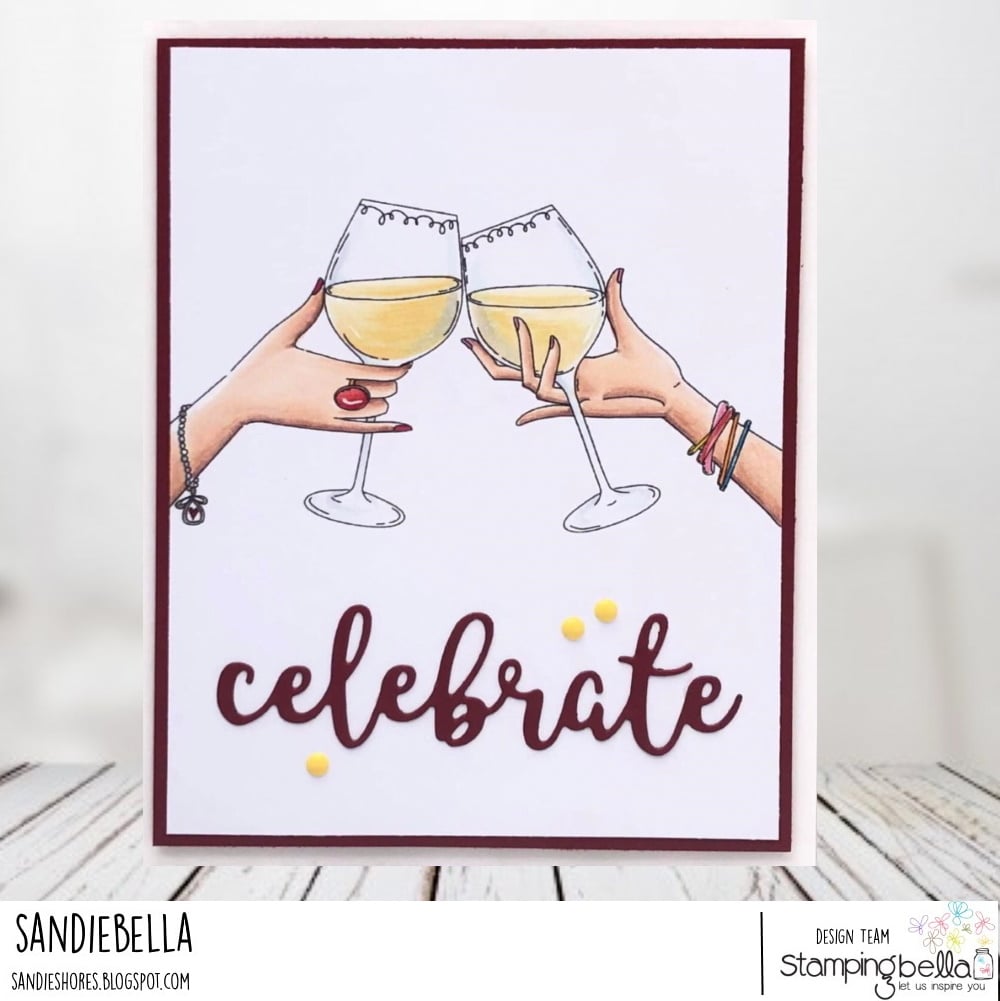
Here’s SandieBELLA’s gorgeous card using our CLINK rubber stamp

hiya sistahs, happy Thursday-with-Sandiebella!
Today Sandiebella teaches us how to make a beautiful POPPING FLAP CARD
Enjoy!
A Gift From Yeti rubber stamp (includes sentiment)
Score the 2.25″ x 3″ piece at 0.5″ from each end on the short side.
Fold into a Z shape. Crease the score lines well.
Apply adhesive on one the 0.5″ sections
Line the edge of the z-fold piece to the score line of the folded 7″ piece of card. Ensure the 3″ section is on top.
Place the inner card onto the card base lining up in the centre horizontally. Apply adhesive to the 0.5″ section.
Fold down the front panel and line the flip mechanism with the bottom of the front panel.
Press down firmly to secure the mechanism to the inside front.
Pull the inside flap and the inner card pops out. Push the long part of the inner card and it pops back into the base card.
Share your personal favourite Stamping Bella creations with us. We LOVE to see what you’ve been creating with Stamping Bella stamps. Share a link to your latest Stamping Bella card in the comments below, or an old favourite you made a while ago. Tell us what your favourite stamps are. Are there any additions you would like to see to the range? Let us know!
Another way to connect is by joining us in the Stamping Bella Sistahood Facebook Group and share your pictures.
If you are posting your images online, we would love to see them on Instagram and all the platforms mentioned above. To make it easier for us to find you just use #stampingbella as a hashtag. Even better tag me @stampingbella . We love it when you connect, so don’t be shy!
Until next time, HAPPY STAMPING!
MWAH