


SURPRISE! We’re so lucky – Sandiebella is back with an EXTRA step by step tutorial for us today, showing how she created this adorable Valentine Gift Box featuring our Bundle Girl Beekeeper stamp set. Read on to see how Sandie worked her magic again…
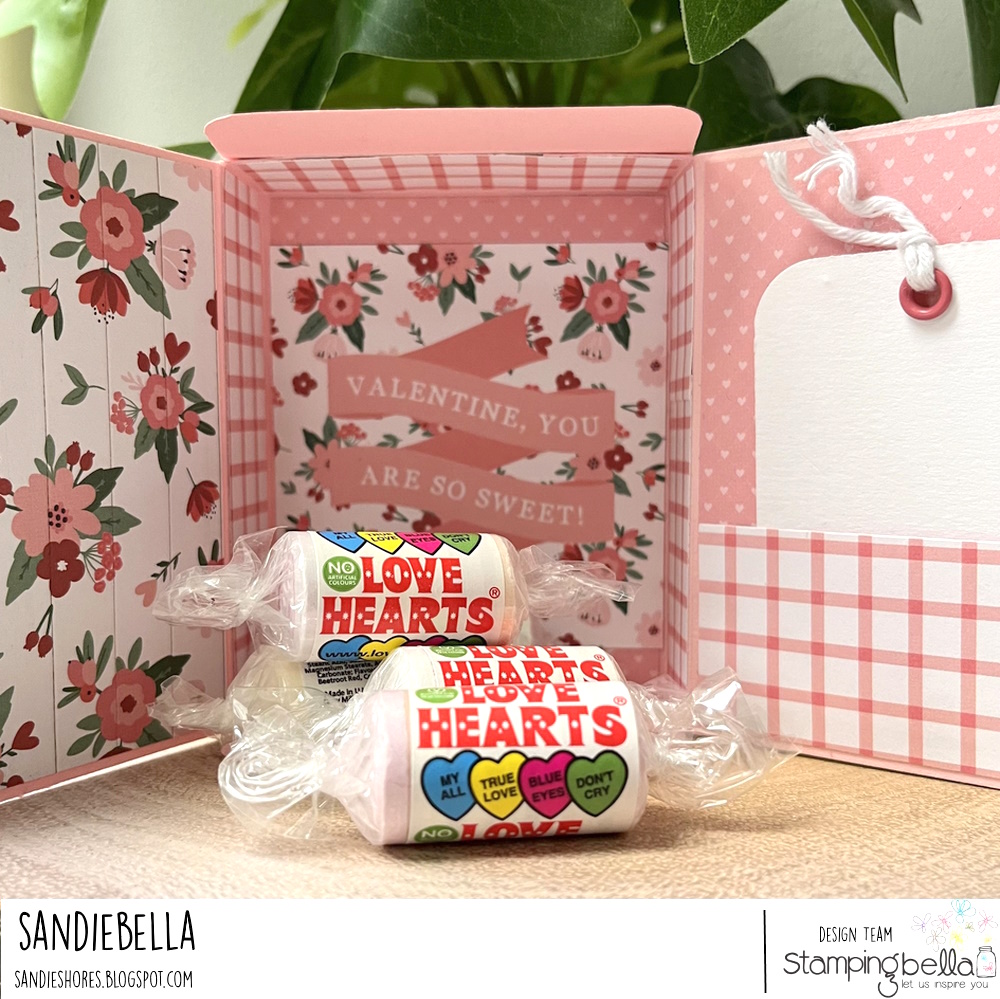
“Sweet as can Bee” Valentine Gift Box

Supplies:


Score the large piece of card on the long side at 3″ and 4″ from each end. Turn 90 degrees and score on the short side at 5/8″ and 1-5/8″ from each end.


Round the corners on both centre end tabs, and on one of the large end panels.

On the inside of the panel with the rounded edges, adhere a magnet approx. 0.5″ in from the edge.

Lay the other magnet on top and apply some strong adhesive.

Fold up the box without using adhesive, and close the flap the rounded edges over the other flap to adhere the second side of the magnet.

Open up the box and there should be a magnet on each side.

Round the corners of one of the paper layers and adhere over the magnet. Adhere another paper layer over the other magnet.

Adhere all the paper layers to the outside, rounding the corners on the end section.
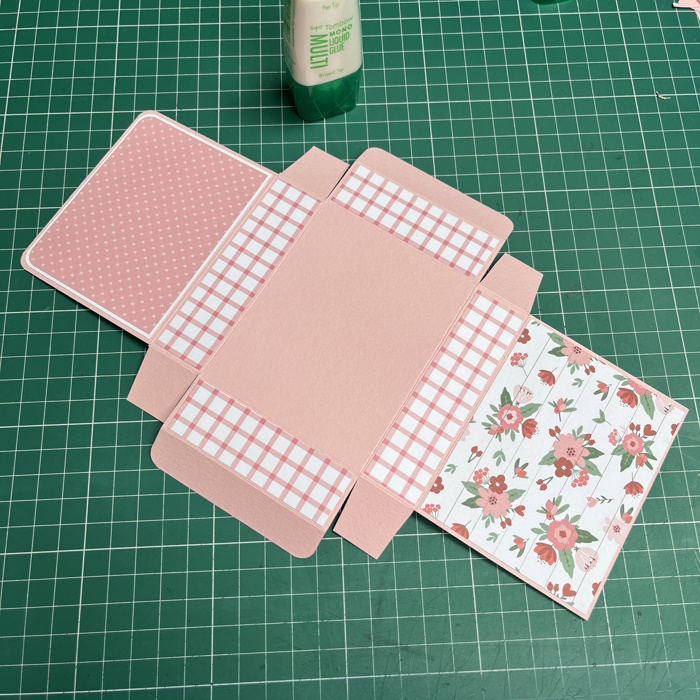
Make a small tag, punch a hole at the top and insert a grommet.

Thread some twine through the top of the tag and slide the tag into the pocket. This pocket also fits a gift card.

Adhere the paper layers to all the inside sections, except the the sections between the tabs.
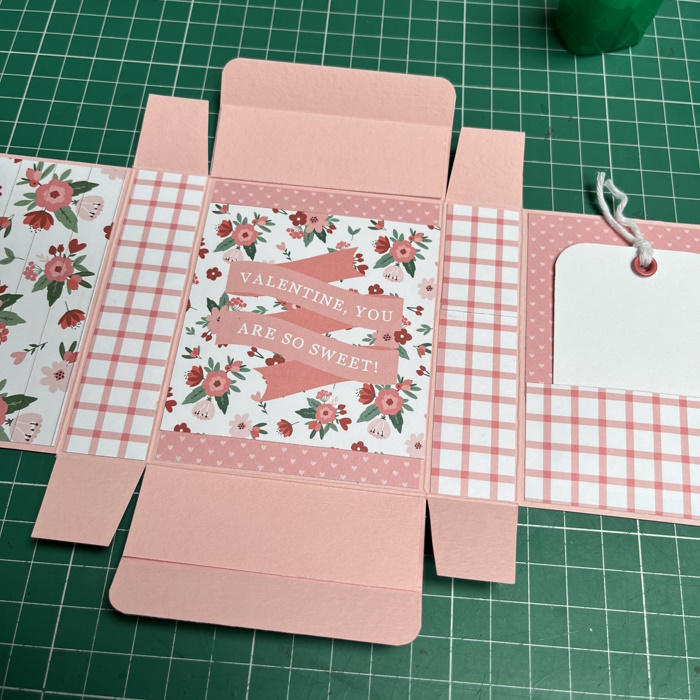
Fold down the tabs, apply adhesive, then adhere inside the sections with no paper.

Once the tabs are stuck down, adhere the paper layer over them

Repeat on both ends.

Cut a tag approx. 3-3/8″ long.

Stamp the sentiment onto white card and cut using a stitched rectangle/pennant die.

Adhere the tag to the front of the box, and then adhere Bundle Girl Beekeeper to the tag using foam tape/dots. Adhere one of the bees above the honey dipper.

Adhere the sentiment across the bottom of the image, using foam tape/dots on the end.

Fill the box with candy hearts or chocolates.

If you follow any of Sandie’s brilliant tutorials, be sure to tag us on social media – #stampingbella – or leave us a comment with a link. We LOVE to see what the SISTAHOOD have been creating.
MWAH!
Elaineabella
Sandie, this Candy Box is really cute… so many uses for it in addition to Valentines Day. I love the colors and your coloring is impeccable. The tag on the front is a wonderful touch helping the Girl Beekeeper and bees really stand out/pop. Thank you for sharing your tutorial.