


A TAKE APART BOX!

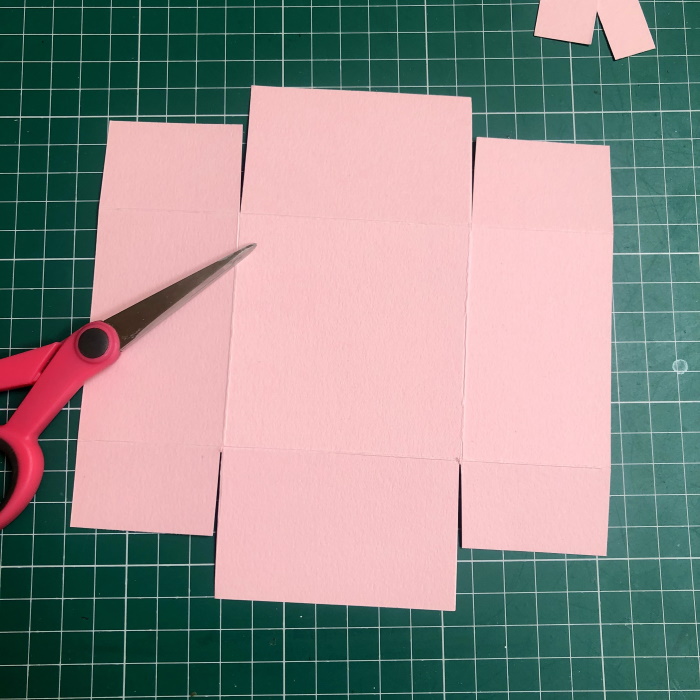
Turn the card and score on the 5″ side at 2″

With the 2″ section at the top, score from the outer corner of the 2″ line diagonally to the inside corner of that 3″ square, on both sides.

Again on the 2″ section, cut the 3″ and 5″ score lines down to the intersecting score line,

Shorten the centre section to about half the size.

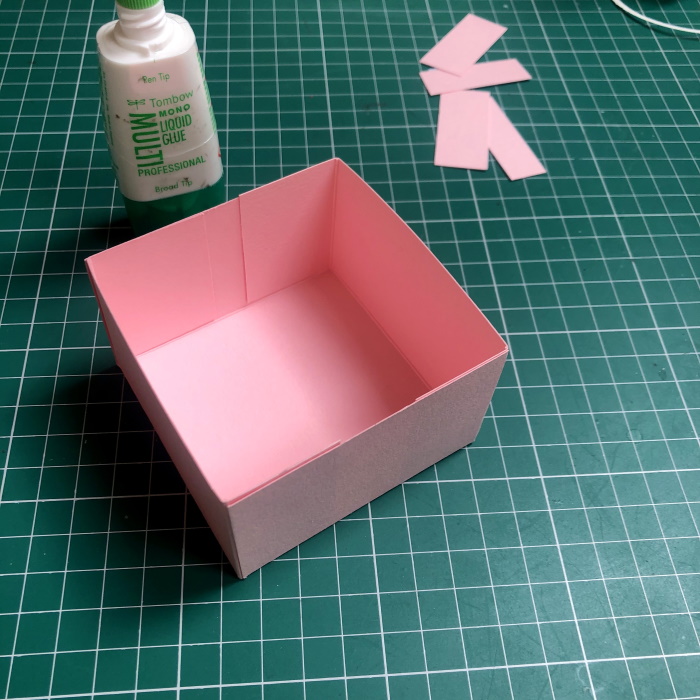
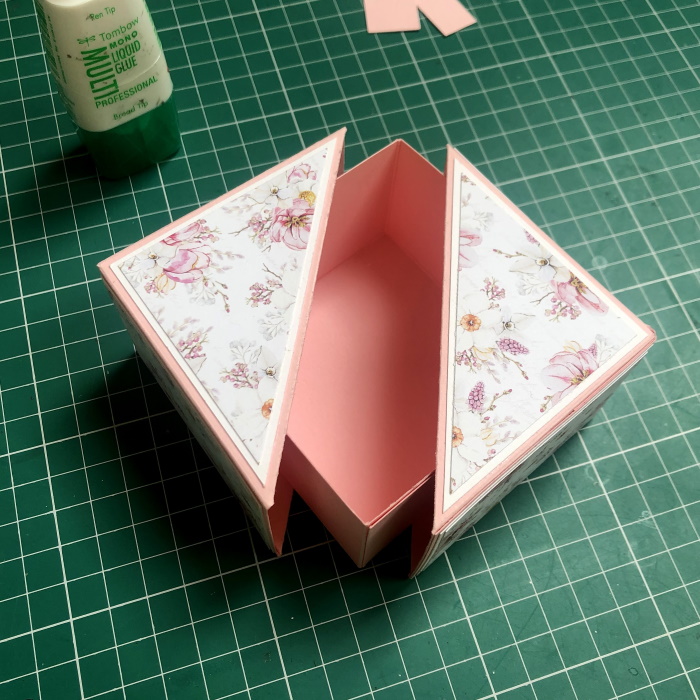
Fold the outer triangles of the 3″ squares inwards and crease with a bone folder. Trim a little if necessary. Once you’re happy with the fit, apply adhesive and stick them down.

Apply adhesive to the inside of the tab you shortened.

Fold up the left side to make the triangle shape, and adhere the tab.

Apply adhesive to the 2″ section, fold up and adhere over the shortened tab.


Adhere all the paper pieces to the white card pieces and adhere them to the top, bottom, and sides of the box.


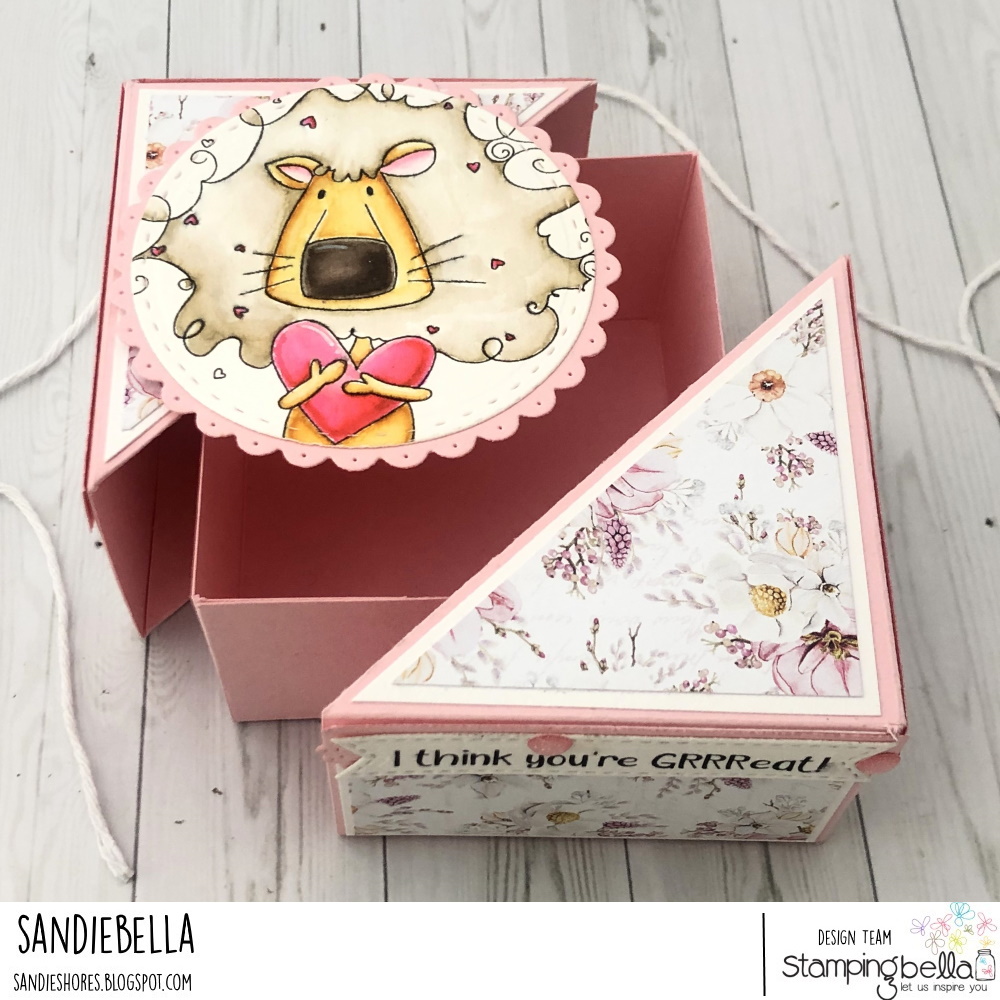
For the inner box cut one piece of card measuring 6.75″x 6.75″.

Cut along the outer score lines and taper the edges of the outer sides as shown

Cut the tabs to about half their length.
Apply adhesive to the tabs and fold up the to make the box.
Ensure the box fits in the outer casing.
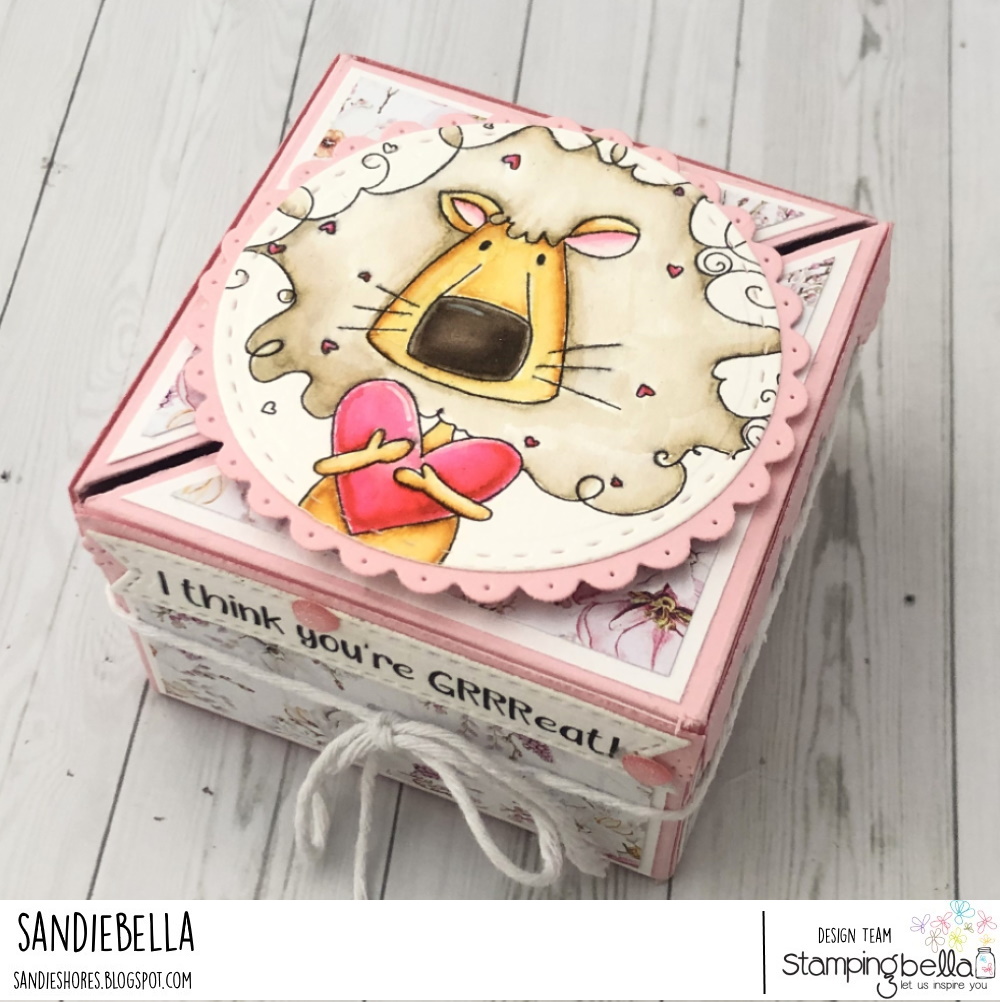
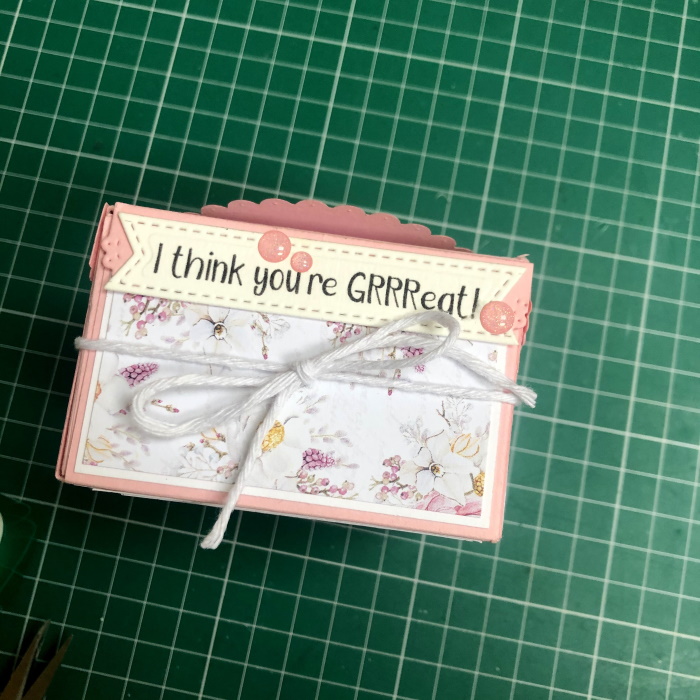
Stamp the sentiment and cut out using a pennant die.


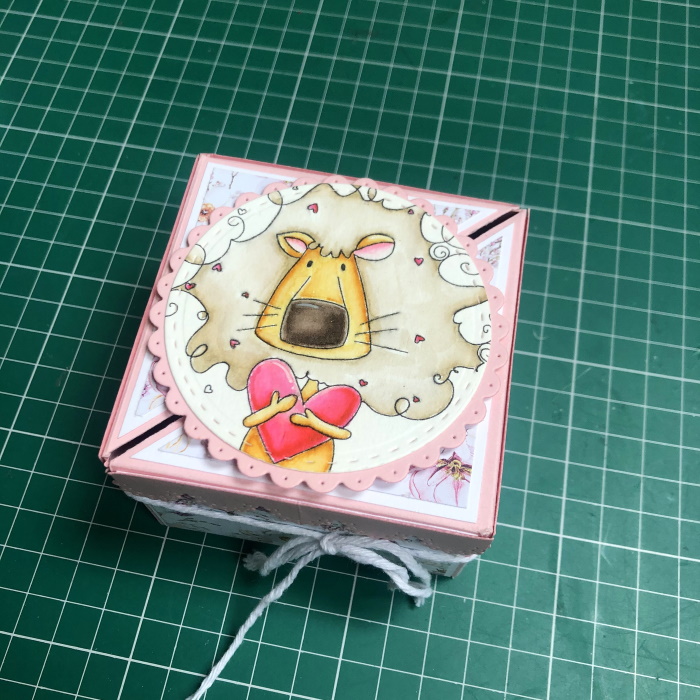
Cut out using a stitched circle die.

Cut a scalloped die a little larger than the image and adhere them together.

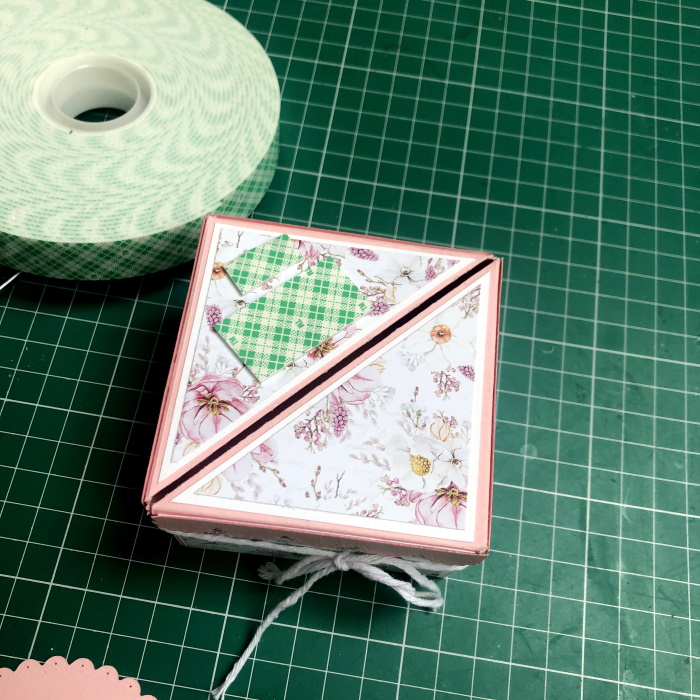
Assemble the box and use twine to hold it together. Apply foam tape on one side of the box
Adhere the image to the foam tape.
Adhere the sentiment to the front of the box and decorate with some glitter dots.
Fill the box with chocolates, a gift card, or other small gift.
Over To You!
Share your personal favourite Stamping Bella creations with us. We LOVE to see what you’ve been creating with Stamping Bella stamps. Share a link to your latest Stamping Bella card in the comments below, or an old favourite you made a while ago. Tell us what your favourite stamps are. Are there any additions you would like to see to the range? Let us know!
Another way to connect is by joining us in the Stamping Bella Sistahood Facebook Group and share your pictures.
If you are posting your images online, we would love to see them on Instagram and all the platforms mentioned above. To make it easier for us to find you just use #stampingbella as a hashtag. Even better tag me @markergeek and Emily @stampingbella . We love it when you connect, so don’t be shy!
Until next time, HAPPY STAMPING!
MWAH
This is absolutely awesome especially with one of those new, cute list be you’ve released this month. I can see so many options for this box. Thank you for sharing this. Stay safe and healthy x
Love this box and that Lion is the ‘cat’s meow’… lol. I like the design, the colors, the quote… seriously… everything. Thank you so much for sharing and please stay safe.