


Hiya sistahs, happy Thursday with Sandiebella !
Today Sandiebella teaches us how to make a CORNER FOLD CARD
Corner Fold Card


Cut a piece of white card measuring 11″ x 5.5″. Score at 5.5″ on the long side and fold in half to make the card base. Adhere a 5-3/8″ piece of designer paper on the front.

Measure down 5/8″ from the top and, from the open side, measure across 4″. Then measure down 4″ and in 5/8″ on the open side of the card. Draw a line from the 5/8″ to the 4″ lines as shown below.


Take a ruler a place it diagonally across 5/8″ points. Score from the points to the outside of the card

Gently fold back the score lines to flip the corner.

To ensure it’s straight, place a piece of white card behind the card front. Adjust the creases as necessary


Cut a piece of white card measuring 3-7/8″ square and a piece of paper measuring 3.75″ square. Adhere them together

Adhere the square panel to the card front, leaving small border around the edges.

Cut a white card circle approx. 3.75″ in diameter, an a paper circle approx 3.5″ Adhere them together, then adhere them to the card front.

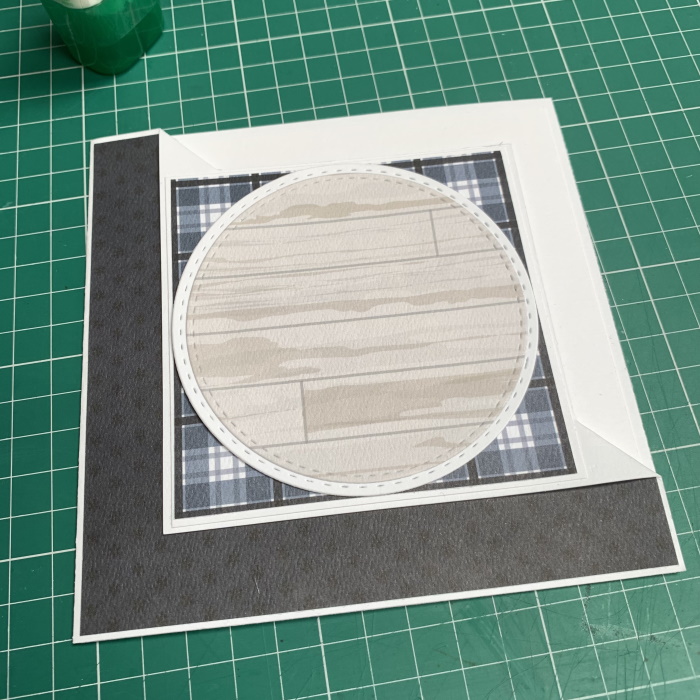
On the inside, adhere a 5.25″ white card square, a 5-1/8″ paper square and then a 4″ square panel for a greeting. Ensure the 4″ square is tucked behind the panel on the card front.

Fussy cut around the outline of Mini Oddball Christmas Pudding.


Stamp the sentiment onto a white strip and cut apart.

Adhere to the circle panel beside the image.

Embellish with enamel dots.
Another way to connect is by joining us in the Stamping Bella Sistahood Facebook Group and share your pictures.
If you are posting your images online, we would love to see them on Instagram and all the platforms mentioned above. To make it easier for us to find you just use #stampingbella as a hashtag. Even better tag me @stampingbella . We love it when you connect, so don’t be shy!
Until next time, HAPPY STAMPING!
MWAH