


Birdhouse Card
Hiya sistahs, happy Thursday with Sandiebella !
Today Sandiebella teaches us how to make a Birdhouse Card!


Take the tallest bird and adhere to a 2.25″ strip of card. Set all the images aside to work on the card.

Hexagon Dies – 2-5/8″W and 2-1/8″W

Score the 11″ x 4.25″ piece of kraft card on the long side at 5.5″

Make a notch at 3″ and 7″, top and bottom of the card base. When the card base is folded these will be 1.5″ down each side.

Fold the card base in half and on the closed end make a notch at 2-1/8″. Flip over to the other side and again make a notch at 2-1/8″.

Score from one 3″ notch, diagonally through the 2-1/8″ mark, down to the 7″ notch on the opposite side.

Repeat on the other side to create an X as shown.


Adhere the white card and the small designer paper together.

Place the larger hexagon die approx 1.5″ down and centred horizontally. Run through a die cutting machine a few times to cut through both layers.

Adhere the panel to the card front. Reposition the hexagon die and cut out the kraft card.


Take another of the white card pieces and position it inside the front of the card – DO NOT GLUE DOWN. Holding the white card in place, turn over to the front and draw a feint pencil line around the inside of the hexagon shape. Place the smaller hexagon die in the centre of the pencil outline and run though the die cutting machine.

Adhere the card piece inside the card font, centering the white border.

Adhere the paper layer on the inside back.

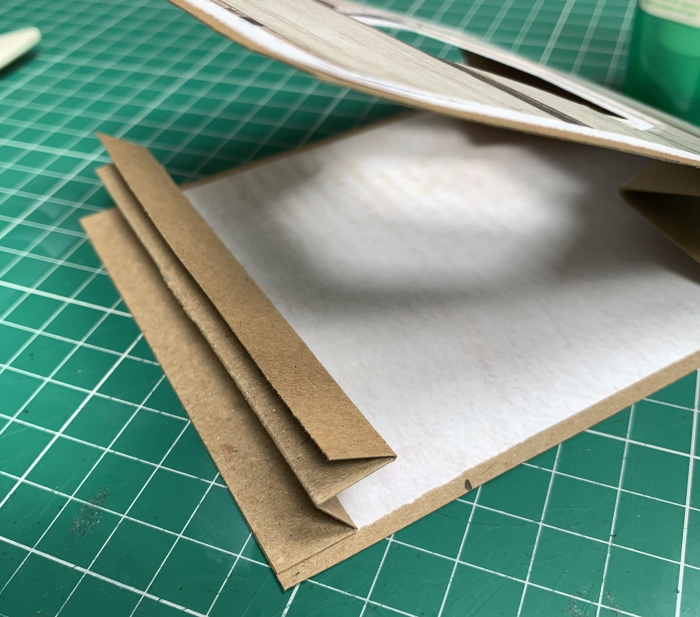
Fold the diagonal score lines on the card base and crease well with a bone folder. Valley fold the 5.5″ centre score line and pinch in the top of the card. Crease the score lines again.

Take the 4″ x 2″ piece of kraft card and score at 0.5″, 1″, and 1.5″ on the 2″ side.

Mountain valley fold into an M

Apply adhesive to one side and adhere to the inside back of the card, flush to the bottom. Apply adhesive other side and fold the card front down. Use wet glue to give you some wiggle room to line up the ends.


Take the third white card piece and stamp the sentiment from the I Miss Your Face Sentiments set. Adhere to the back of the card.


Take the bird attached to the strip of card and apply adhesive to the bottom part of the strip.

Slide the strip into the card, position the bird with it’s feet over the edge of the hexagon, and adhere the strip to the inside of the card front.

Adhere the branches and the other bird to the card front.

Stamp the sentiment from the Encouragement Sentiments set, cut out using a shaped die. Punch a hole on the end and tie some thread/string through it and into a bow.

Adhere the sentiment to the birdhouse using foam tape.
Another way to connect is by joining us in the Stamping Bella Sistahood Facebook Group and share your pictures.
If you are posting your images online, we would love to see them on Instagram and all the platforms mentioned above. To make it easier for us to find you just use #stampingbella as a hashtag. Even better tag me @stampingbella . We love it when you connect, so don’t be shy!
Until next time, HAPPY STAMPING!
MWAH
Comments are closed.


Thank you! appreciate you sharing your art – love your style!