Thursdays with Sandiebella

It’s Thursday with Sandiebella !

Hiya sistahs, happy Thursday  with Sandiebella !

Today Sandiebella teaches us how to make a Mother’s Day Gift Box using our Curvy Girl Mom rubber stamp


Supplies:
Card
Designer paper
Scoring board and bone folder
Adhesive
Scalloped border, Heart, and Tag dies
Twine
Packing straw
How to:
Stamp Curvy Girl Mom on to a 5.5″ x 4.25″ piece of  white card and colour using your preferred medium. Stamp the sentiment in the top left.
The box base is made up of 2 pieces. 
One piece measuring 10.5″ x 12″ and the other measuring 7″ x 12″
Score the 10.5″ x 12″ on the long side at 2″ and 10″. Flip to the short side and score at 2″, 4″, 6.5″, and 8.5″
Score the 7″ x 12″ piece on the long side at 2″ and 10″, and on the short side at 2″, 4″, and 6.5″

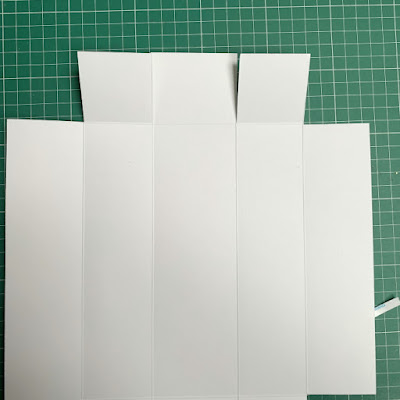
Fold and crease all the score lines of both pieces.

On the smaller piece, cut away the top and bottom 0.5″ sections and taper the edges of the centre section. On the opposite side, cut away the outer 2″ section, on both ends. Cut the remaining score line up  to the intersecting score line.

Cut a tiny sliver off the end of the remaining 2″ section, apply adhesive and fold down onto the inner 2″ section.

Adhere the side tabs to the inside of the box.

On the large piece, cut away all four outer squares. Cut the remaining score lines up to the intersecting score line.

Again, remove a tiny sliver from each of the outer short sections, apply adhesive and fold down onto the inner 2″ sections.

Shorten the outer tabs to approx 1″. Apply adhesive and adhere to the inside of the centre tab.

Apply adhesive to the 0.5″ section of the smaller box piece and adhere the full box to it.

Cut 2 pieces of card measuring 2″ x 5″ and adhere them to each end of the box.

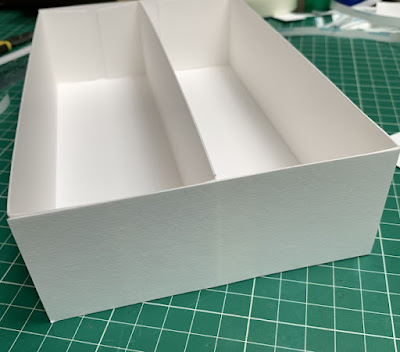
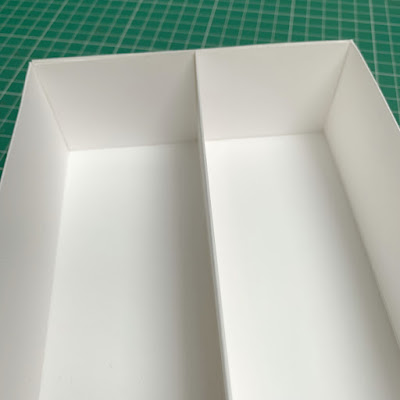
Cut four pieces of card measuring 2″ x 2.5″ and adhere to the inside ends of the boxes. Trim down as necessary.

To make the lid of the box, cut one piece of card measuring 9-1/16″ x 10-1/16″ and another piece measuring 9-1/16″ x 3″
Score the large piece on the long side at 2″, and on the short side at 2″ from each end, leaving 5-1/16″ in the centre.

Score the small piece on the short side at 1″ and on the long side at 2″ from each end, leaving 5-1/16″ in the centre.

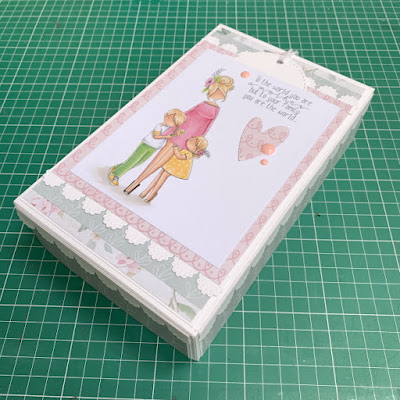
On the small piece, cut away the 1″ sections leaving only the centre one. Apply adheside and adhere it to the large lid piece.

Adhere the tabs to the long sides to complete the lid.

For the panels, cut:
Card
(2x) 4-7/8″ x 1-7/8″
(2x) 7-7/8″ x 1-7/8″
(1x) 7-7/8″ x 4-7/8″

Paper

(2x) 4.75″ x 1.75″
(2x) 7.75″ x 1.75″
(1x) 7.75″ x 4.75″
Adhere the panels to the box lid and add a scalloped border all around.
Layer papers and the image onto the top of the lid, adding more scalloped borders and a stitched tag.
Decorate as desired.
Insert some packing straw into each compartment and place a small bottle of Prosecco and 6 Raffaello inside – or, if you prefer, different types of chocolates in each compartment instead of the Prosecco.
Share your personal favourite Stamping Bella creations with us. We LOVE to see what you’ve been creating with Stamping Bella stamps. Share a link to your latest Stamping Bella card in the comments below, or an old favourite you made a while ago. Tell us what your favourite stamps are. Are there any additions you would like to see to the range? Let us know!

Another way to connect is by joining us in the Stamping Bella Sistahood Facebook Group and share your pictures.

If you are posting your images online, we would love to see them on Instagram and all the platforms mentioned above. To make it easier for us to find you just use #stampingbella as a hashtag. Even better tag me @stampingbella . We love it when you connect, so don’t be shy!

Until next time, HAPPY STAMPING!

MWAH

One Comment

  1. Sandra Bonagura says:

    thank you …. this is so useful!

Leave a Reply

Comments (required)