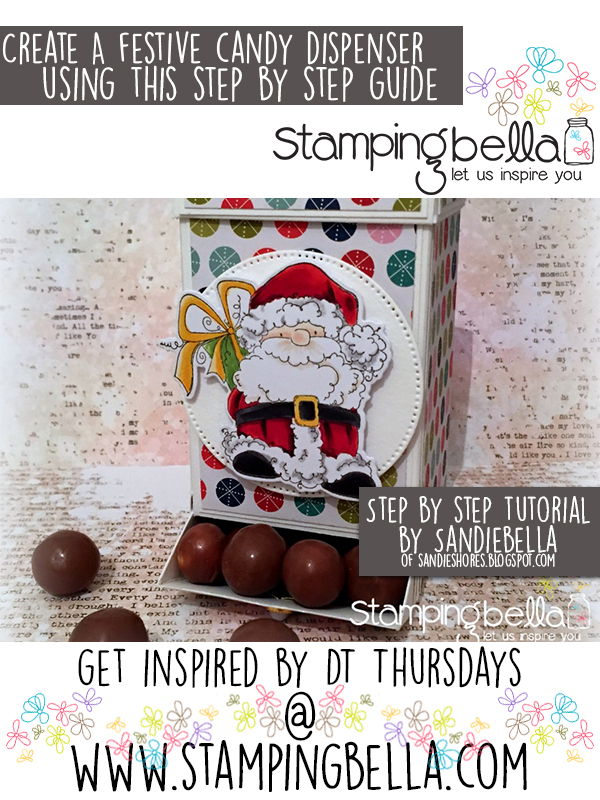
Time for another fab DT Thursday tutorial from Sandiebella!
 Santa Candy Dispenser
Flip the card 90 degrees and score at 1″
Cut away the corner where the 1″ scoreline meets the 10″ perpendicular scoreline.
With the 1/2″ section on the right, measure on the second 2.5″ section, from the bottom up to 1.5″ and mark with a pencil. Cut from the bottom up to the 1.5″ pencil marks.
Add a second pencil mark at 1.25″
Using a craft knife or trimmer, cut across on the 1.25″ and remove the piece.
Cut the bottom 1/2″ sections up to where it meets the scoreline. Taper the edges of all the 1/2″ sections except the one on left. Set the whole thing aside.
Next, cut a piece of white card measuring 4 9/16″ x 4 9/16″ and score at 0.5″ and 1″ on all four sides.
Cut away the 3 outer squares on each corner and make a tab from the last one, tapering the edges.
Apply double sided tape to the outside of the tabs, and the inside of the outer sections.
Adhere the small tabs to the adjacent side, on the inside and then fold down the longer tabs. Burnish with a bone folder.
Cut a piece of white card measuring 4.75 x 3.5″
Score on the 4.75″ side at 1 1/8″ and 3 5/8″
Turn the card 90 degrees and score at 1″
Cut away the 2 outer bottom pieces, leaving a T shape.
Score the outer piece diagonally, from the top at the scoreline to the outer edge, on both sides.
Using a scissors, snip away a piece of the corners
Turn the card over and apply some wet glue to the tabs.
Fold inwards and burnish well.
Use a scissors to trim away any uneven bits.
Fold in both sides and burnish well.
Now take the rest of the white card and patterned paper cut earlier and adhere the paper to it’s matching white card.
Adhere all the panels to the box
Stick the drawer pieces onto the drawer front.
Apply double sided tape to the 1/2″ tab.
Turn it over so that the inside is facing upwards. Fold both sides inwards to adhere the 1/2″ tab to the inside of the end panel.
Apply double sided tape to the 1/2″ sections at the bottom of the box.
Fold in the tab that you didn’t taper and then adhere the side tabs to it.
Slide each side of the drawer into place.
The 1/4″ slits on each side will hold the drawer closed.
Close in the drawer fully, and fold rest over the bottom of the box.
Now place the lid on the box to make sure everything fits.
Add a brad to make a drawer knob.
Stamp Santa has a Prezzie onto some white card and colour using your desired medium.
Adhere Santa to the front of the box.
Stamp the sentiment and cut out using a circle die/punch. Cut a larger circle from patterned paper and adhere them together. Stick them to the lid of the box using 3D foam tape/dots.
Fill with candy and open the drawer to dispense it 🙂
If you try out the techniques shown in any of the posts with your Stamping Bella stamps, be sure to share! We would love to see the results and hear how you feel about them. Show off your creations in the comments below and even better, share your own favourite tips with us. Let’s talk stamping!
If you are posting your images online, we would love to see them on Instagram and all the platforms mentioned above. To make it easier for us to find you just use #stampingbella as a hashtag. Even better tag @stampingbella . We love it when you connect, so don’t be shy!
If you’re on Facebook join us in our private chat group Stamping Bella Sistahood to share your creations there and chat all things Stamping Bella related!
Until next time, HAPPY STAMPING!
MWAH
Elaineabella
So adorbs!! I love that Santa too!
This is so adorable! It looks very complicated to me and I don’t have some of those tools but wow, you guys are so creative! I love what everyone does!
I can’t wait to try this. So cute. The grandkids will love it, I’m sure. Thanks so much for these Thursday creative posts.
So charming! Thanks for sharing.
Thank you Sandy for these wonderful projects! This is going to make such a wonderful gift. You inspire me every week!!
Oh this is awesome! Love this!!! 🙂