Time for another
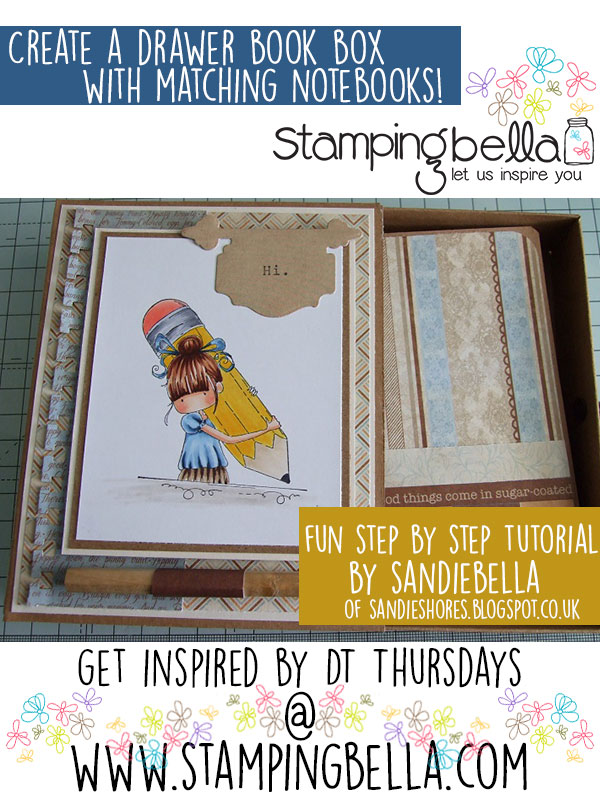
Design Team Thursday! This week we’ve got a fantastic tutorial for you from our fantastic Sandiebella, sharing how she creates a lovely Drawer Book Box project and uses Stamping Bella stamps to decorate it to make the perfect handmade gift.
The best thing? This project does not require any fancy or expensive equipment – just a scoring board and paper trimmer!
As the school holidays are fast coming to an end here I decided to try my hand at designing a Drawer Book Box and matching notebooks. This is all cut and scored by hand so there is no need for a cutting machine.
Book Box – what you need:
Kraft card
Cream card
Authentique patterned papers
Drawer knob
Small pencil
Scoring Board & Tool
Paper Trimmer or Craft Knife and Ruler
The How To…
Cut the kraft card – 1 piece 10.25″ x 5.5″ and 2 pieces 6.75″ x 4.5″
Score the largest piece, on the long side, at 4.5″ and 5.75″.
Fold and crease the scorelines, Curve the centre piece slightly to create the book spine. Set this aside for now.
Score the two smaller pieces, on the long side, at 5.5″ and 6.5″.
Cut another piece of kraft measuring 9.5″ x 8.5″ and score, on all four sides,at 1″ and 2″.
On all four sides, cut away the 3 outside squares as marked here.
Cut the remaining square up the inside score line and taper in the edges on all tabs, as shown
Fold all the scorelines and crease with a bone folder.
With the outside facing up, apply score tape or wet glue to the 4 small tabs.
Turn the kraft over and apply score tape to the top inside of the longer tabs.
Remove the backing from the tape and adhere the small tabs to the inside of the adjacent panel. Repeat for all 4 tabs.
Fold the larger tabs down and adhere to the inside of the box. Set this aside for now.
Taking the 6.75″ pieces, fold and crease the scorelines. Taper the edges of the 0.25″ tabs
Apply a strip of score tape along the 0.25″ tabs on both pieces.
Adhere the tab to the inside of the other piece
Ahere the other 0.25″ tab to the end of the first piece, to make a drawer wrap.
Take the drawer your had put aside, and ensure it fits in the wrap.
Cut some cream card – 2 pieces 5.25″ x 4.25″ and 1 piece 1 1/8″ x 4.25″
Cut some patterned papers – 1 piece 51/8″ x 4 1/8″ and 1 piece 1″ x 4 1/8″
Layer the cream card and then the patterned papers, to the front, back and side of the book box.
Apply score tape to both sides of the drawer wrap.
Remove the top line of score tape and line the wrap exactly to the end of the inside of the book cover. It should go right up to the first scoreline and be the full length of the cover. Once you are happy that it’s lined up, remove the other 2 strips of score tape and burnish well.
This is how the cover should look from the front.
Next cut a piece of card and patterned paper for the front of the drawer.
Using a crop-a-dile, punch a hole in the centre of the drawer front and attach a drawer knob.
Stamp and colour the image, matting it with kraft and cream card.
Cut the sign and stamp the Hi sentiment. This sentiment comes with Penelope.
Design the front of the box as desired. I added a little pencil, which is rolled in matching patterened paper and adhered under the image.
Cover 3 small notebooks with coordinating patterned paper.
This is the whole project completed.
I hope you enjoyed this tutorial and you are inspired to make your own.
Thanks for dropping by
Sandie
Over To You!
We hope you’ve enjoyed checking out Sandiebella’s tutorial and are feeling inspired to try it out yourselves. If you do, make sure you drop by and share with us! You can get in touch in all the following ways:
- On our Facebook page – tag us, post your Stamping Bella creations on the page.
- In our Facebook Group Stamping Bella Sistahood – share your creations, chat with other sistahs!
- On Instagram – tag @stampingbella and view our feed HERE.
- Here on the blog – share your thoughts and links to your Stamping Bella creations down in the comments section!
Happy Stamping!

fab idea, thanks
hugs
céline
great tutorial! always looking for little projects… will surely give this one a try! and i have that cute stamp in my collection 🙂
I love this idea! Pinned it!
Oh, I love this project! Thanks so much for the detailed tutorial, it is terrific with all the photos! What a wonderful box of notebooks. Must try this today!
Precious, love it!
A fabulous tutorial!!
Christine x
Love this project! Great idea. Thanks for the tutorial.
Oh what a fantastic tutorial! I’m bookmarking this page! I’m going to have to give this a try. Thanks so much for sharing!!! 🙂
What a great idea! I don’t know that I would ever do this for anybody because I don’t have that stamp and I wouldn’t have anybody to give it to. It is an adorable gift for somebody and I am glad that I got to see it.
The crafts are outstanding and original. I’ve never seen the ideas anywhere else but here on StampingBella. Such talented artisans. I’m so amazed. Thank you for sharing apart of you selves with us.