Hey hey, Elaineabella here with this week’s Stamp It Saturday post courtesy of our fantastic Sandiebella!
It has been quite a whirlwind this week with the NEW RELEASE. I’m still recovering, personally… What better way to unwind than with a cardmaking project?


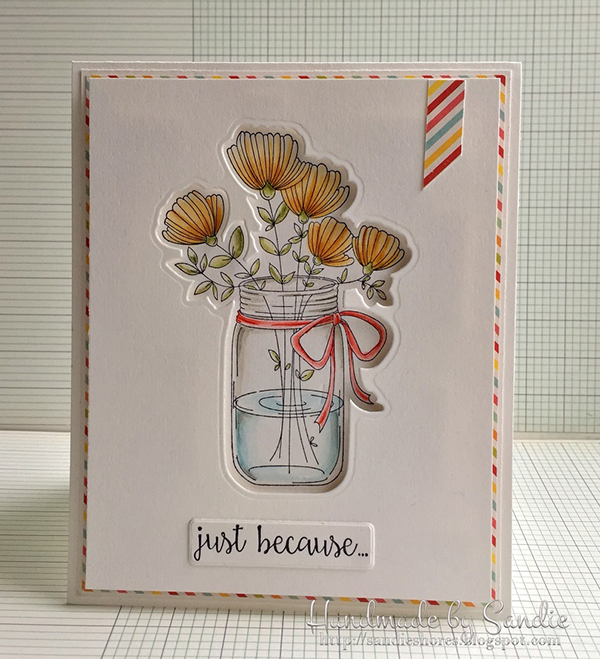
Stamp the image onto white card, making sure to leave plenty of border all around.
Colour with your desired medium. I used a plain white card and distress markers
Once it’s coloured up, choose your patterned paper and cut your card base and layers.
Take the top layer of card and position the die on it, leaving space at the bottom for the sentiment.
Run it through your die cutting machine and remove the jar cut-out.
Trim down the image, so that it’s slightly smaller than the die cut layer.
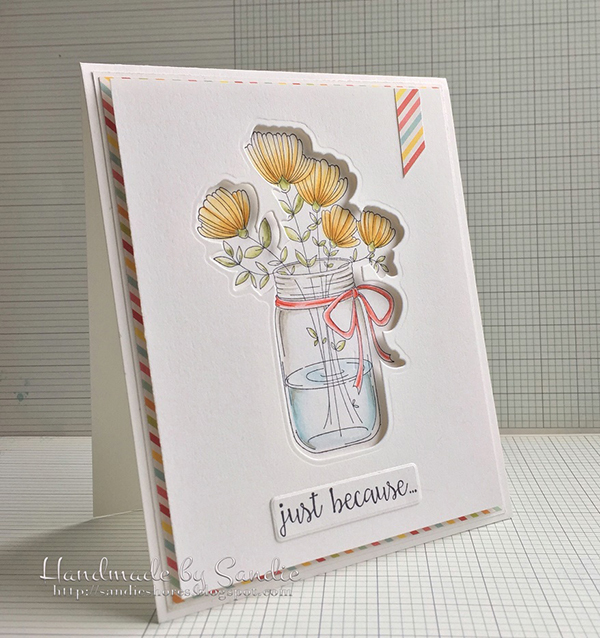
Apply foam tape to the back of the white card.
Remove the tape backing and carefully position the ‘frame’ over the jar of flowers, so that it’s centered.
Stamp the sentiment and cut out using the coordinating die.
Adhere the sentiment in place.
Alternatively, you can stamp the sentiment directly onto the card front, after you cut out the shape and before you apply foam tape.
If you try out the techniques shown in any of the posts with your Stamping Bella stamps, be sure to share! We would love to see the results and hear how you feel about them. Show off your creations in the comments below and even better, share your own favourite tips with us. Let’s talk stamping!
If you are posting your images online, we would love to see them on Instagram and all the platforms mentioned above. To make it easier for us to find you just use #markergeekmonday and/or #stampingbella as a hashtag. Even better tag me @markergeek and @stampingbella . We love it when you connect, so don’t be shy!
If you’re on Facebook join us in our private chat group Stamping Bella Sistahood to share your creations there and chat all things Stamping Bella related!
Until next time, HAPPY STAMPING!
MWAH
Elaineabella
Comments are closed.
This is really cool!! Thanks for the inspiration!!
Love this idea! Thanks for sharing.
Wow what depth you get with this lovely technique. Love it and will try.
Very effective. Great.
Oh what a great card! I will certainly give this a try! 🙂
This is too cute! I love this technique and will have to try it.