


Elaineabella here with this week’s Stamp It Saturday post! I’ve been playing with Distress Inks again, and I thought I would share another really simple yet effective way to use them on your cards, together with a bonus tip!
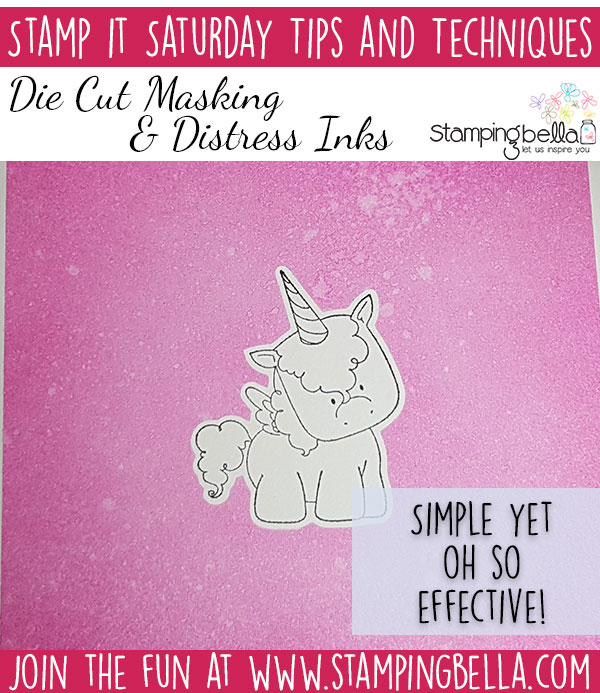
Die Cut Masking with Distress Inks
One layer cards can be so effective, and so easy to pop in the post (not to mention cheaper). Using die cuts to mask before inking a background using Distress Inks is a great way to achieve a one layer look and still have plenty of crafty fun!
My previous post on Distress Inks: Stamp It Saturday Distress Ink Backgrounds with Elaineabella
I wasn’t having the best day when putting this one together, so you can benefit a little from my foggy brain and see how the right tools can really help you out of a stamping bind! Read on and chuckle at my ineptitude. 😉 You will also notice that I’ve used one of my favourite stamp sets again, and I’m not even sorry! Unicorns forever! 😉 No, I will use something else soon…I promise… In the meantime, enjoy the cuteness, because these are the bestest unicorns ever. I could have gone all themed on you and used an Easter stamp but that just isn’t how I roll. 😉
I started off on the wrong foot, by masking the first piece I worked on using a mask I created using the stamp outline. Whoops. Imagine my face when I realised…sigh… After trimming another piece of card, I went back to work:
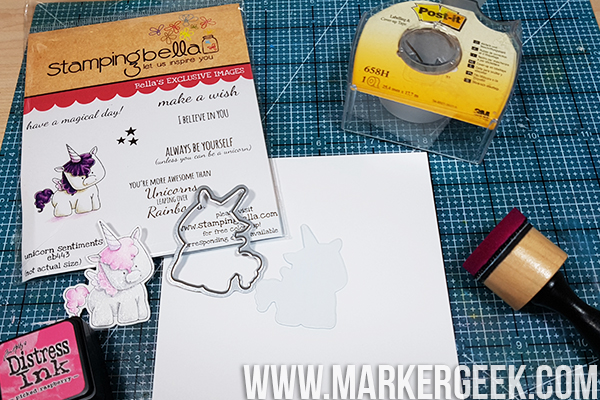
Using Inkadinkado Stamping Mask paper and the appropriate die I die cut the standing unicorn from the Stamping Bella Unicorn Sentiment set and positioned the mask centrally on my 12cm x 12cm square piece of Bristol Board.
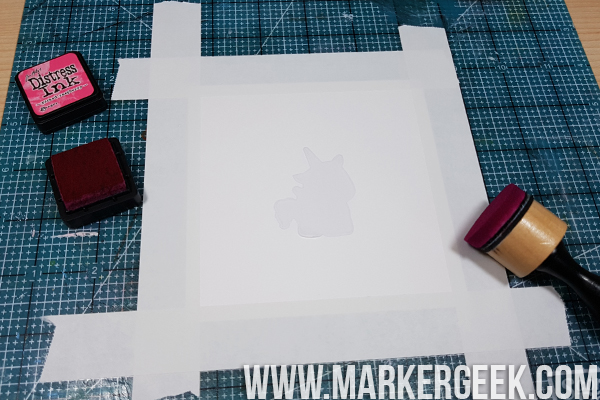
I then masked off the edges of my paper to create a border as in my Stamp It Saturday Distress Ink Backgrounds with Elaineabella post from last week.
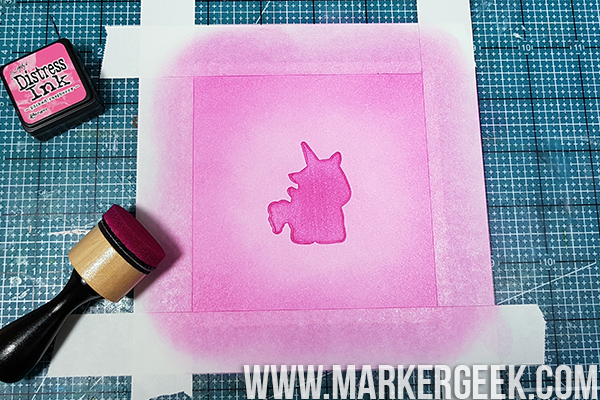
Using Distress Ink Picked Raspberry and a mini blending tool I carefully blended the ink until happy with the coverage and colour.
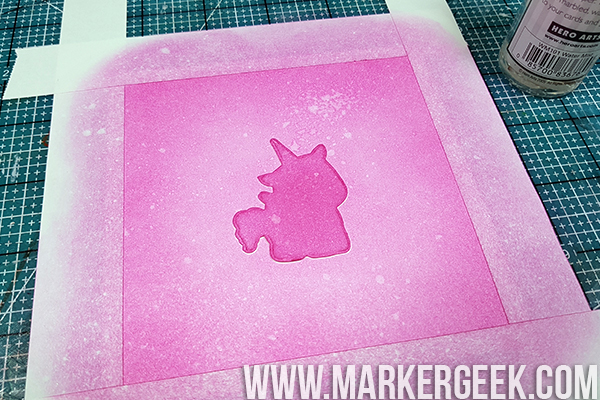
As in my Stamp It Saturday Distress Ink Backgrounds with Elaineabella post from last week I then used a water spray to spritz some water over the background, which I then dabbed off with a paper towel. Love this effect.
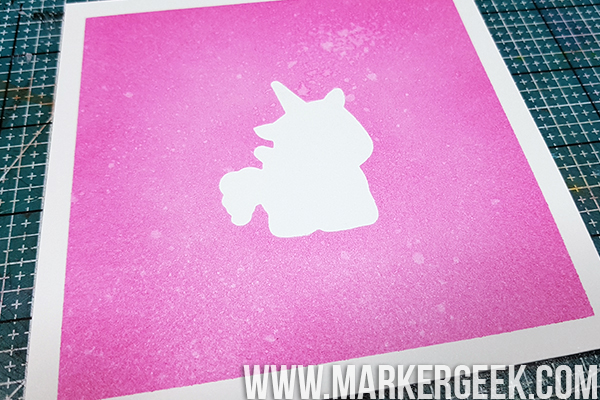
After removing all of the masking paper to reveal the background I smacked myself in the forehead, realising that it would probably have been smarter to stamp the unicorn first before masking, since Stamping Bella stamps are rubber not clear. However, a stamp positioning tool like the MISTI makes this NO PROBLEM AT ALL even with rubber stamps, so I was safe. Quite frequently I find myself grateful I took the plunge and made the investment.
Here’s how to do it:
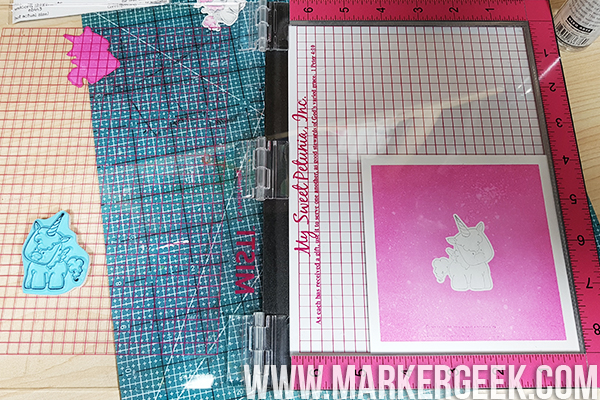
Using my trusty piece of acetate sheet over the top of my masked background, I test stamped the unicorn until I was happy with the positioning. The acetate sheet is invaluable for this. I simply cut mine down from an A4 sheet I had in a pack.
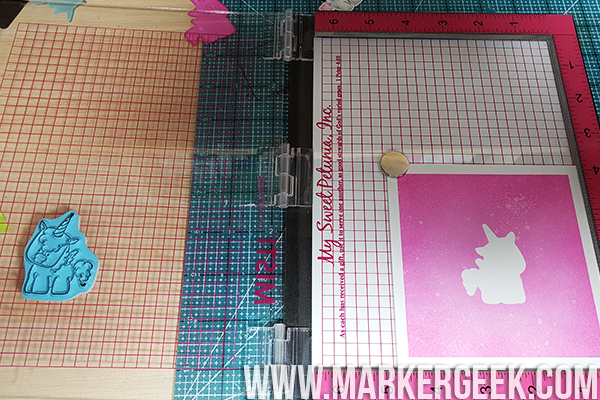
I held my breath because I’m silly and stamped for real!
Perfecto! I would not have even tried with just an acrylic block! A Stampamajig, maybe, but I find the MISTI so much simpler. To be honest, I’d probably need to use it even if I were using a clear stamp…
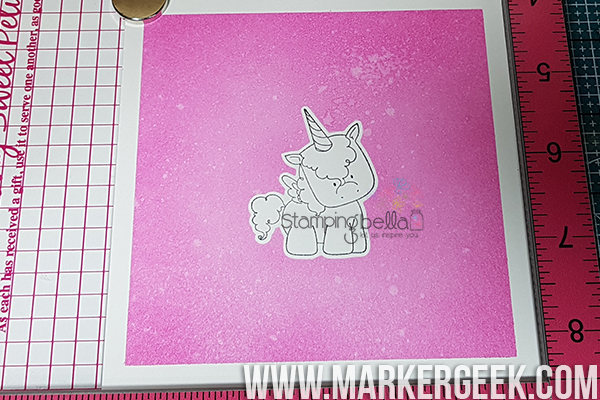
Fast forward and here’s the card:

I coloured the unicorn using Prismacolor Pencils in the following colours Body: 10% Warm Grey,30% Warm Grey,White Hair: Violet,Parma Violet,Lavender,White Horn/Wings: Lavender,White
TIP: You could try this technique with other inks, of course, and you could also use other media like Copics, either by colouring directly on the masked paper using the markers or airbrushing.
Over To You!
If you try out the techniques shown in any of the posts with your Stamping Bella stamps, be sure to share! We would love to see the results and hear how you feel about them. Show off your creations in the comments below and even better, share your own favourite tips with us. Let’s talk stamping!
If you are posting your images online, we would love to see them on Instagram and all the platforms mentioned above. To make it easier for us to find you just use #markergeekmonday and/or #stampingbella as a hashtag. Even better tag me @markergeek and @stampingbella . We love it when you connect, so don’t be shy!
If you’re on Facebook join us in our private chat group Stamping Bella Sistahood to share your creations there and chat all things Stamping Bella related!
Until next time, HAPPY STAMPING!
MWAH
Elaineabella
I don’t know how anyone who stamps does so without a MISTI….one of the greatest investments I’ve ever made….totally changed my opinion about stamping….I found I had stamps I rarely used because I didn’t always get a good image…with the MISTI, problem solved. I’ve been taking my stamps off their wood blocks, too….some I have to put in the microwave for 15 or so seconds to help them release easier.
I, too, love that masking paper….I had a roll of another brand which was fine (no release sheet tho), but the Inkadinkado with the release paper is much easier to handle. I keep my masks and store them with the stamps.
Hi Elaine,
I love every one of your posts! You make things look so easy and it helps to hear about your mishaps, too. I so need a MISTI! Love your adorable unicorns and looking forward to seeing more unicorn cards!
Hmmmm….maybe a MISTI is a need, just not a “want”.
What a cute card! I will have to give this a try! I have usually done it the other way around, stamp, mask, and then background. This looks a little easier! 🙂
Another fabulous tutorial Elaine (and yes I did smile!) – thank you! You explain things so well and clearly… and of COURSE, I love the PINK background too. I love my MISTI too….. I don’t know what I ever did without it!
The unicorns have made a little appearance on my desk too this weekend… they’re currently being worked on…
Happy Easter
Christine x
Wonderful card and instructions too