


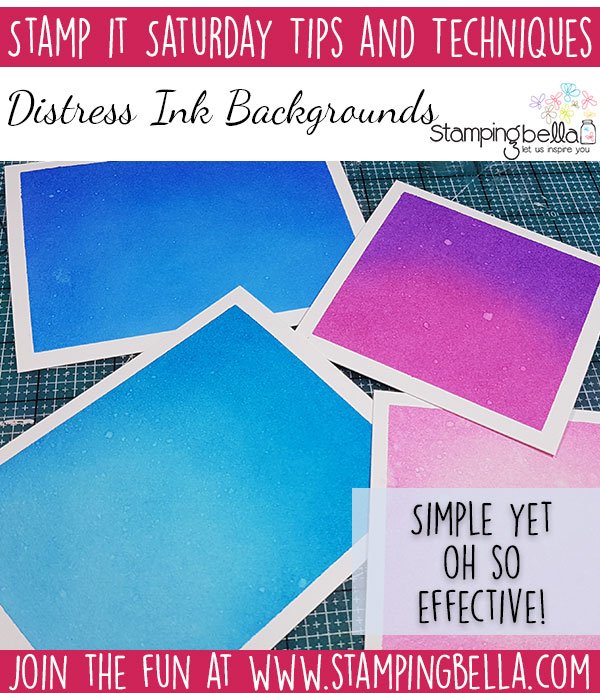
Elaineabella here with this week’s Stamp It Saturday post! This week I’ve been playing with Distress Inks, and I thought I would share how easy it is to create simple yet effective backgrounds to complement Stamping Bella images.
Distress Ink Backgrounds:
If you caught my Marker Geek Monday post this week you may have seen some of my cards featuring Distress Ink backgrounds. Here’s one of them:

Stamp Used: Stamping Bella Set of Unicorns & Coordinating Dies
And here’s a little guide to how I create the backgrounds:
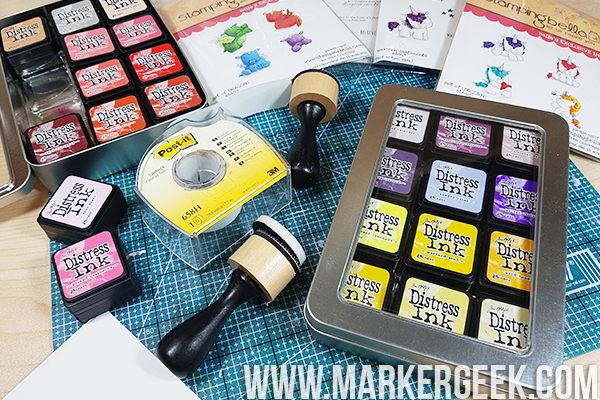
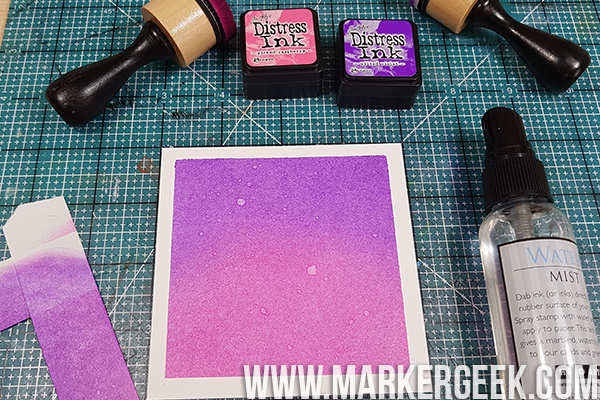
I switched a while ago from the full size Distress Ink pads to the minis. If you’re just getting started, I’d recommend just buying the minis – they come in sets which you can get at great prices if you shop around. They take up less space, which is a big bonus for me. Because they are easier to store, I find it easier to pull them out to use.
I’d also recommend the mini blending tools and foams, even if you have the full size ink pads. The round foams are so much nicer to blend with, helping to avoid hard edges and lines.
As far as paper goes, try out what you have on hand. My personal preference is for Bristol Board as I find the ink blends a little better on it than other cardstock I have used in the past.
The following steps will create a Distress Ink background with a white border around it – ideal for clean and simple cards, and so easy to achieve.
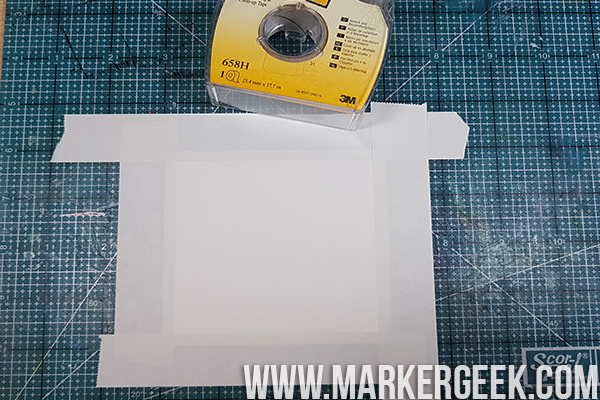
Cut your chosen paper to size (I cut mine to 12cm square or about 4 3/4″ square). Line it up on a grid lined cutting mat (you could use grid lined paper if you don’t have a mat) and use the lines on the mat to secure it with masking tape, using the masking tape to create an even border around the edge of your paper.
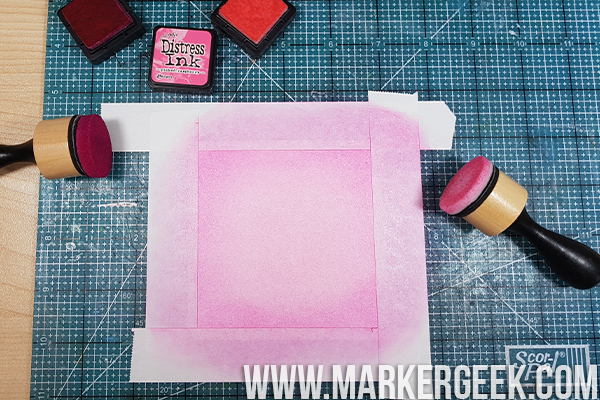
Take your chosen Distress Inks and the blending tools, and blend away!
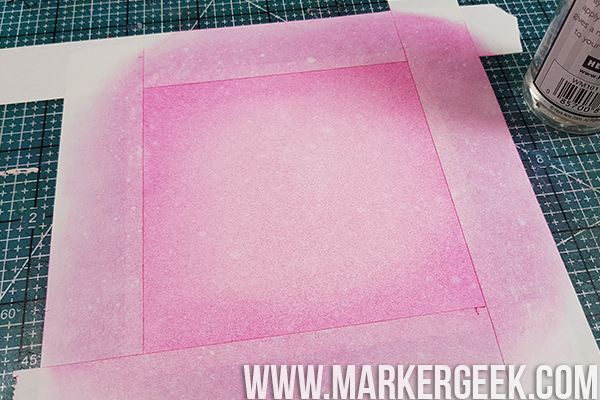
Time for the magic! Take a spray bottle filled with water and spray a fine mist over the paper. Because Distress Inks react with water, this helps the ink to blend even more, softening it, and removing little spots for a cool effect.
Take care here not to over-wet the paper, especially on the taped edges, as the ink may bleed under the tape (other tapes would probably be better for this, I was just using what I had on hand, and it works pretty well as long as you don’t get over-excited with the spray). To speed things up and avoid the ink travelling under the edges, use a heat gun to give it a quick blast and dry. You can also use a paper towel or cloth to dab off some of the water.
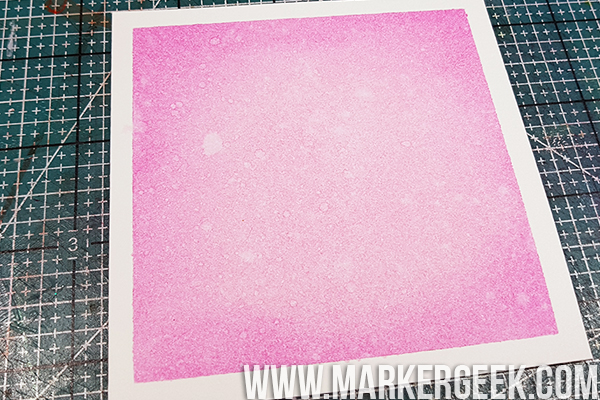
My favourite part! Carefully peel up the masking tape to reveal your background with a lovely white border.
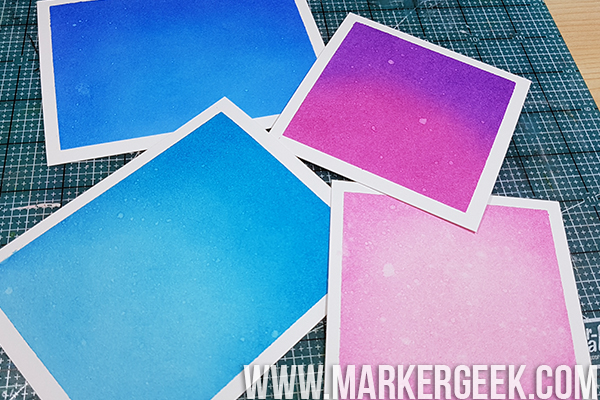
Here are some more I created. When I’m playing with Distress Inks I like to sit and create several backgrounds at once, so I have them on hand for cards.
You may see some of these popping up next week on cards I’m creating for Marker Geek Monday, so don’t forget to stop by and see what I’ve been up to! Have a great weekend!
Over To You!
If you try out the techniques shown in any of the posts with your Stamping Bella stamps, be sure to share! We would love to see the results and hear how you feel about them. Show off your creations in the comments below and even better, share your own favourite tips with us. Let’s talk stamping!
If you are posting your images online, we would love to see them on Instagram and all the platforms mentioned above. To make it easier for us to find you just use #markergeekmonday and/or #stampingbella as a hashtag. Even better tag me @markergeek and @stampingbella . We love it when you connect, so don’t be shy!
If you’re on Facebook join us in our private chat group Stamping Bella Sistahood to share your creations there and chat all things Stamping Bella related!
Until next time, HAPPY STAMPING!
MWAH
Elaineabella
I’ve changed from the blending tools to the creative expressions smoothies. I find it’s much easier. I also love using my mama elephant inks as they blend beautifully with very little effort.
Hugs
Hazel xxx
Loving all those backgrounds! This is one of my favorite technique too 🙂
Your backgrounds are the best! What a great idea to stamp a bunch at once. The taped edge is so crisp, love it! Thanks for another great tutorial!
Oh what great backgrounds! I need to do more of this! Thanks for sharing! 🙂
I have a question. I don’t have any of the distress inks yet but I love having the tiny ones because you get more colors then just one pad at a time of the bigger ones. Can you do this with other inks? I’d love to try this because I love how it looks and I love how the border looks. If I can use the inks I already have, then this is a win/win for me!
Don’t try to spray water on inks that aren’t specified to use with water. You won’t get the desired effect. One or two mini cubes of Distress Inks can be found at reasonable price points.