


Time for a little creative inspiration with me, Elaineabella, for Stamp It Saturday!

Don’t be scared!
As I mentioned in last week’s post – Big Dresses, No Worries! – I adore the recently released Uptown Zodiac Girl collection. A couple of my favourites from the set are Capricorn, who I featured in last week’s post and Virgo who we’re going to look at today. Their big dresses offer so many possibilities. If you want to practice your colouring technique creating pleats and folds, they are ideal, because there aren’t any fussy details to work around, just a big open canvas to play with. I know however, that some may find them a bit intimidating. It’s like looking at a blank page in a sketchbook or journal. If you put pressure on yourself to achieve perfection, it can be incredibly tough to even make a start. The fact is though, it’s just ink and paper, and you will never get good at it unless you try. Make a start and enjoy the process. If you mess up, try and find a creative way to fix it, or simply start over.
Of course, time can be a factor. We want to have fun and create, and sometimes only have a small window of time in which to do so. Some little creative shortcuts can speed up the colouring process and give you gorgeous results, with less stress and effort. Plus, if you’re so inclined, you can practice where to add shading for pleats and folds without having to worry about colour and blending too!
Last week we looked at paper piecing the dresses using patterned paper and adding shading and extra details with markers, stamps and pens. Today I’ve got some slightly different suggestions!
Firstly, here’s my Copic colouring video for gorgeous Uptown Zodiac Girl Virgo. You can see in detail how I coloured the image either in the video below or in HD over on YouTube.
Simple Distress Ink:
For the first dress I created I used Distress Inks to create a really soft and subtle look (something I’m not amazing at doing with Copics). I did this by stamping the image twice, once for the base layer, and once so I could colour the dress and cut it out. On the dress layer I simple used a blending tool to colour the dress with my chosen shade of Distress Ink, giving it some basic shading by adding more colour to one side.
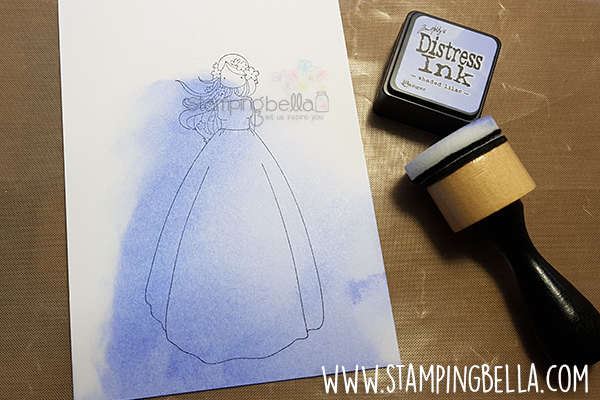
I applied the ink quickly and messily, knowing I would be cutting the dress out. When the ink was laid down, I spritzed the dress with some water to help soften the ink and add that subtle speckled pattern you can get with Distress Inks reacting with water
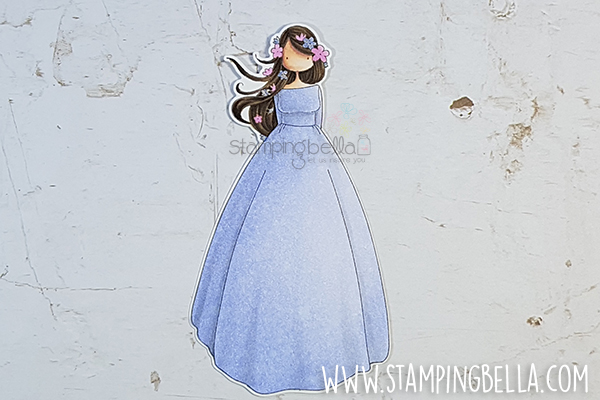
I gave it a quick blast with my heat gun to dry it before adding some quick shading with some grey Copic markers. The entire process took about 5 minutes. After cutting the dress out I added it to an image I had previously coloured (skin and hair) and die cut.
Distress Inks are dye based inks and cause no problems with Copic markers. I colour over Distress Inks frequently.
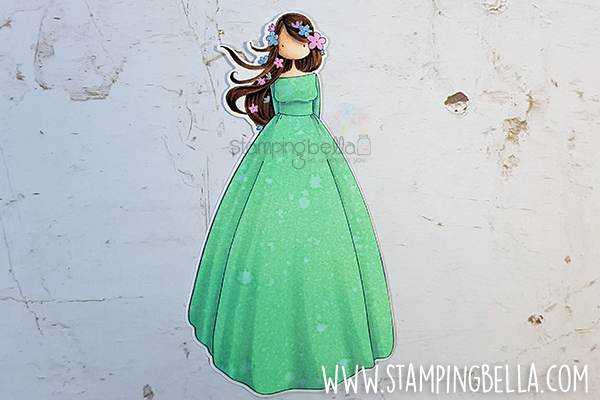
Simple Distress Oxide:
This one is similar, but uses a simple Distress Oxide one colour background I created when playing with the inks a while ago. The piece was created using one shade of Distress Oxide on Bristol Vellum Surface paper, spritzed with water. That’s it. For this post I stamped Virgo on the background, then cut the dress out to apply to my base image. This is a great way to use backgrounds you rejected for card fronts, or scraps of larger pieces.
NOTE: Distress Oxides are a pigment/dye ink hybrid, as such, please use your own judgment regarding using Copic or other alcohol based markers over the top to add shading. I’m happy to do this myself, in the knowledge that if my nibs do get clogged, I can replace them or possibly clean them (I do scribble on scrap paper while colouring to help remove any residue). I have yet to ruin a nib, but I make no guarantees – do whatever you’re comfortable with!
Gorgeous Distress Oxides:
You may recall that last year I did a post on using Distress Oxides to create a stunning tail for our lovely Tiny Townie Mermaid stamp. You can find that post HERE. I actually used some of the pieces I created for that post to create dresses for Virgo. When I create Distress Ink or Distress Oxide pieces, I tend to do so in batches, so I have a little stash of pretty backgrounds that are ready to use on other occasions when I’m in a rush or don’t feel like getting too messy.
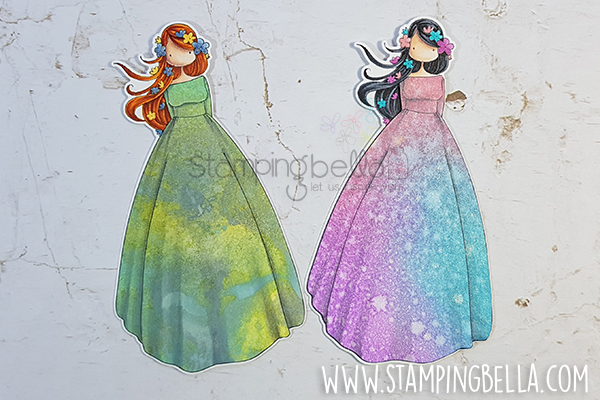
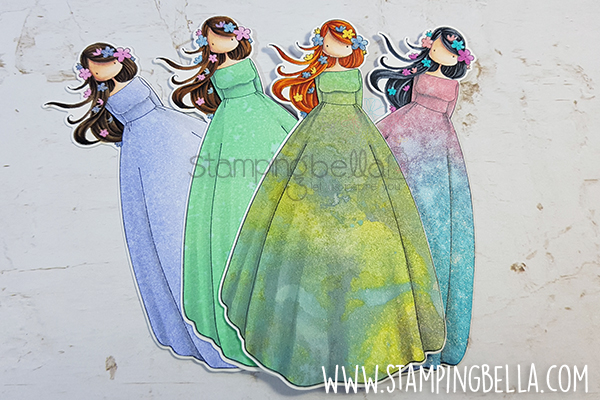
Gorgeous, no? I simply stamped Virgo on the Distress Oxide backgrounds, cut the dress out, added some basic shading with Copics to give the dresses some definition, then popped them on my pre-coloured girls. Again, if you use backgrounds you’ve created previously, this makes the process pretty quick and simple.
Here they all are, ready to find their way on to some cards!
Over To You!
How would you approach colouring Virgo’s dress? Have you already coloured her? Share your ideas and thoughts in the comments below!
If you are posting your images online, we would love to see them on Instagram and all the platforms mentioned above. To make it easier for us to find you just use #markergeekmonday and/or #stampingbella as a hashtag. Even better tag me @markergeek and @stampingbella . We love it when you connect, so don’t be shy!
If you’re on Facebook join us in our private chat group Stamping Bella Sistahood to share your creations there and chat all things Stamping Bella related!
Until next time, HAPPY STAMPING!
MWAH
Elaineabella
These are great suggestions. Thank you xxx
Gorgeous! Love what you do, will be neat to see the finished card.
Love this idea so much ! I’ve done paper piecing with pattern paper but never thought of oxides ?
Neat ideas, how much fun! Thanks
I’d like to add something to the dress like polka dots or hearts or some other small stamp I have that would make a great print on the dress. I also like the pleats and the tie dyed look too. I don’t have this stamp but if I had, that’s what I would do. Thanks for showing us what you did and for giving us some ideas on how to do her dress. I love them all!
Oh what great dresses! Love how each one is so different! 🙂