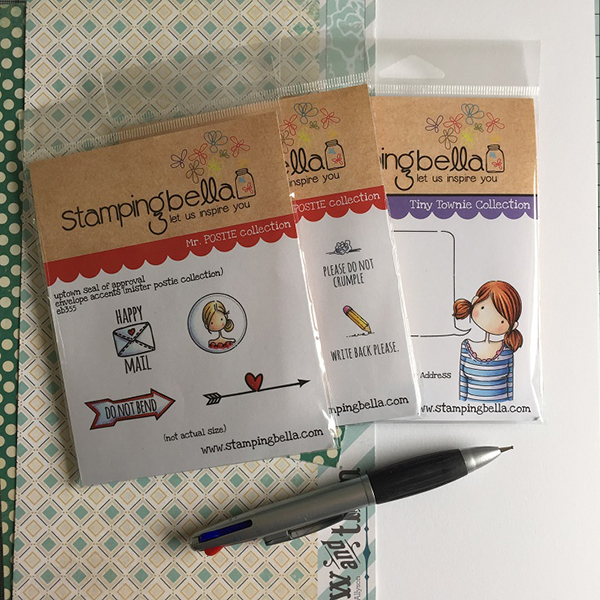
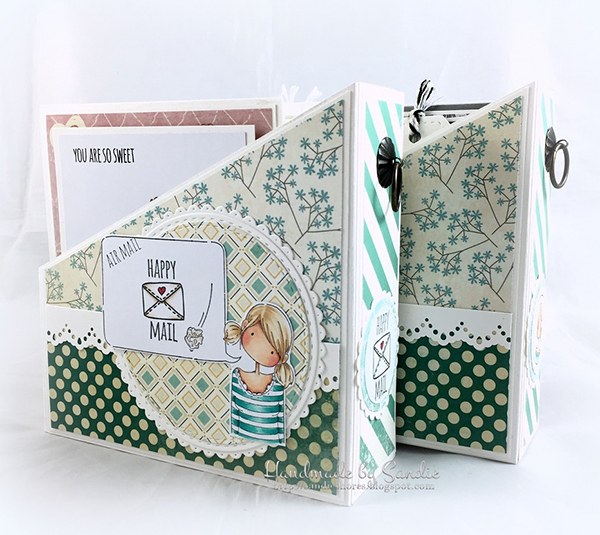
Hey everyone, it’s time for DT Thursday here on the Stamping Bella blog. This week Sandiebella has another fab project for you to recreate! Click on through for the full step by step guide to this project.

Step by Step Guide:
These magazine holders fit 5.75″ wide cards. If you want to make it larger, adjust the measurement of the centre panel, and height, accordingly.
Cut 2 pieces of white card measuring 6″ x 10″ and score at 2″ and 8″ on the long side.
**On one end, measure up 3″ and mark with a pencil
Use a craft knife or paper trimmer to cut across from the 3″ mark to the first score line.
Cut from the top down, to remove the 3″ piece, as shown.
Cut the card diagonally, from the 2″ scoreline on the other side, down to the 3″ tab
This is what you should have
Repeat to make the other side of the holder, cutting diagonally from the opposite end.
Cut 2 pieces of white card measuring 5.75″ x 5.75″, 1 piece measuring 1.75″ x 5.75″ and 1 piece measuring 1.75″ x 2.75″
Cut 2 pieces of patterned paper measuring 5 5/8″ x 5 5/8″, 1 piece measuring 1 5/8″ x 5 5/8″ and one piece measuring 1 5/8″ x 2 5/8″
Take one of the white card panels and position it in the centre panel of the box base. Make a mark with a pencil where it you want to cut to.
Cut diagonally from the top left corner down to the pencil mark.
This should give you the perfect angle
Repeat with the patterned paper, centering it on the white card you just cut.
Adhere the patterned paper to the white card.
Repeat for the other side of the box.
Adhere the other patterned paper pieces to the white card.
Adhere the centre panel and both end pieces on one side of the box. Using a crop-a-dile, or similar, punch a hole on the long 2″ section, about 1.5″ down from the top
Insert the drawer handle and butterfly the ‘legs’
On the other side of the box, adhere the centre panel.
Apply plenty of double sided tape to the long 2″ section. this will hold the handle in place.
Apply more double sided tape to the shorter 2″ section.
Adhere the middle panels together and burnish well to secure the handle.
To make the bottom of the box, cut a piece of card measuring 2 7/8″ x 5 7/8″ and score at 1/2″ on all 4 sides.
Cut the ends to make tabs, as shown.
Taper the edges of the tabs.
Apply double sided tape to the outside of all of the tabs
Remove the tape backing from the small tabs and adhere them to the inside to make a tray.
Remove the backing from the rest of the tabs and adhere the tray to the inside of the box, wrapping it around the tray.
Stamp the image onto white card and colour with your chosen medium.
Use the accent stamps to add more elements, and colour them in.
Cut 2 pieces of contrasting patterned paper measuring 2 1/4″ x 5 5/8″. Punch a border and cut to lengths of 5 5/8″
Adhere them to the sides of the boxes
Cut some scalloped circles and stitched circles and matt them together. If you don’t have circle dies, you can cut squares.
Adhere the circle die to the side of the box and adhere the image, flat, onto it.
Stamp out more of the accessory stamps and colour. Again, cut some circles and scalloped circles to matt it
Adhere it to the back of the box, as shown.
Pop your cards in the holders
You can use the other accent stamps to make a set.
Alternative magazine holder base. The top section of this is the same method as above.
Flip it 90 degrees and score on the 10″ side at 2″ and 8″.
Cut from the bottom 1.5″ section on each of the 2″ score lines, up to the horizontal score line. Taper the edges, as shown.
On the second piece, cut away both outside pieces of the 1.5″ section and tape the centre piece.
To assemble (after decorative panels have been added.) Adhere the 2 long ends, and the 2 short ends. together.
Fold in the side tabs. Fold down one of the long tabs, apply double sided tape to the inside of the other side and adhere to close the bottom.
Cut a piece of card 5 7/8″ x 2 7/8″ and adhere to the inside of the box to make the bottom sturdier.

Hopefully I’ve inspired you to sit down and try your hands at this lovely project.
We also encourage you to share your personal favourite Stamping Bella creations with us. We LOVE to see what you’ve been creating with Stamping Bella stamps.
Another way to connect is by joining us in the Stamping Bella Sistahood Facebook Group and share your pictures.
If you are posting your images online, we would love to see them on Instagram and all the platforms mentioned above. To make it easier for us to find you just use #stampingbella as a hashtag. We love it when you connect, so don’t be shy!
Until next time, HAPPY STAMPING!
Comments are closed.
What a fantastic project!! Thanks for sharing!!
love it! can’t wait to try this out! thanks!!
Great design and a handy thing to have! Love your embellishment on it.
Sandie these are awesome…love em!!!
I know what I’m doing this afternoon. How cute are these!
Totally love those beautiful and adorable boxes. Perfect way to use as gift. Thank you so much for the tutorial.
Another wonderful tutorial!! Your card holder is so cute!
OUTSTANDING! I need to make one of these!
Oh wow! These are beautiful! I’m definitely saving this one in my favorites! This would make great gifts! Thanks so much for sharing! 🙂
Wow, who knew you could do this? Great idea! Leave it up to you guys to come up with something so clever.