


Time for another fab DT Thursday tutorial from Sandiebella!
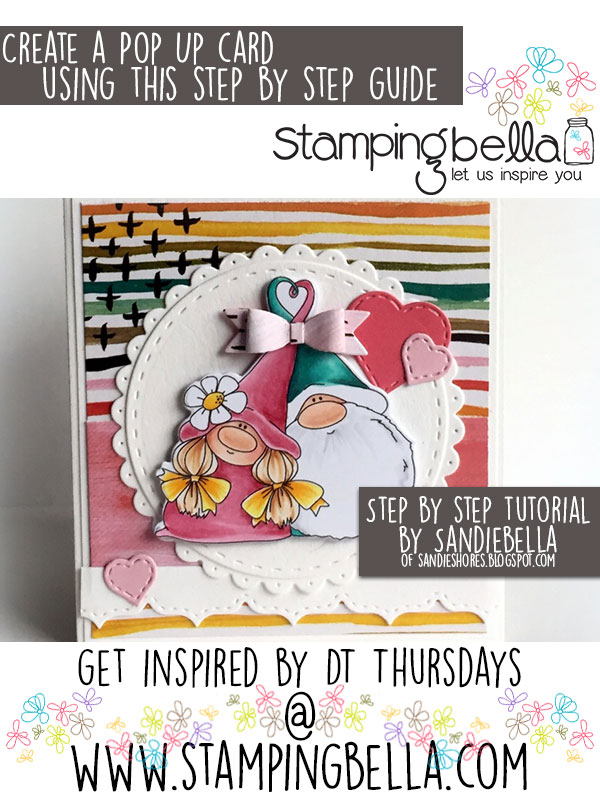
Pop Up Card
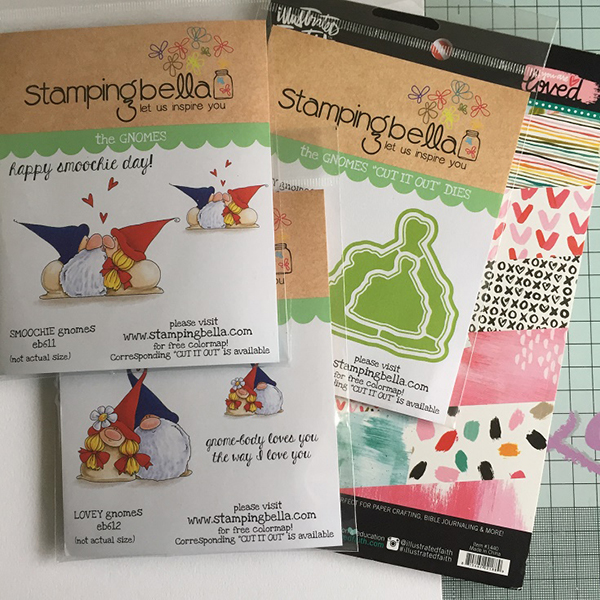
Supplies:
3D foam tape/dots
How To:

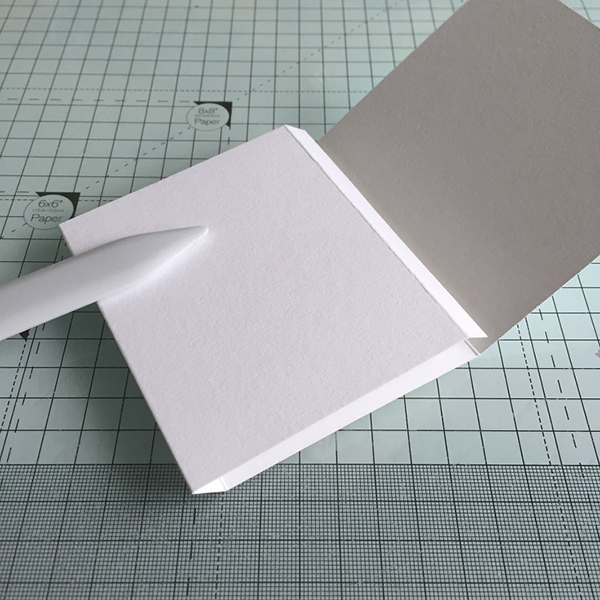
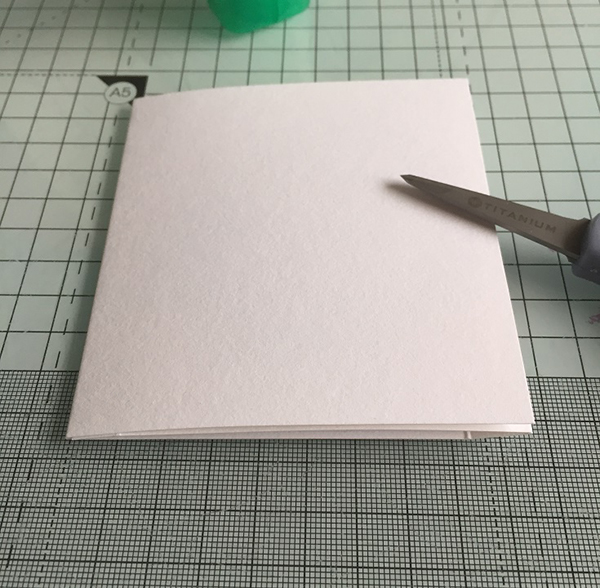
Fold and crease all the scorelines.
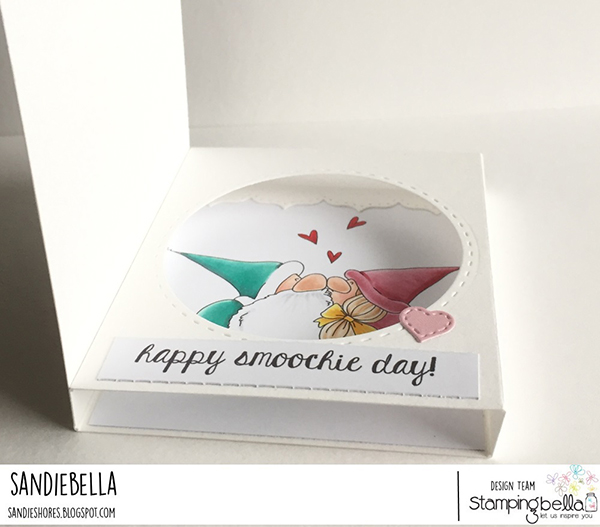
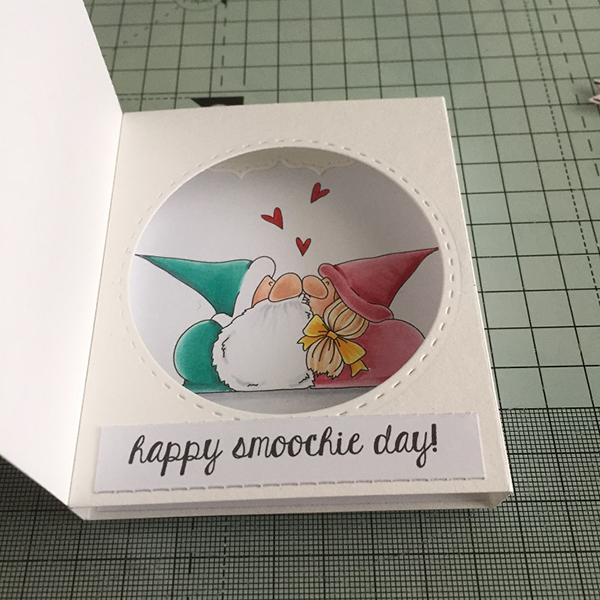
In the panel beside the 3/8″ section, cut a circle in the centre. This will be the window you will place the image behind. Be sure to keep the circle you just cut out, as you will use it later, on the front of the card.
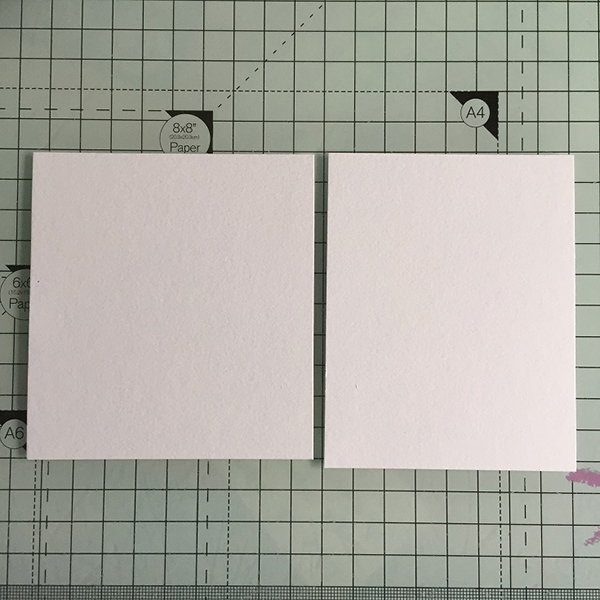
Cut one piece of white card, , measuring 3 5/8″ x 3 7/8″, for the font of the card, and one piece, measuring 3 1/8″ x 4″, for the inside panel behind the image.
Cut some patterned papers for the front of the card.
Adhere the patterned paper to the card front panel and set aside.

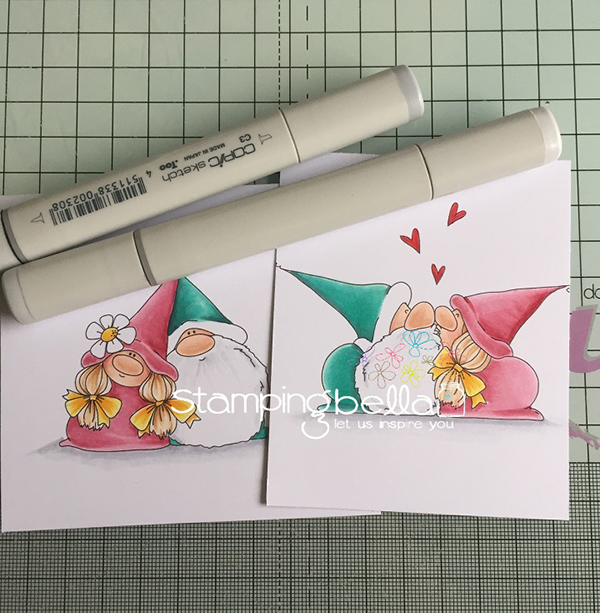
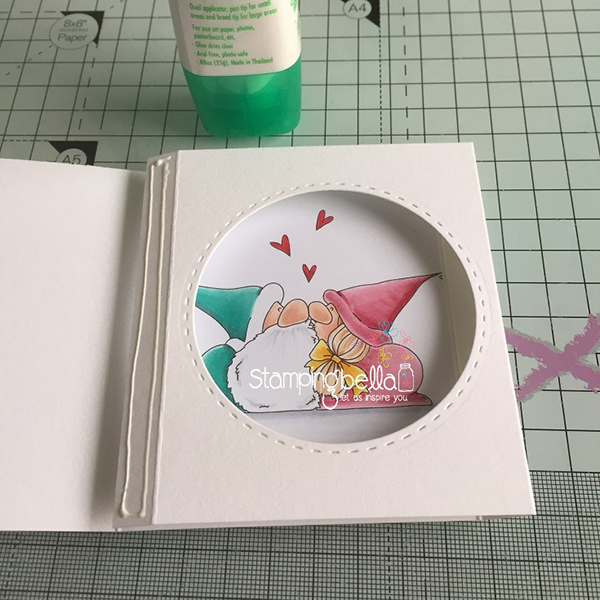
Stamp the images onto white card and colour them using your preferred medium. These are coloured using copic markers. Ensure to leave plenty of white space around the SMOOCHIE Gnomes, preferably stamping them into the centre of a 3 1/8″ x 4″ piece of white card/paper.
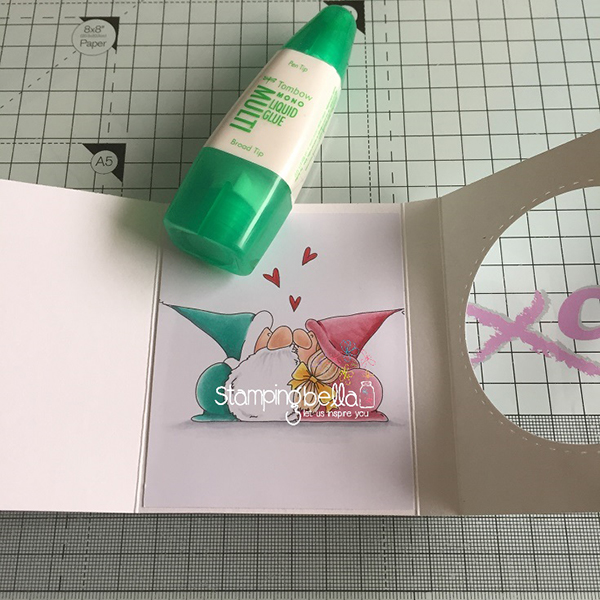
Take the white card you cut for the inside panel and adhere it down, then adhere the image on top. This just gives the back of the card extra weight, for stability.
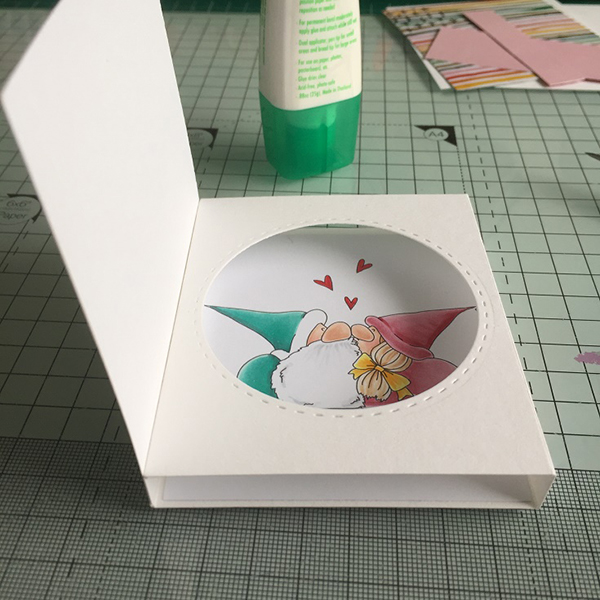
Fold over the window, ensuring the edge of the card doesn’t cover the first scoreline. If it does overlap, trim the 3/8″ piece.

Apply adhesive to the 3/8″ strip
Then fold the front of the card down. Use a bone folder to burnish the edge where the adhesive is.
When you open up the card, your window should pop up.
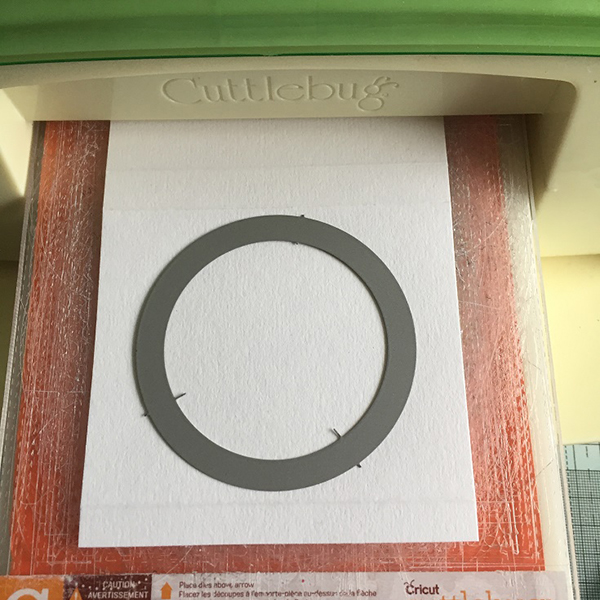
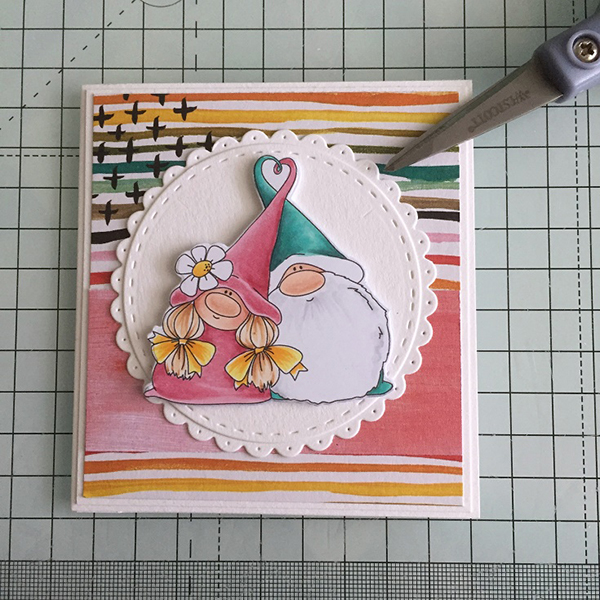
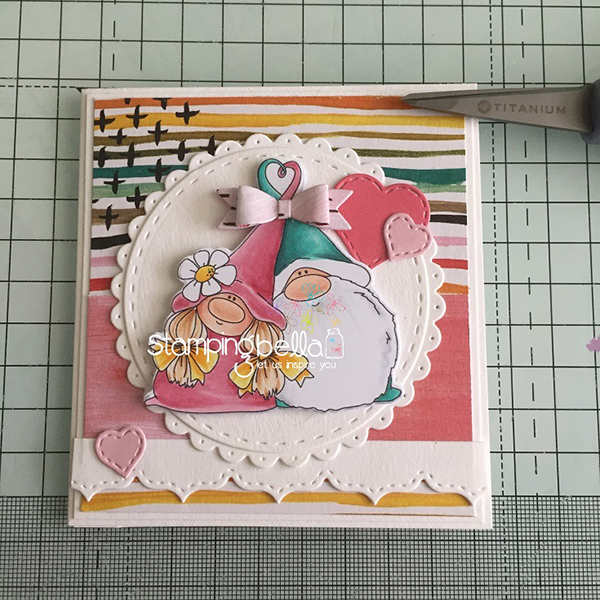
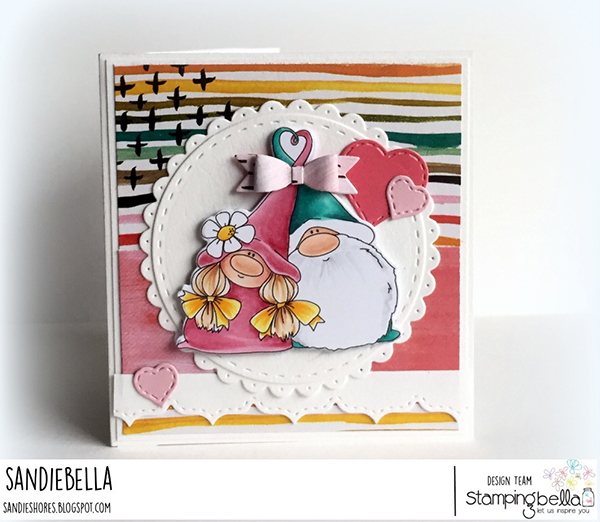
Using the LOVEY gnomes CUT IT OUT Die to cut them out. Also, cut a scalloped circle slightly larger than the circle you cut out from the window panel.
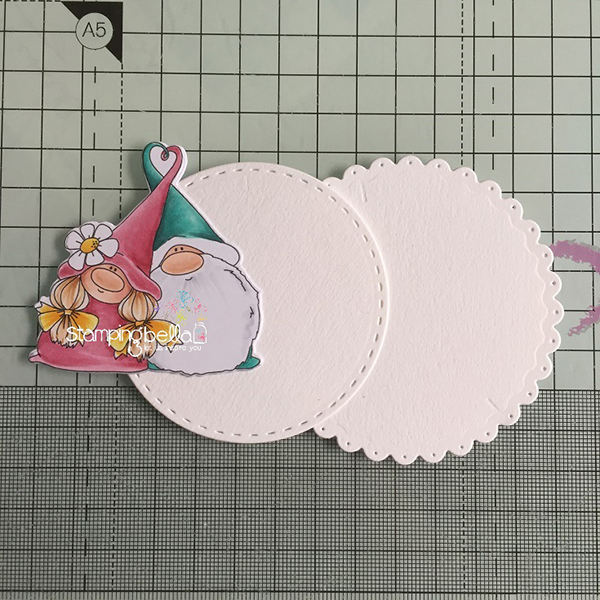
Adhere the circle and scalloped circle together. Apply 3D foam tape/dots to the back of the Gnomes and stick them down onto the circle. Adhere the whole thing to the front of the card
Stamp and cut out the sentiment from the SMOOCHIE Gnomes set.
Adhere it under the window.
To finish the card, embellish as desired. I simply added some die cut hearts and a bow.
Over To You!
If you try out the techniques shown in any of the posts with your Stamping Bella stamps, be sure to share! We would love to see the results and hear how you feel about them. Show off your creations in the comments below and even better, share your own favourite tips with us. Let’s talk stamping!
If you are posting your images online, we would love to see them on Instagram and all the platforms mentioned above. To make it easier for us to find you just use #stampingbella as a hashtag. Even better tag @stampingbella . We love it when you connect, so don’t be shy!
If you’re on Facebook join us in our private chat group Stamping Bella Sistahood to share your creations there and chat all things Stamping Bella related!
Until next time, HAPPY STAMPING!
MWAH
Elaineabella
Cute and love the idea! Thanks for sharing.
Wow!!!! This is really neat. I’ll have to try it. Love the way you paired your gnomes to the card- very creative mind. TFS
I love this! What a great idea to hide the shadow box inside!
Really cute card! Can’t wait to try it out… thanks for sharing
Oh this is awesome! I’m going to try one of these! 🙂