


DT Thursday time! Sandie has a fab project for us to follow along with today!
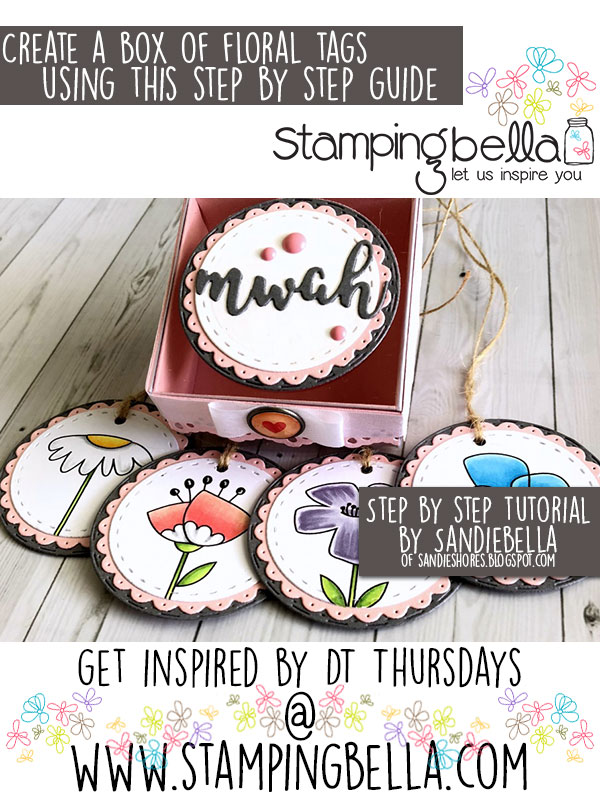
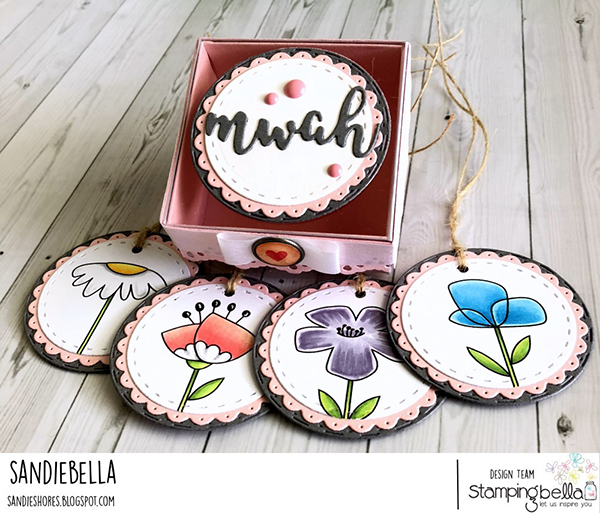
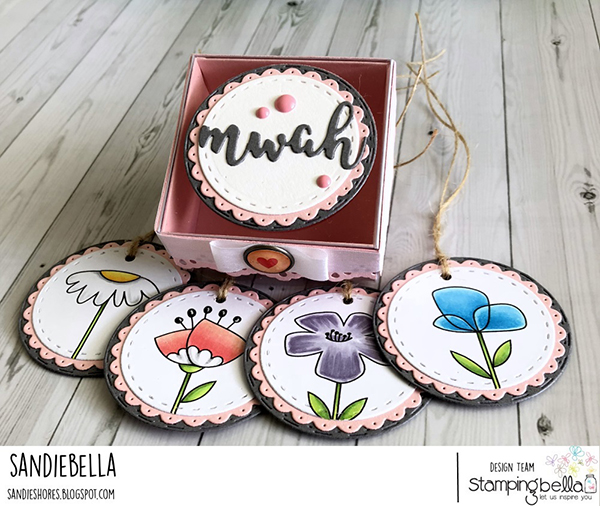
Little Bits Floral Box of Tags
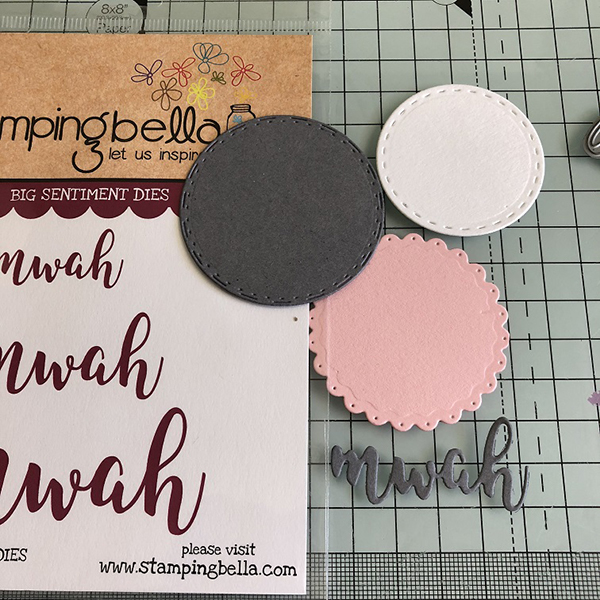
Supplies:
How To:
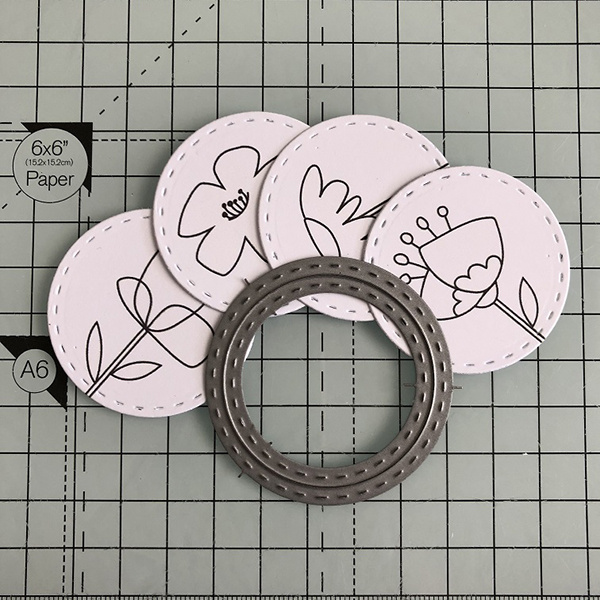
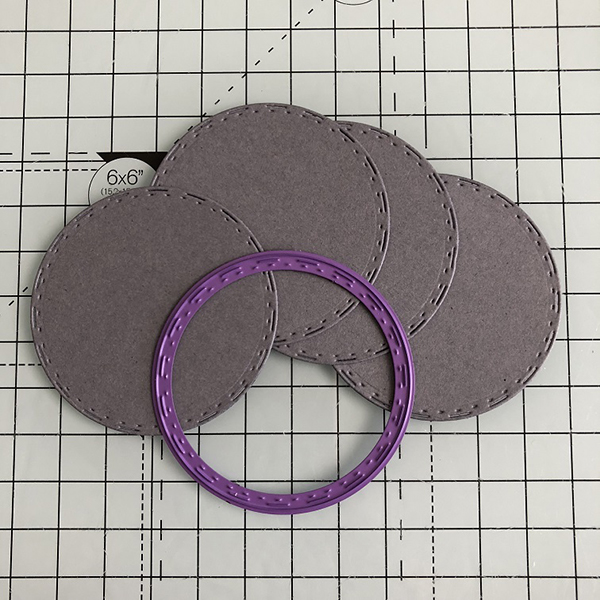
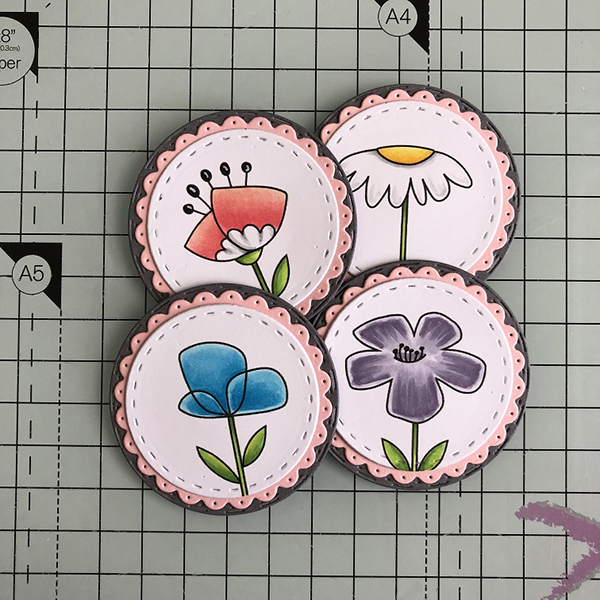
Using the same die as for the images, cut 5 circles from white card. Set one aside
Cut 9 scalloped circles from the pink card, slightly larger than the images. Set one aside

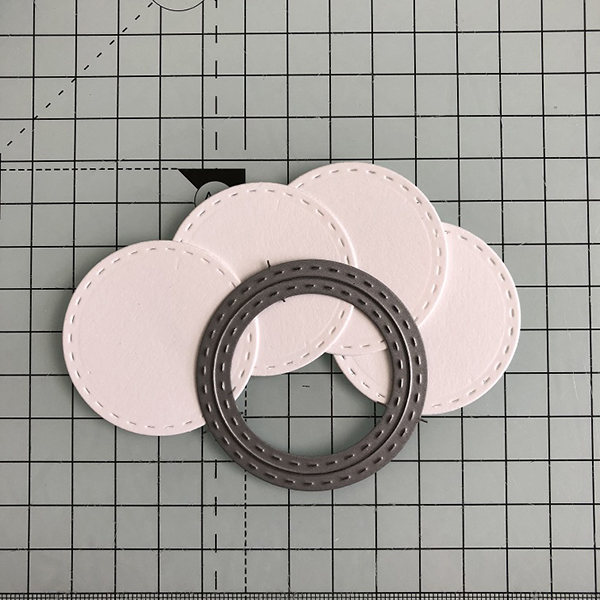
Cut 5 circles from the dark grey card, larger than the pink scalloped circles. Set one aside
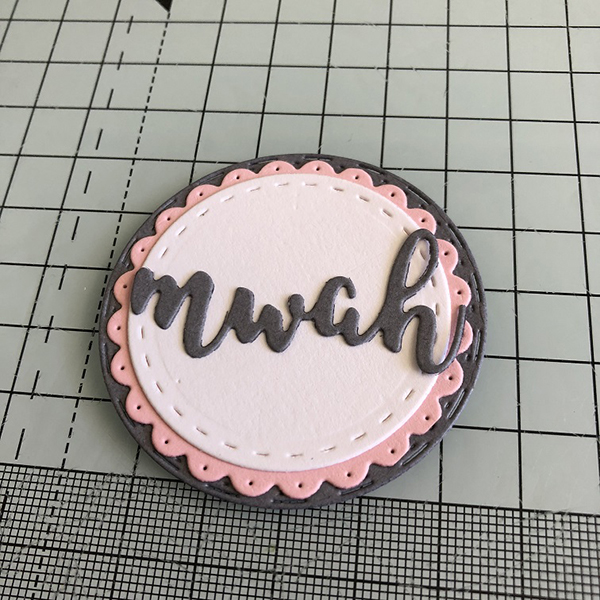
To assemble the tags (repeat for all 4 tags):
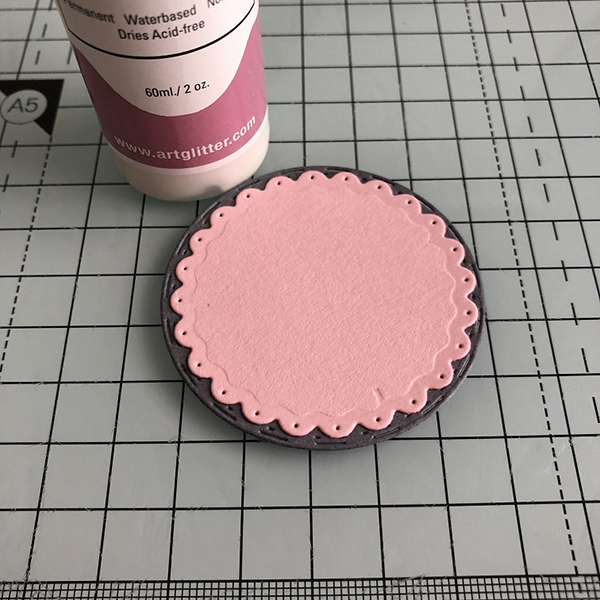
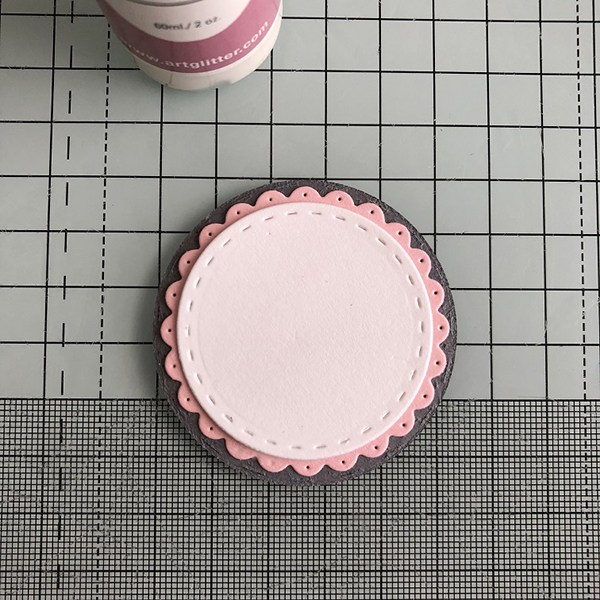
Adhere a white circle to the back side of the dark grey circle.
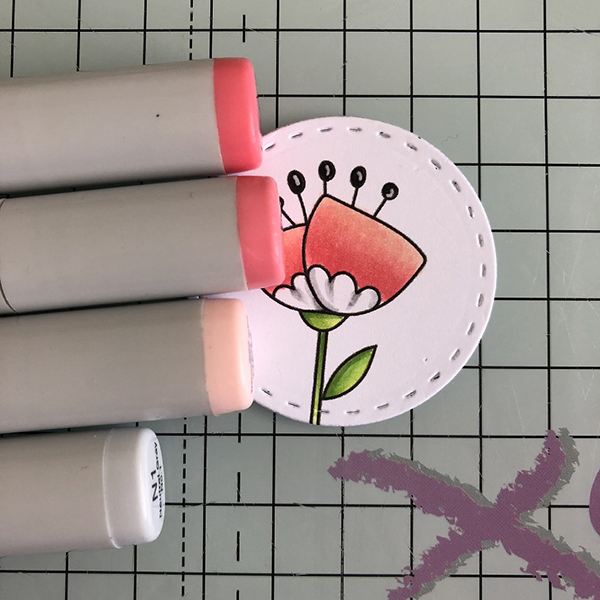
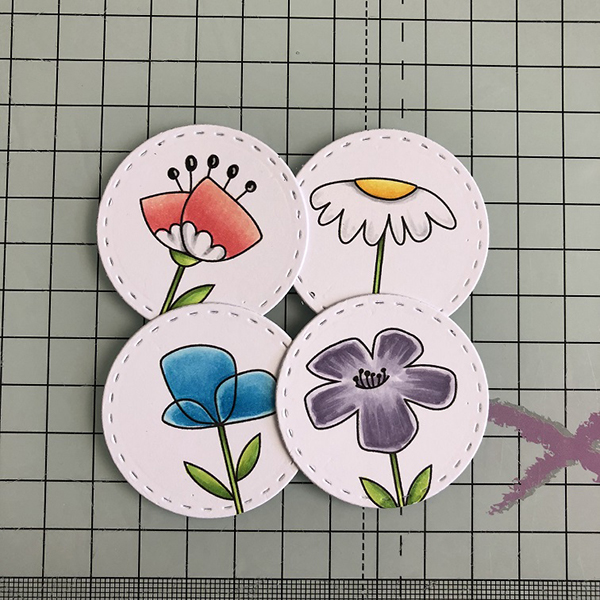
Colour the stamped flowers using your desired medium
Adhere the images to the front side.
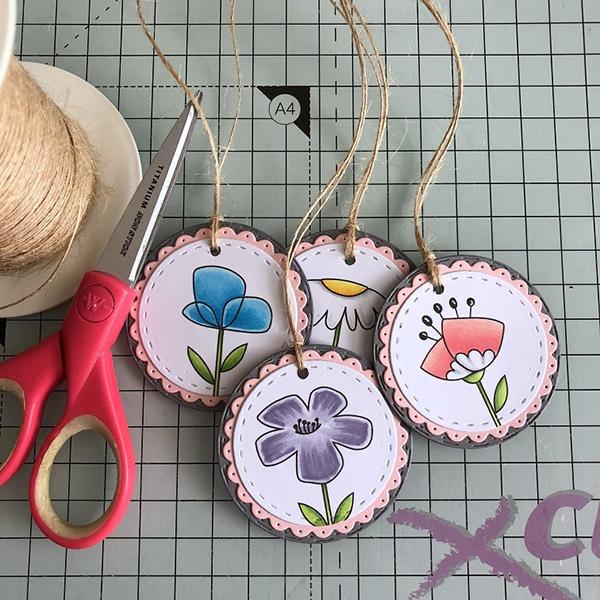
Using a crop-a-dile, or similar, punch a hole at the top of each tag.

Thread twine through each of the holes.
For the Box:
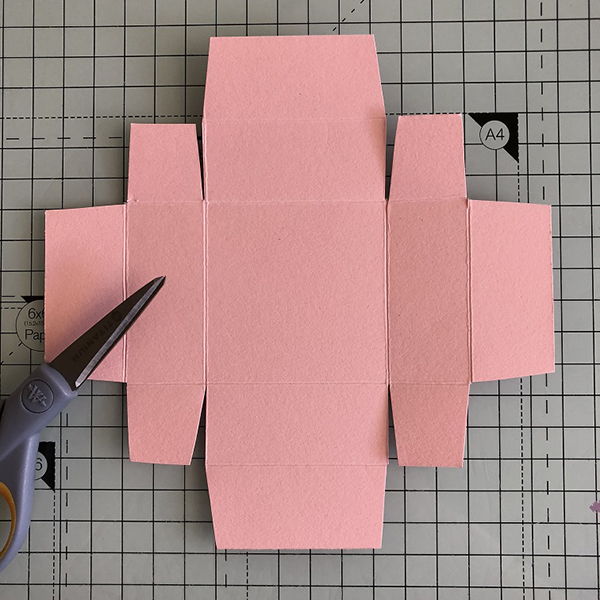
Create a basic box base by cutting a 6.25″ square of pink card and scoring at 1″ and 2″ on all 4 sides. Cut away the outer 3 squares in each corner, making a tab with the inner square. Taper the edges of the tabs slightly, as shown.
Apply adhesive to the outside of the 1″ tabs and the inside of the larger tabs.
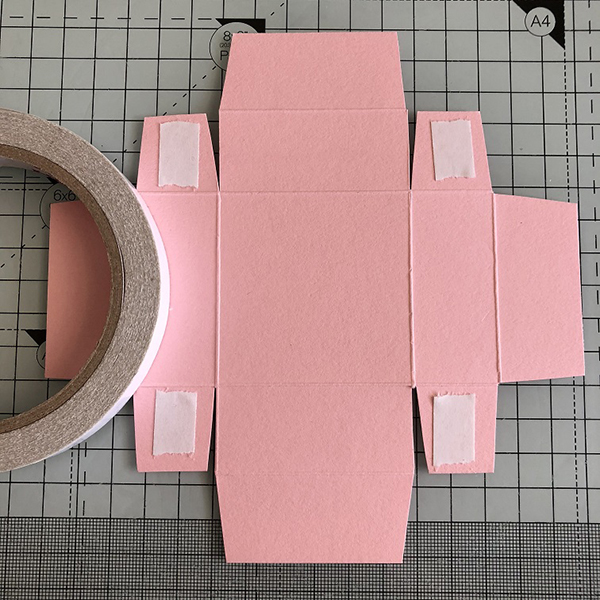
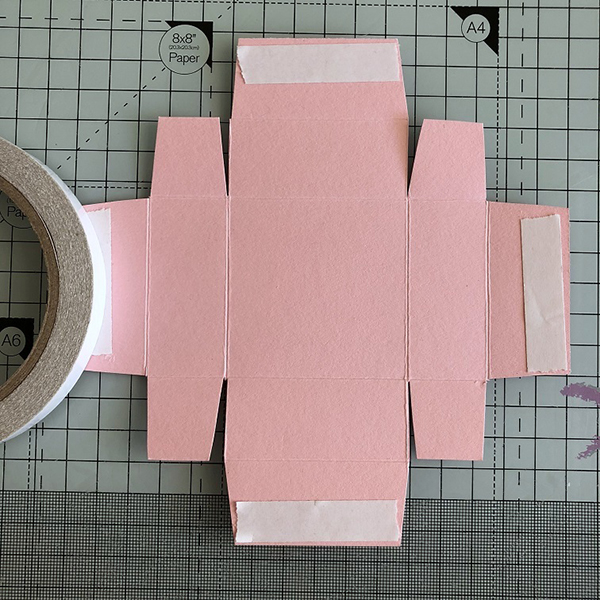
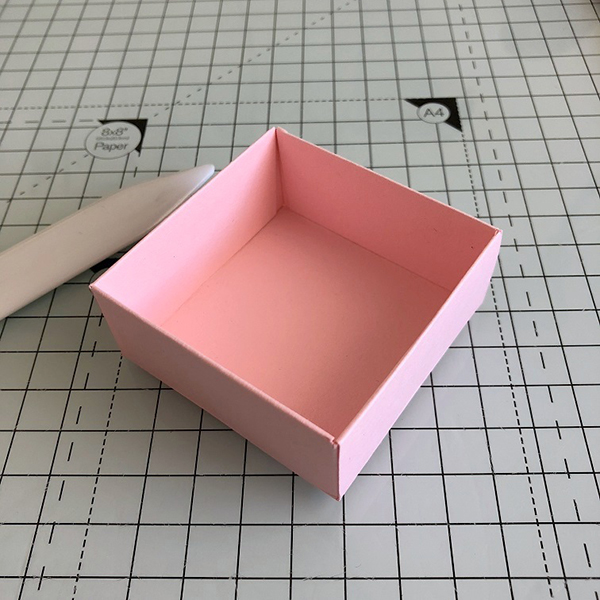
Fold in all the tabs to create the box base.
For the Box top:
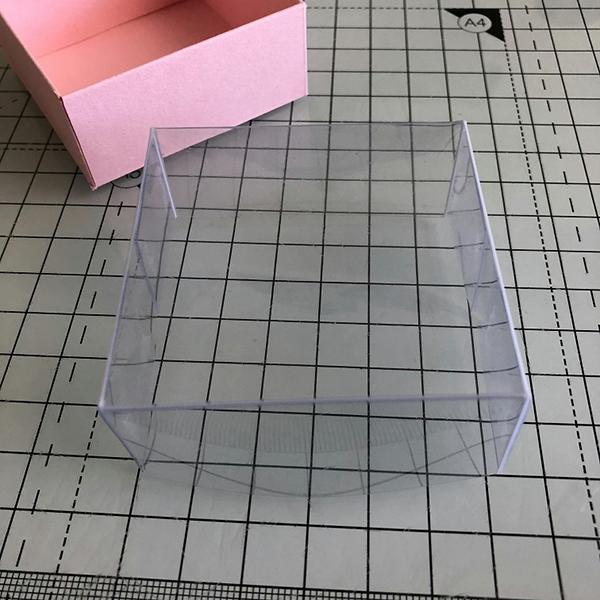
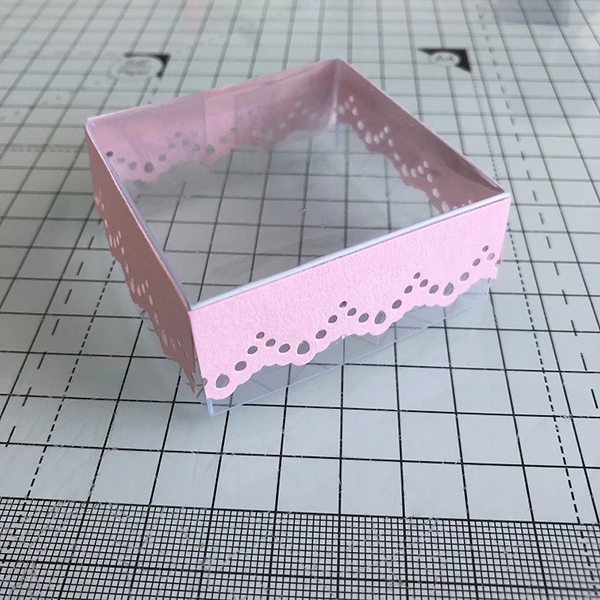
Cut a piece of acetate measuring 4 5/16″ square.
Score on all 4 sides at 1″
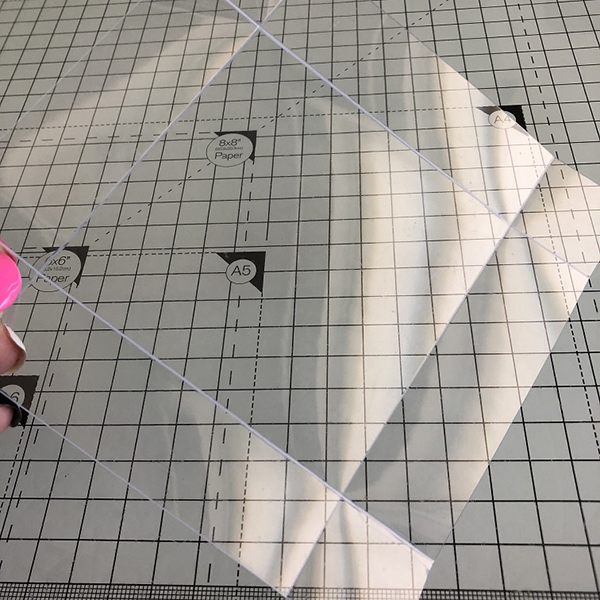
Cut up to the intersection, the same as for the box base and taper the tabs just on the inner side.
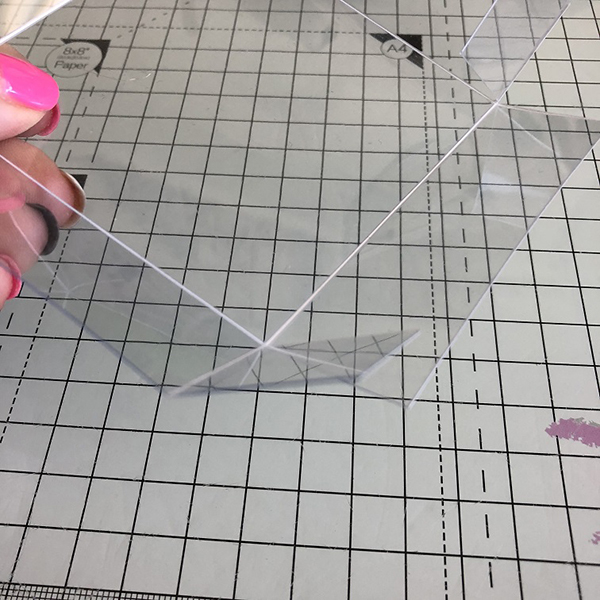
Apply double sided tape to the tabs and fold them in to make the box top.
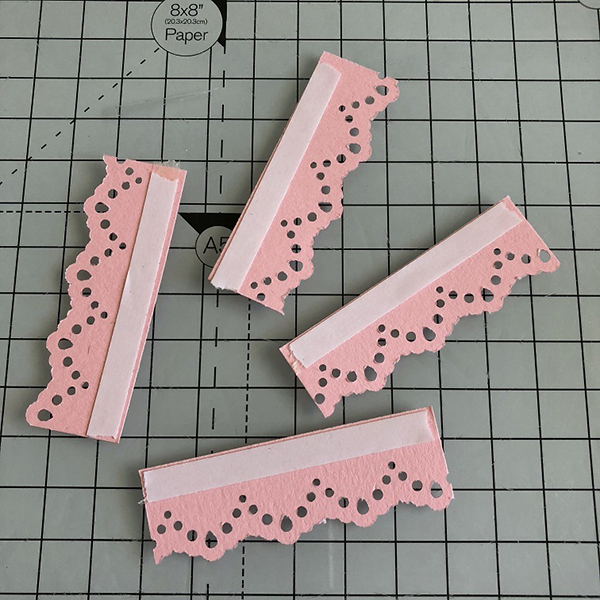
Punch a border and cut at 0.75″ x 2 5/16″
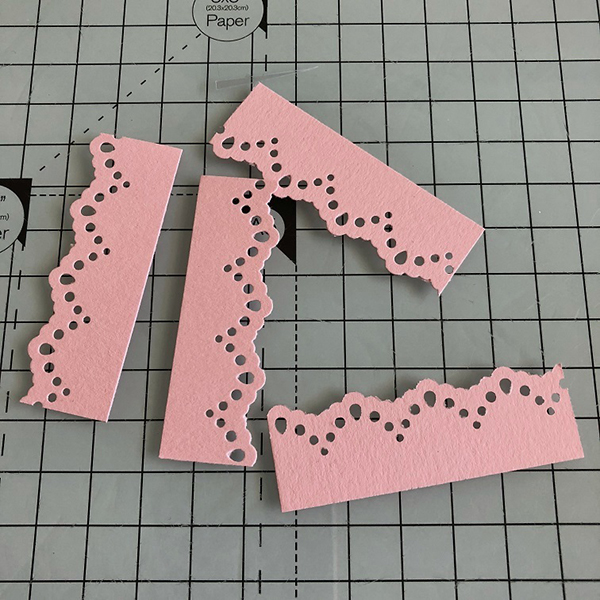
Apply double sided tape and adhere to the 4 sides of the acetate lid.
Adhere ribbon around the box and make a little bow to cover where the ribbon meets.
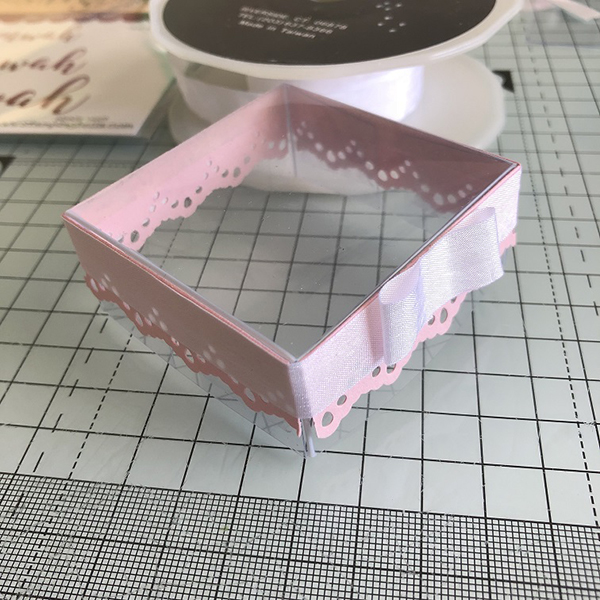
Add a button, or similar, to the centre of the bow.
For the top of the lid, use the remaining circles/scalloped circles, and adhere them together the same as the tags. Cut the smallest of the three MWAH dies from the dark grey card.
Adhere the MWAH across the front and then adhere the circles down onto the lid.
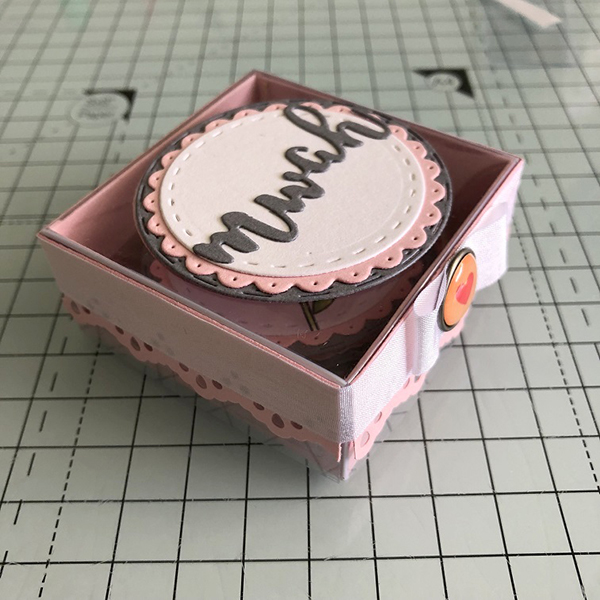
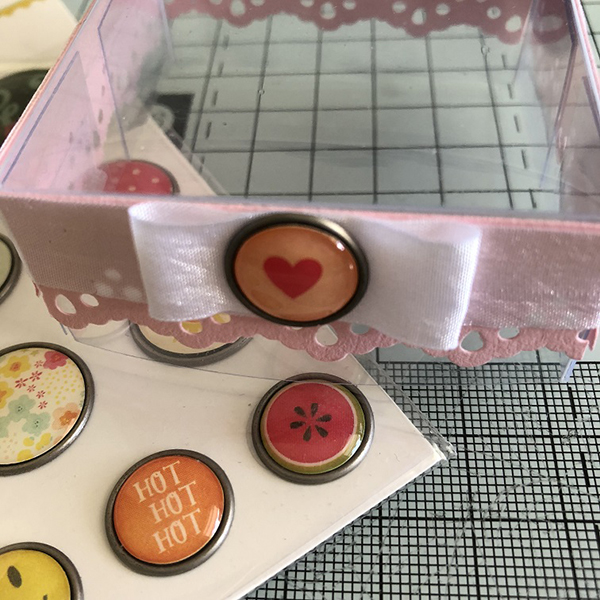
Add some enamel dots if desired.
Over To You!
Share your personal favourite Stamping Bella creations with us. We LOVE to see what you’ve been creating with Stamping Bella stamps. Share a link to your latest Stamping Bella card in the comments below, or an old favourite you made a while ago. Tell us what your favourite stamps are. Are there any additions you would like to see to the range? Let us know!
Another way to connect is by joining us in the Stamping Bella Sistahood Facebook Group and share your pictures.
If you are posting your images online, we would love to see them on Instagram and all the platforms mentioned above. To make it easier for us to find you just use #markergeekmonday and/or #stampingbella as a hashtag. Even better tag me @markergeek and @stampingbella . We love it when you connect, so don’t be shy!
Until next time, HAPPY STAMPING!
MWAH
Elaineabella