Thursday with Sandiebella: Gift Box Card Tutorial

It’s the very first Thursday of the year and Sandiebella is back with a gorgeous step by step tutorial for us, showing how she created a gift box card featuring the amazing Oddball Frog Footman (Alice in Wonderland). He’s just such a great image! Read on to see how Sandie worked her magic again…

You can find the stamp set Sandie used, along with a host of other Alice in Wonderland themed Oddballs in the ODDBALLS SECTION of the store. We also have the ALICE IN WONDERLAND SENTIMENT SET to go with them!

Gift Box Card

Continue reading

Thursday with Sandiebella: Half Hexagon Box Card

Happy Thursday! A very quick reminder before I leave you with Sandiebella and her amazing step by step for today… We’re in the final day of our Black Friday sale, so make sure you don’t forget to place those orders! SHOP HERE.

Happy shopping and happy crafting!

Elaineabella

Half Hexagon Box Card

Supplies:

Red card, white card
Acetate
Scoring board & bone folder
Ruler
Adhesive – wet glue, foam tape, and strong double sided tape
Decorative border die

How to:

Stamp Mice in Boots onto blending card, colour and then fussy cut around the outline.
Set aside.

Continue reading

Thursday with Sandiebella – Tutorial Round Up

Elaineabella here. We don’t have a new tutorial from our Sandiebella today, so I’m here to remind you of some of her previous AMAZING festive themed Thursday makes, which all come complete with fantastic step by step instructions. We love our Sandiebella – she’s brilliant, and so generous with her time in creating easy to follow tutorials for us each week.

ACCORDION FOLD CHRISTMAS CARD TUTORIAL featuring The Gnome and The Christmas Tree stamp set

Continue reading

It’s Thursday with Sandiebella!- featuring our SNUGGLE OWLIES!

Hiya sistahs, happy Thursday with Sandiebella !

Today Sandiebella teaches us how to make a  Trifold Angled Card


Supplies:

Card
Designer paper
Scoring board, bone folder
Pencil, ruler, eraser
Foam strips/dots
Enamel dots
How to:
Stamp  Snuggle Owlies onto white card, colour and fussy cut around the outline.

Set aside.

For the card base, cut a piece of card measuring 5.5″ x 11″. Score at 3-3/8″ and 7-5/8″

On the short side, measure down 1.5″ from the top and mark with a pencil. Measure up 1″ from the bottom and again mark with a pencil. Repeat on the opposite end.

Cut on the four corners from the score lines to the pencil marks.

Layering panels:

Use the card base as a template for creating the layering panels of white card and then for the designer paper. Cut another piece of card measuring 4″ x 5.25″ for inside the card.

Fold up the card and crease the score lines

Adhere the layering panels on the front angled sections.

Adhere the white card panel inside

Cut two pieces of paper measuring 4″ x 1″ and adhere at the top and bottom of the white panel

Fold up the card again.

Cut a piece of card measuring 2.25″ x 11″. Centre across the front of the card and fold both sides around the back of the card.

Apply adhesive on both ends and secure.

Cut two pieces of paper measuring 4-1/8″ x 2-1/8″ and adhere to the front and back of the belly band.

Stamp a sentiment from the Snuggle Weather Sentiments set on the inside of the card.

Apply plenty of foam strips to the image, keeping within the height of the bellyband.

Adhere the image to the belly band

Slide the band back on, then add some enamel dots for decoration.


Share your personal favourite Stamping Bella creations with us. We LOVE to see what you’ve been creating with Stamping Bella stamps. Share a link to your latest Stamping Bella card in the comments below, or an old favourite you made a while ago. Tell us what your favourite stamps are. Are there any additions you would like to see to the range? Let us know!

Another way to connect is by joining us in the Stamping Bella Sistahood Facebook Group and share your pictures.

If you are posting your images online, we would love to see them on Instagram and all the platforms mentioned above. To make it easier for us to find you just use #stampingbella as a hashtag. Even better tag me @stampingbella . We love it when you connect, so don’t be shy!

Until next time, HAPPY STAMPING!

MWAH

Continue reading

it’s Thursday with Sandiebella!

Hiya sistahs, happy Thursday with Sandiebella !

Today Sandiebella teaches us how to make a Back to School Folio Card


Supplies:
Designer papers
Black card
Scoring board, bone folder.
Pencil, ruler, eraser
School themed stickers
Magnets
Enamel dots
 
How to:
Stamp Curvy Girl is Busy onto white blending card and colour using your preferred medium.

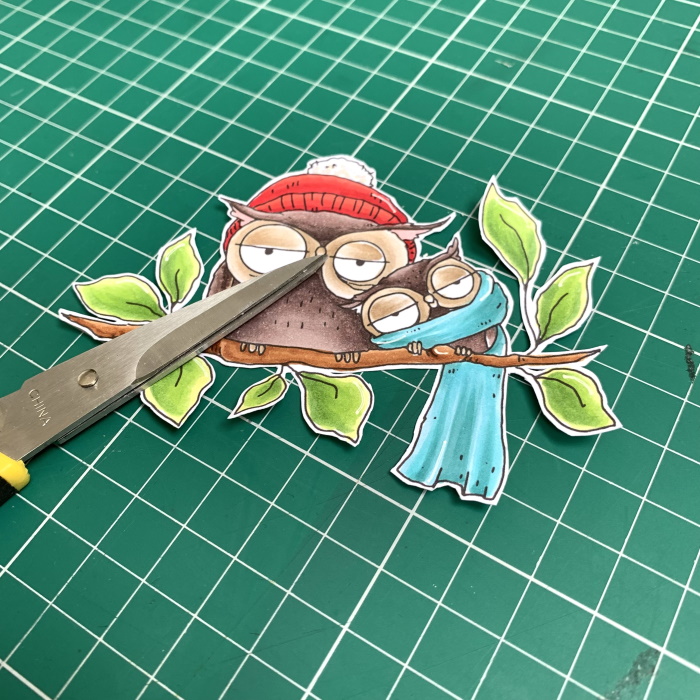
Fussy cut around the outline and set aside.

Cut:
Black card:
10″ x 7″ (base)
5″ x 7″ (front flap)
2″ x 5.25″ (small inside pocket)
8.5″ x 4″  & 7.75″ x 3.5″ (booklet pages)
5″ x 5″ (large inside pocket)
Paper:
(4x) 6.75″ x 4.75″ (base)
(2x) 6.75″ x 3.75″ (front flap)
1.75″ x 4.5″ (small inside pocket)
(3x) 4″ x 3.75″, (2x) 3-5/8″ x 3.25″ and (2x) 3-3/8″ x 3.25″ (booklet pages)
4-3/8″ x 4.25″ (large inside pocket)
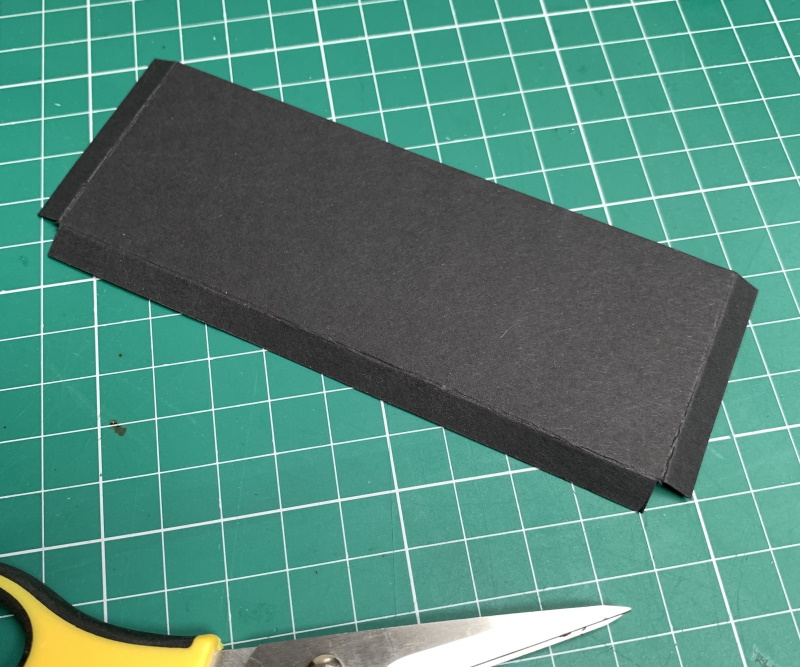
To make the front flap, score the 5″ x 7″ piece of card at 1″ on the short side

On the larger side, make a notch at 3.5″ along the 7″ side

Turn and make a notch at 1″ on the short side – top and bottom

Cut from the 3.5″ notch to the 1″ notch on the outer edges. Fold in the 1″ score line and burnish well.

Fold the 10″ x 7″ piece in half on the long side to create a 5″ x 7″ card base.

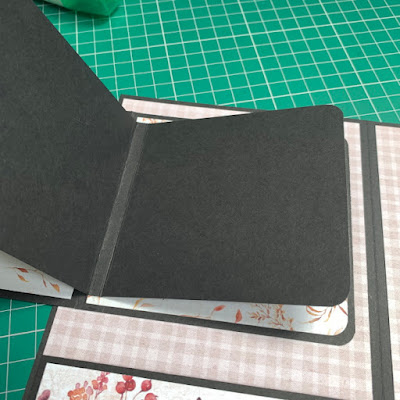
Slide the card base into the flap and adhere the 1″ section of the flap to the back of the card. Open up the card and adhere two of the 6.75″ x 4.75″ pieces of paper.

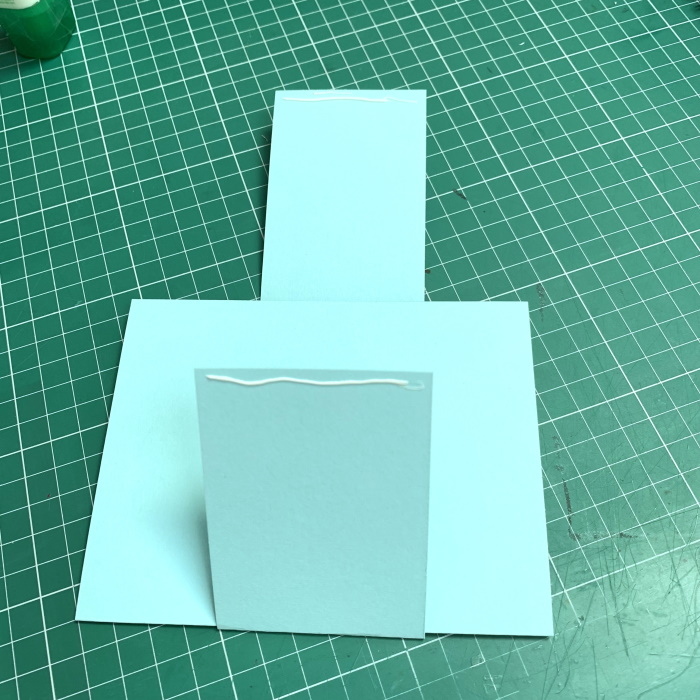
Take the 5.25″ x 2″ piece of card and score at 0.25″ on each of the short sides and one of the long sides.

Cut away the corners.

Fold in both side and burnish well, then apply a little dot of glue to the bottom 0.25″ section and fold up.

Apply adhesive to the sides and adhere the pocket at the bottom of the inside left page.

To make the booklet, fold the 8.5″ x 4″  & 7.75″ x 3.5″ pieces of card in half. Round the outer edges.

Apply adhesive to the back of the larger pages and adhere down on the inside left, leaving approx 0.75″ gap between it and the pocket at the bottom of the page. Adhere the paper layers to the inside and outside.

Score the smaller pages approx 0.25″ from the centre fold line.

Apply adhesive ONLY to the 0.25″ section

Adhere down on top of the other pages, lining it up to the score line.

Adhere the paper layers

Take the 5″x 5″ piece of card and score at 0.25″ on three sides.

Measure down 2″ on the left side and cut diagonally from the top right corner to the 2″ mark.

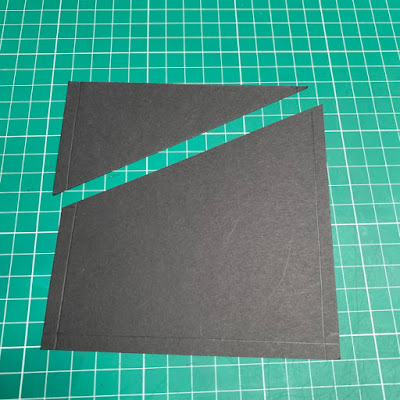
Cut away the corners as before.

Taper down the right 0.25″ section so that it is not visible when folded in.

Adhere the pocket to the inside right page.

Use the pocket to mark the angle for the paper.

Place the 6.75″ x 3,.75″ piece of paper on the inside of the front flap. Using a pencil, mark the centre top and approx 1/8″ down on each side. Cut diagonally from the centre pencil mark down to the outside pencil marks. Repeat on the outside piece.

Before adhering the paper to the inside of the front flap, adhere one side of the magnet down.

Adhere the paper down and then put the other side of the magnet on top. Apply some glue.

Fold down the flap, let it dry for a few minutes and then lift up the flap. This should leave the 2nd magnet piece stuck to the front of the card. Adhere the front paper layer over the magnet.

Cut two stitched pennants approx 6.5″ long and 2.25″ wide. Cut inside the stitches on the paper pennant, and adhere to the black card pennant.

Adhere to the front flap.

Retrieve Curvy Girl is Busy and adhere to the pennants using foam tape/dots.

Use a circle punch and some paper offcuts to add some paper elements.

Embellish the inside using stickers and die cuts. As the card needs to fold up the inside elements need to be kept flat.

Finally, add some enamel dots to finish off.

Share your personal favourite Stamping Bella creations with us. We LOVE to see what you’ve been creating with Stamping Bella stamps. Share a link to your latest Stamping Bella card in the comments below, or an old favourite you made a while ago. Tell us what your favourite stamps are. Are there any additions you would like to see to the range? Let us know!

Another way to connect is by joining us in the Stamping Bella Sistahood Facebook Group and share your pictures.

If you are posting your images online, we would love to see them on Instagram and all the platforms mentioned above. To make it easier for us to find you just use #stampingbella as a hashtag. Even better tag me @stampingbella . We love it when you connect, so don’t be shy!

Until next time, HAPPY STAMPING!

MWAH

Continue reading